

Start With a Safety Check Before Front Steps Replacement
Front steps replacement starts with deciding whether the steps truly need rebuilding. Check for deep cracks, crumbling concrete, loose brick, rot, severe settling, or uneven riser heights that create a trip hazard. If the structure is sound but the concrete has sunk, professional leveling may solve the problem without demolition. If the steps are failing, plan the new layout, confirm local permit rules, build a stable and well-drained base, and use consistent step measurements before installation begins.
For many homes in Northwest Ohio, Southeast Michigan, and Northeast Indiana, freeze-thaw cycles and soil movement are the root cause of step problems. A full replacement can be the right long-term fix for badly damaged steps, but lifting sunken concrete with polyurethane foam can cost 30% to 50% less than tear-out and replacement when the existing steps are otherwise in good condition. Most foam-leveling repairs take only a few hours and can be used almost right away.
I am Trey McNamee, owner of FoamWorks Concrete Leveling, with more than two decades of experience in marketing, strategy, and building-materials product development. Our team applies that practical knowledge to help homeowners make informed front steps replacement decisions, from evaluating sinking concrete to choosing a lasting repair or rebuild.
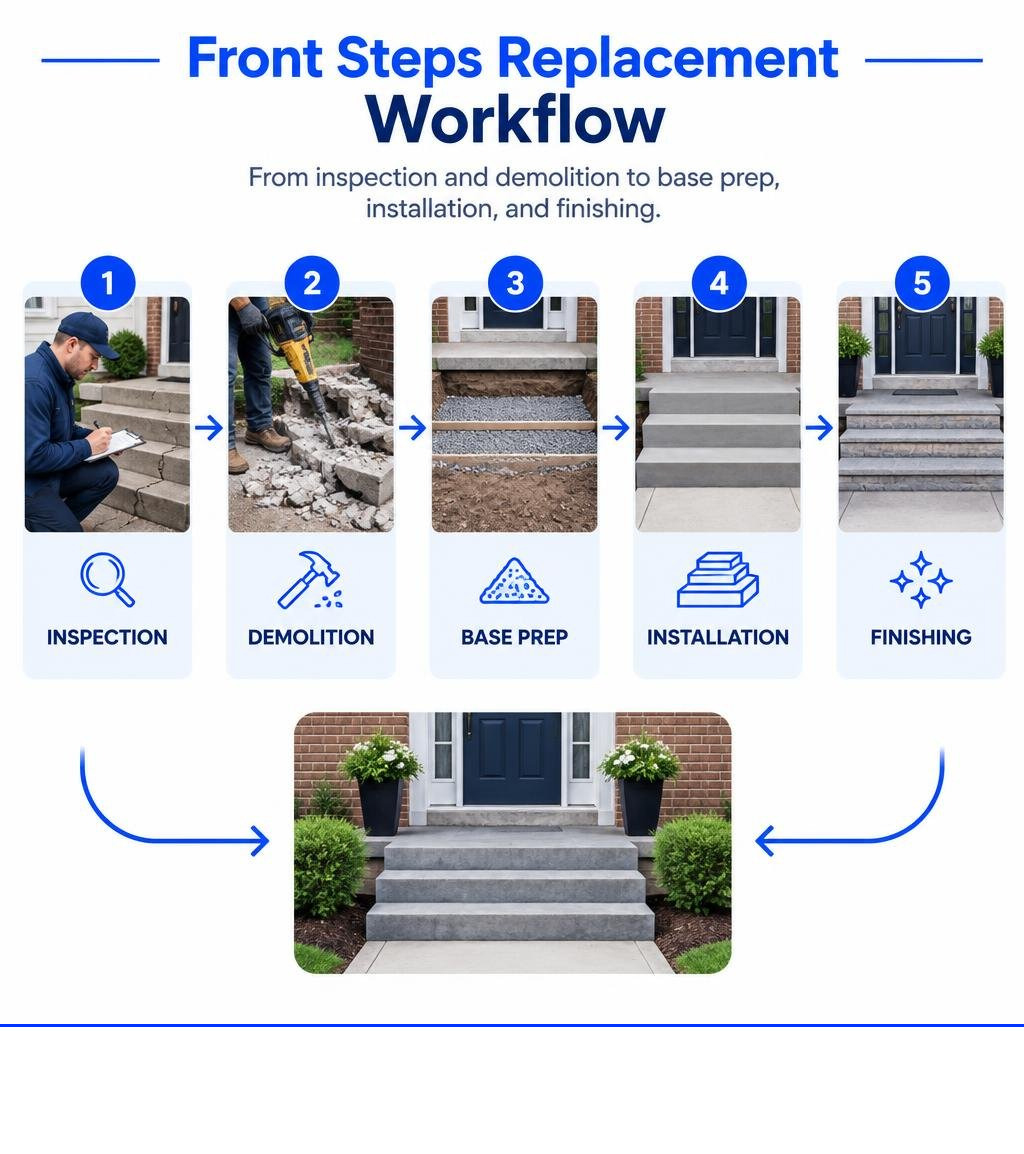
Front steps replacement glossary:
Assessing Stair Damage: When to Repair vs. Rebuild
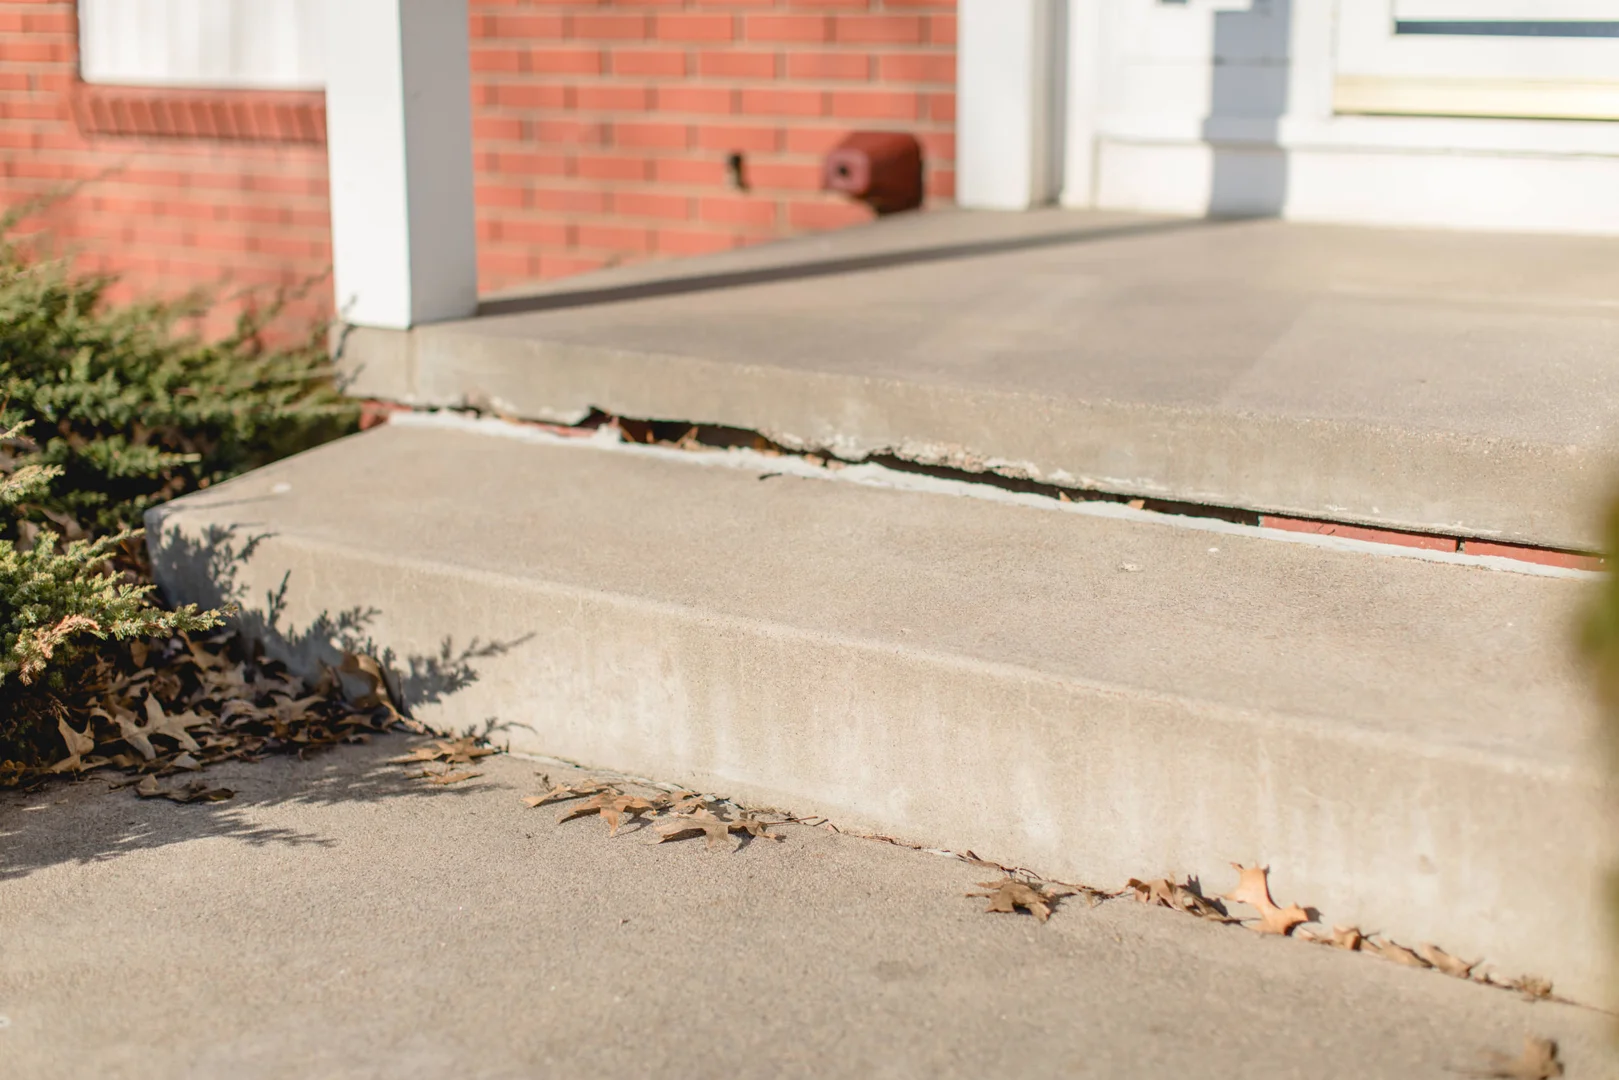
Your front entryway is the handshake of your home. It welcomes friends, shelters package deliveries, and frames your architectural curb appeal. However, because entryway stairs endure constant foot traffic and intense weather exposure, structural degradation is common. Uneven measurements in steps contribute to roughly 25% of all home falls, making safety your absolute top priority.
When inspecting your entry, check for surface-level spalling, crumbling mortar joints, broken edges, and pulling away from the foundation. Surface scaling and hairline fractures can often be patched using simple techniques for lasting cement step repair. However, when treads tilt downward or pull away from the siding, deciding between lifting vs rebuilding concrete steps to save your porch requires examining the underlying soil stability and masonry core. If the slab is structurally sound but resting on eroded ground, raising sinking concrete steps before they downfall can restore their original height without a full rebuild.
Identifying Severe Structural and Foundation Damage
A full replacement becomes necessary when structural integrity fails completely. Severe damage includes:
- Deep horizontal or diagonal foundation fractures: Major fissures splitting through the main structural body indicate load failure.
- Severe spalling and aggregate separation: Concrete with an average compressive strength of 3,000–5,000 psi can break down after 10–15 years of aggressive freeze-thaw cycles and chemical deicers.
- Rotted or broken stringers: On timber or composite systems, softened structural stringers compromise overall load capacity.
- Frost heave and soil washout: Repeated ground movement that leaves stairs pitched sideways beyond safe tolerances.
Reviewing everything you need to know about concrete steps and stairs can help you determine whether your porch stoop has reached the end of its useful lifespan.
When Polyurethane Foam Leveling Is the Smarter Alternative
Before hauling out a sledgehammer, evaluate whether the concrete itself is intact. If a solid concrete stoop or step unit has simply pitched forward or dropped because of soil settlement, complete demolition is often unnecessary.
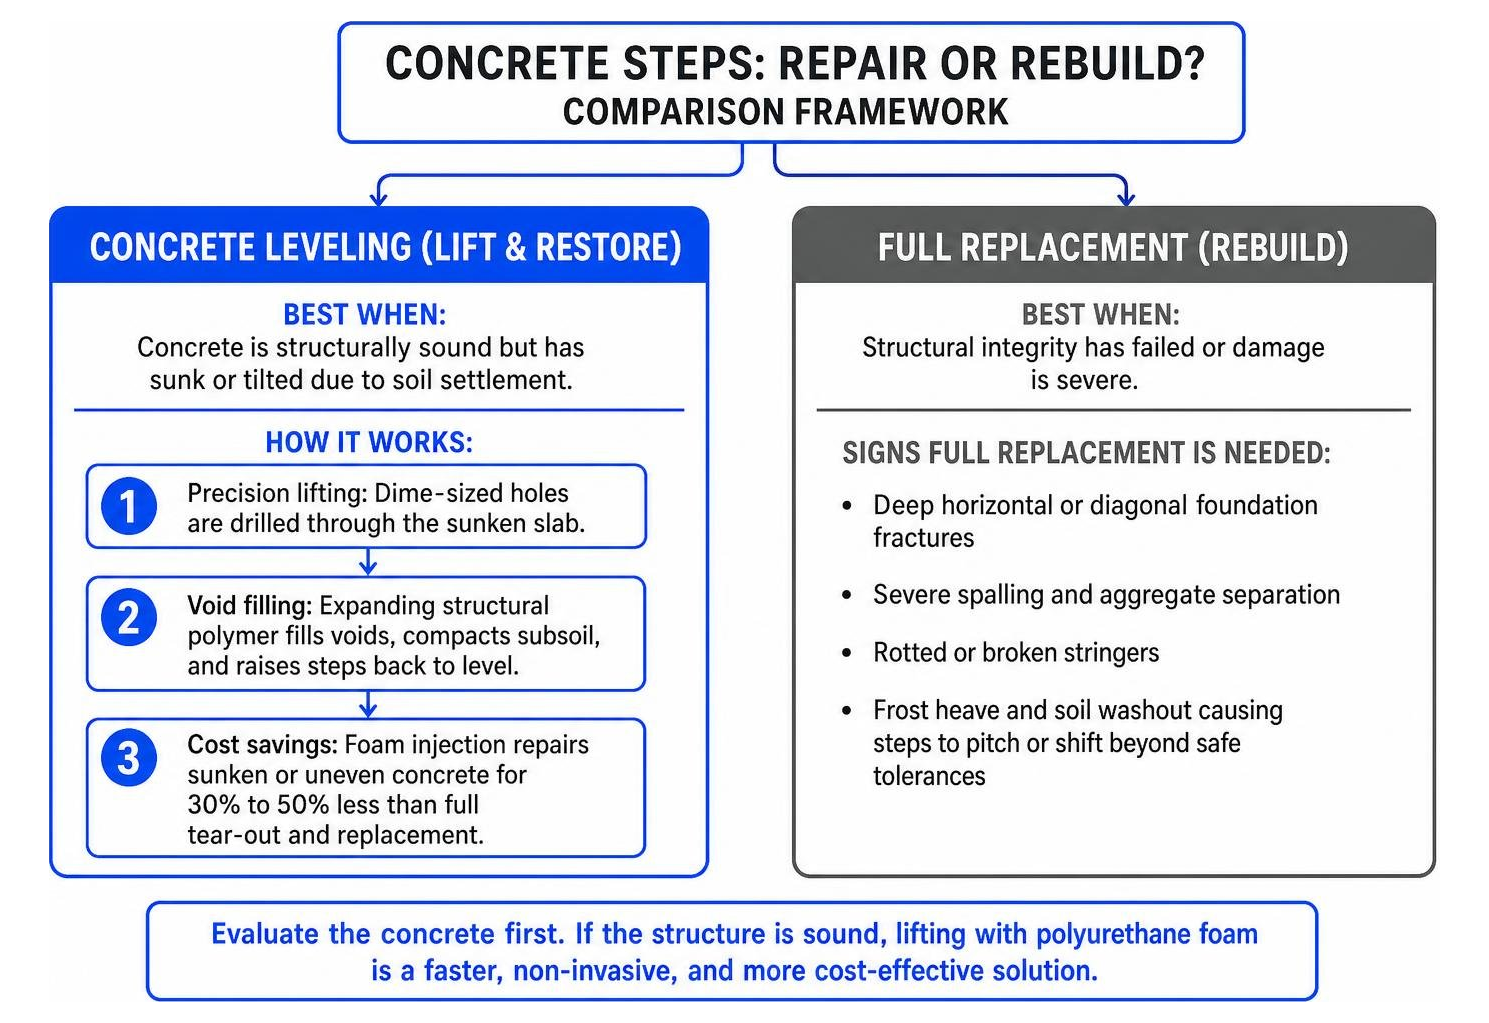
High-density polyurethane foam injection offers an efficient, non-invasive lifting method:
- Precision lifting: Small, dime-sized holes are drilled through the sunken slab.
- Void filling: Expanding structural polymer fills subterranean voids, compacts loose subsoil, and gently raises the stairs back to level.
- Cost savings: FoamWorks Concrete Leveling uses polyurethane foam injection to repair sunken or uneven concrete for 30% to 50% less than full tear-out and replacement, helping homeowners save significantly on repair costs.
- Minimal disruption: Most repairs are completed in just a few hours, and the surface can be used almost immediately. Because there’s no need for heavy excavation, the process also reduces landscape damage, labor costs, debris removal, and disposal fees that come with replacing concrete. We provide free estimates to see how much you can save.
If you are dealing with sunken pathways leading to your stairs, pairing step lifting with our concrete leveling services for adjacent slabs creates a seamless, trip-free entrance.
Building Codes, Safety Dimensions, and Material Options
When building new front steps, strict adherence to local building codes is mandatory. The International Residential Code (IRC R311.7) sets specific parameters to prevent falls and structural failures. According to structural standards, exterior steps must support a minimum uniform live load of 40 pounds per square foot (psf). Consulting modern building codes and curb appeal considerations ensures your entry is safe, functional, and visually balanced.
Stair Measurements and Code Compliance
Maintaining consistent dimensions is essential for a safe entryway:
- Riser Height: The maximum riser height is 7.75 inches (7 ¾ inches), with a minimum of 4 inches.
- Tread Depth: The minimum run depth is 10 inches (or 11 inches if no nosing overhang is present). A standard 10–11 inch tread combined with a 7–7.75 inch riser yields a comfortable 17–18 inch combined step depth.
- Dimensional Uniformity: The greatest riser height or tread depth within any flight cannot exceed the smallest by more than 3/8 inch. Inconsistent riser heights are a primary contributor to household fall injuries.
- Stair Width & Landings: A minimum clear width of 36 inches is required. Any exterior door requires a landing at least 36 inches in the direction of travel.
- Handrails: Any flight of stairs with four or more risers requires a continuous, graspable handrail positioned between 34 and 38 inches measured vertically from the leading edge of the tread nosing.
Comparing Step Materials: Concrete, Stone, Brick, and Composite
Selecting the right material balances upfront budget, architectural harmony, and ongoing maintenance.
| Material | Average Cost / Sq. Ft. Installed | Typical Lifespan | Compressive Strength | Pros & Cons |
|---|---|---|---|---|
| Poured Concrete | $14 – $32 | 10 – 15+ Years | 3,000 – 5,000 PSI | Pros: Economical, highly customizable, versatile finishes. Cons: Prone to freeze-thaw spalling if unsealed. |
| Brick Veneer (over Concrete) | $24 – $58 | 25 – 40 Years | 2,500 – 4,000 PSI (Mortar dependent) | Pros: Timeless aesthetic, complements traditional homes. Cons: Mortar joints require repointing; water penetration risk. |
| Natural Granite / Stone | $42 – $95 | 100+ Years (Centuries) | 17,000 – 23,000 PSI | Pros: Extreme durability, zero maintenance, high slip resistance. Cons: Heavy material weight, higher upfront investment. |
| Composite (over Treated Wood) | $38 – $72 (linear ft) | 25 – 30 Years | N/A (Structural Frame) | Pros: Splinter-free, rot-resistant treads, low upkeep. Cons: Requires solid underlying wood framing; thermal expansion. |
Custom stair builds can increase perceived curb appeal significantly, boosting overall home value by up to 7%.
Total Cost Breakdown for Front Steps Replacement
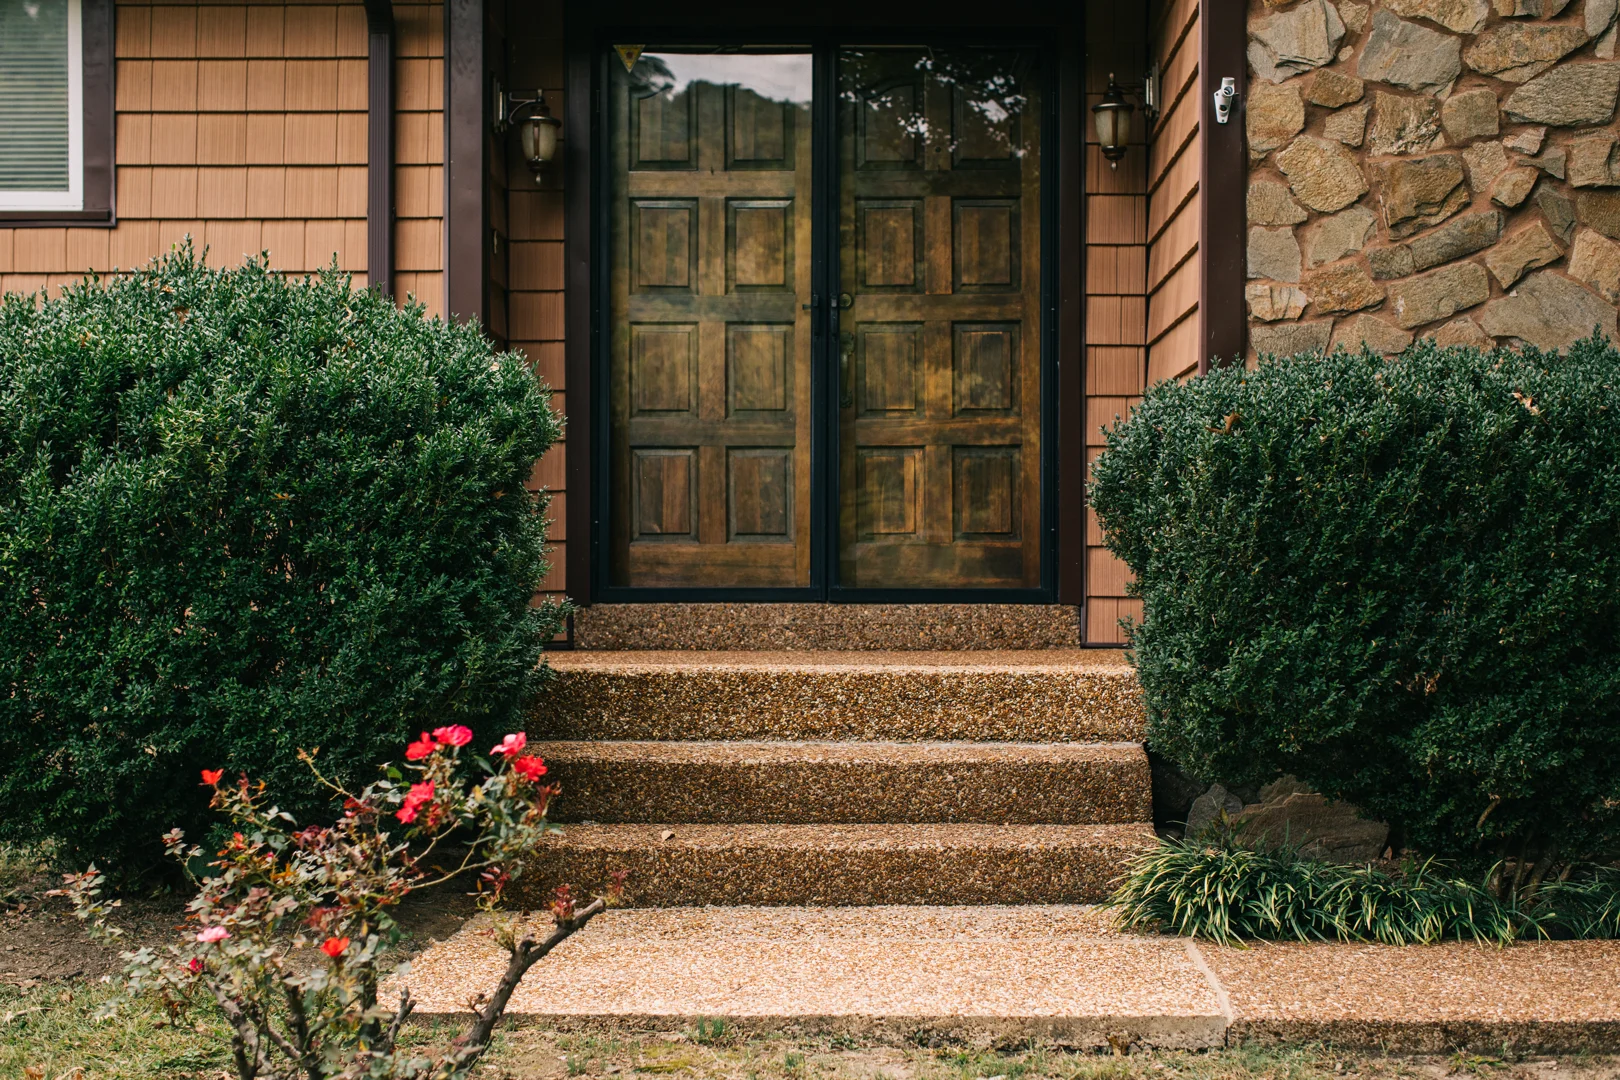
A full front step replacement typically ranges from $2,000 to $10,000, with most standard residential projects landing between $4,000 and $8,000 for a flight of 6–8 steps. If you are replacing an entry stoop or installing custom masonry, reviewing a detailed analysis of front step replacement costs helps establish a realistic contingency budget.
Price Factors: Materials, Dimensions, and Site Prep
Total expenditure depends on several key project variables:
- Material Selection: A standard 5-step entry averages $1,400 to $2,400 for poured concrete, $1,800 to $3,400 for composite decking over a timber frame, $3,200 to $5,800 for brick veneer, and $4,800 to $9,800 for solid natural stone.
- Demolition & Haul-Away: Jackhammering and removing old concrete steps typically adds $300 to $2,000 depending on machine access and disposal fees.
- Site Accessibility: Tight lot lines, steep slopes, or manual-carry requirements increase labor hours.
- Permit & Inspection Fees: Municipal building permits generally run from $50 to $500 depending on location.
DIY vs. Professional Installation Costs
Building simple entryway steps can be a viable DIY project for handy homeowners. A basic single DIY box step costs roughly $50 to $150 in lumber and fasteners and takes about half a day. Similarly, small DIY poured concrete front steps can cost under $200 in basic materials (excluding mixer rentals) and require about 3.5 days of labor.
However, multi-step structural builds demand heavy structural excavation, precision formwork, and strict code compliance. Hiring a contractor guarantees proper subbase compaction, code-certified riser heights, integrated reinforcement, and warranty protection. For failing structures that cannot be lifted, opting for comprehensive concrete replacement ensures long-term foundation safety.
The Step-by-Step Construction and Installation Process
Executing a durable front steps replacement requires methodical execution from ground preparation to final cure.
Preparing the Foundation for Front Steps Replacement
A staircase is only as reliable as the foundation beneath it:
- Excavation and Subgrade: Remove all organic topsoil and old debris down to stable subgrade.
- Base Compaction: Install a 4- to 6-inch base of crushed aggregate (such as open-graded crushed limestone). Compact thoroughly using a mechanical plate tamper to eliminate air pockets.
- Frost Footings: In colder regions where ground freezes, pour concrete footings extending below your local frost line (typically 36 to 48 inches deep) to prevent winter frost heaving.
- Wood Steps Alternative: When building low-rise timber stairs, explore simple box frame construction methods set over solid concrete pavers or gravel beds to ensure moisture isolation.
Pouring, Leveling, and Applying Finishing Touches
- Formwork & Reinforcement: Build sturdy forms using 2-inch dimensional lumber braced with external stakes. Install #4 (1/2-inch) rebar in a grid tied 12 inches on center. Set the forms with a slight outward pitch of 1/8 to 1/4 inch per foot to ensure rainwater drains away from the home’s siding.
- Pouring: Pour an exterior-grade 4,000 PSI concrete mix. Consolidate the mix with a concrete vibrator or by tapping the forms with a mallet to eliminate internal voids and honeycomb pockets.
- Screeding & Edging: Screed the surface level along the forms, float to bring paste to the surface, and run an edging tool along perimeter corners to create durable, rounded arrises.
- Texturing: Apply a light broom finish across the treads to produce a durable, slip-resistant surface that complies with ANSI A326.3 wet traction standards.
- Curing: Keep the concrete damp by misting with water or applying a curing compound for at least 5 to 7 days before subjecting the steps to heavy foot traffic.
Common Mistakes to Avoid During Front Steps Replacement
Avoid these common installation errors:
- Inconsistent Riser Heights: Mismatched step heights create dangerous trip hazards. Always account for finished tread thickness when setting form heights.
- Trapping Standing Water: Level or backward-pitched treads cause water to pool, accelerating freeze-thaw surface scaling and winter ice formation.
- Poor Subbase Compaction: Pouring heavy concrete over uncompacted backfill leads to structural settling within 12 to 24 months.
- Skipping the Expansion Joint: Always install an asphalt-impregnated fiber expansion strip between the new stairs and the home’s foundation wall to accommodate seasonal building movement.
Frequently Asked Questions About Front Steps
How long does a full front step replacement take?
A professional front step replacement typically takes 2 to 4 days of active labor:
- Day 1: Demolition, excavation, and subbase preparation.
- Day 2: Form building, reinforcement placement, and concrete pouring.
- Day 3–4: Form stripping, surface detailing, railing installation, and site cleanup.
The concrete requires 24 to 48 hours to cure before accommodating light foot traffic, reaching full design strength at 28 days. In contrast, polyurethane foam lifting takes only 1 to 2 hours with immediate entry access.
Do I need a building permit to replace my front steps?
Yes, most municipalities require a building permit if you are altering the structural footprint, changing the riser/tread count, replacing foundational footings, or modifying guardrail configurations. Direct like-for-like minor masonry repairs may be exempt, but checking with your local building department prevents costly code-violation penalties.
How do I maintain new front steps to extend their lifespan?
- Apply Penetrating Sealers: Seal concrete every 3 to 5 years using a silane-siloxane penetrating sealer to prevent water absorption and freeze-thaw spalling.
- Avoid Chemical Deicers: Avoid using rock salt (sodium chloride) or calcium chloride on concrete less than two years old. Use sand or clean kitty litter for winter traction.
- Seal Joints: Apply polyurethane masonry caulk to expansion joints and gaps between the stoop and foundation to keep water out of the subbase.
- Routine Cleaning: Power wash stairs using moderate pressure (under 2,000 PSI) with mild cleaners to prevent surface degradation.
Conclusion
A well-planned front steps replacement restores safety, eliminates trip hazards, and transforms your home’s exterior appeal. By understanding building codes, selecting climate-resilient materials, and preparing a solid foundation, you can ensure your new entryway stands strong for decades.
If your existing steps are structurally sound but sinking or unlevel, you may not need an expensive tear-out. FoamWorks Concrete Leveling provides fast, cost-effective polyurethane lifting to restore your entryway steps in just a few hours. Contact us today for a free estimate and explore our concrete repair solutions to revitalize your home’s entryway.