
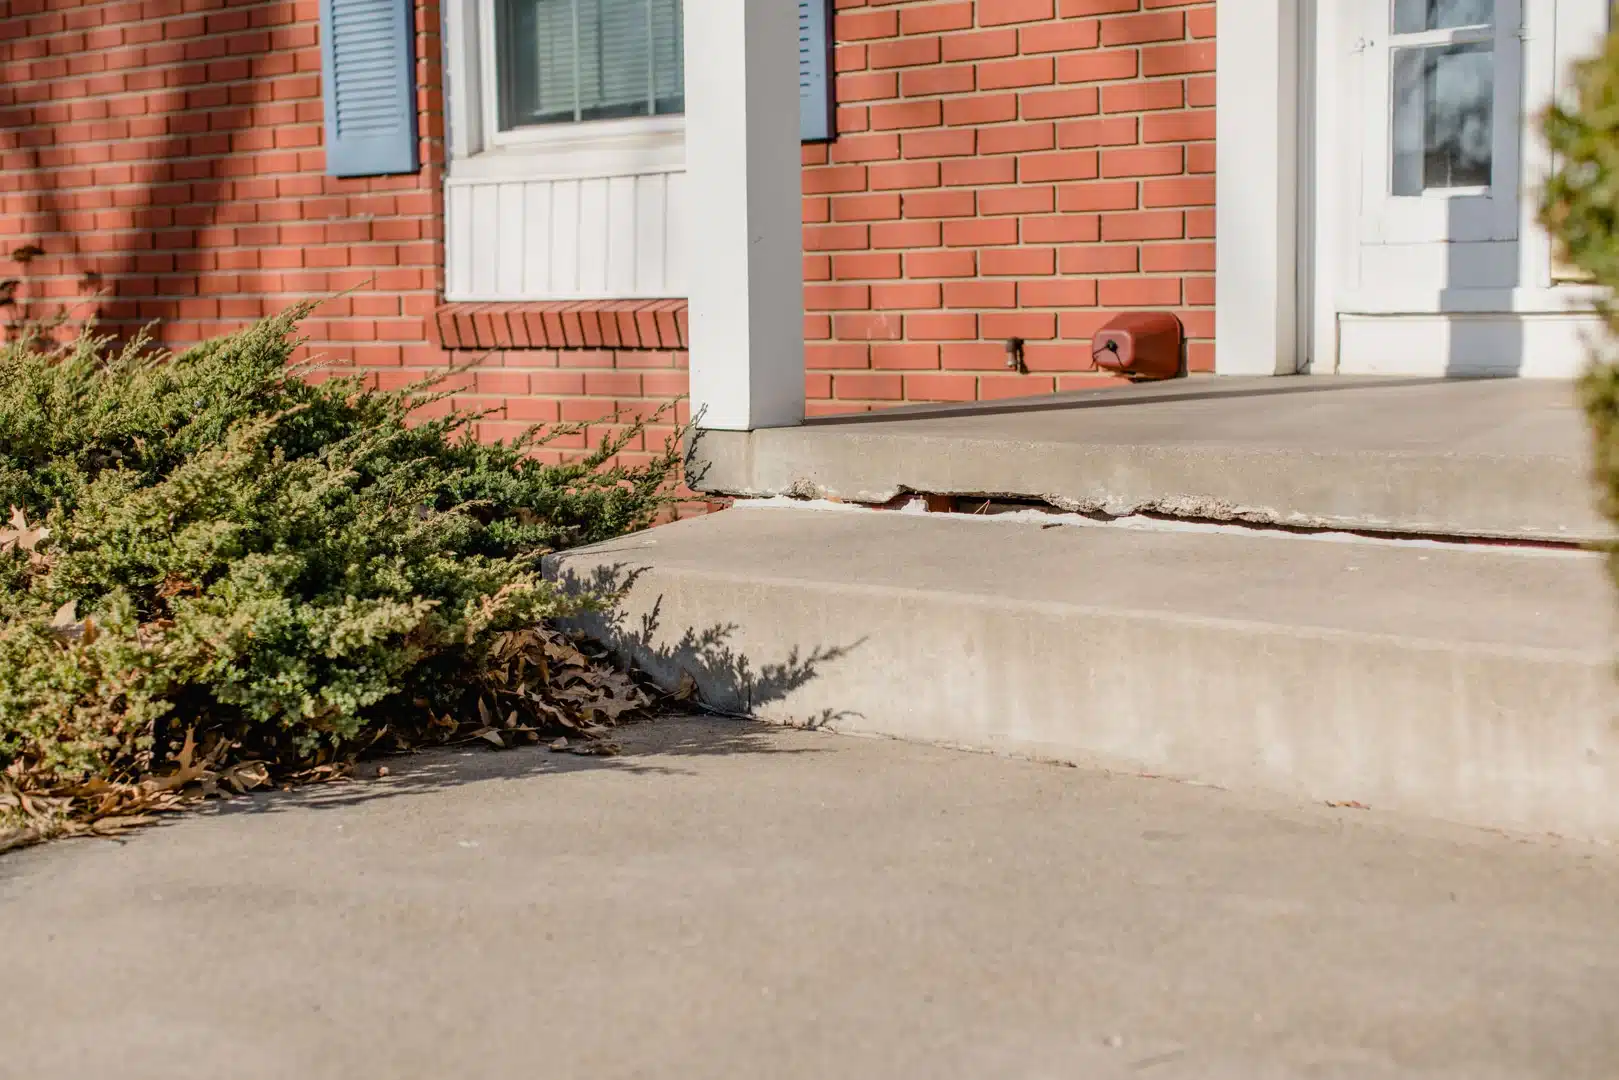
Stop Concrete Step Damage Before It Becomes a Safety Problem
Concrete step repair starts by removing loose material, cleaning and preparing the solid concrete beneath it, then using the right patch material for the depth and location of the damage. Small cracks, chips, and surface flaking are often repairable, but deeply fractured, hollow, or sinking steps need a closer look before a surface patch can last.
In Northwest Ohio, Southeast Michigan, and Northeast Indiana, winter weather is especially hard on exterior steps. Water enters small cracks, freezes, expands, and breaks away more concrete over time. The result can be a rough, unsafe tread, a broken front edge, or a step that no longer looks or feels stable.
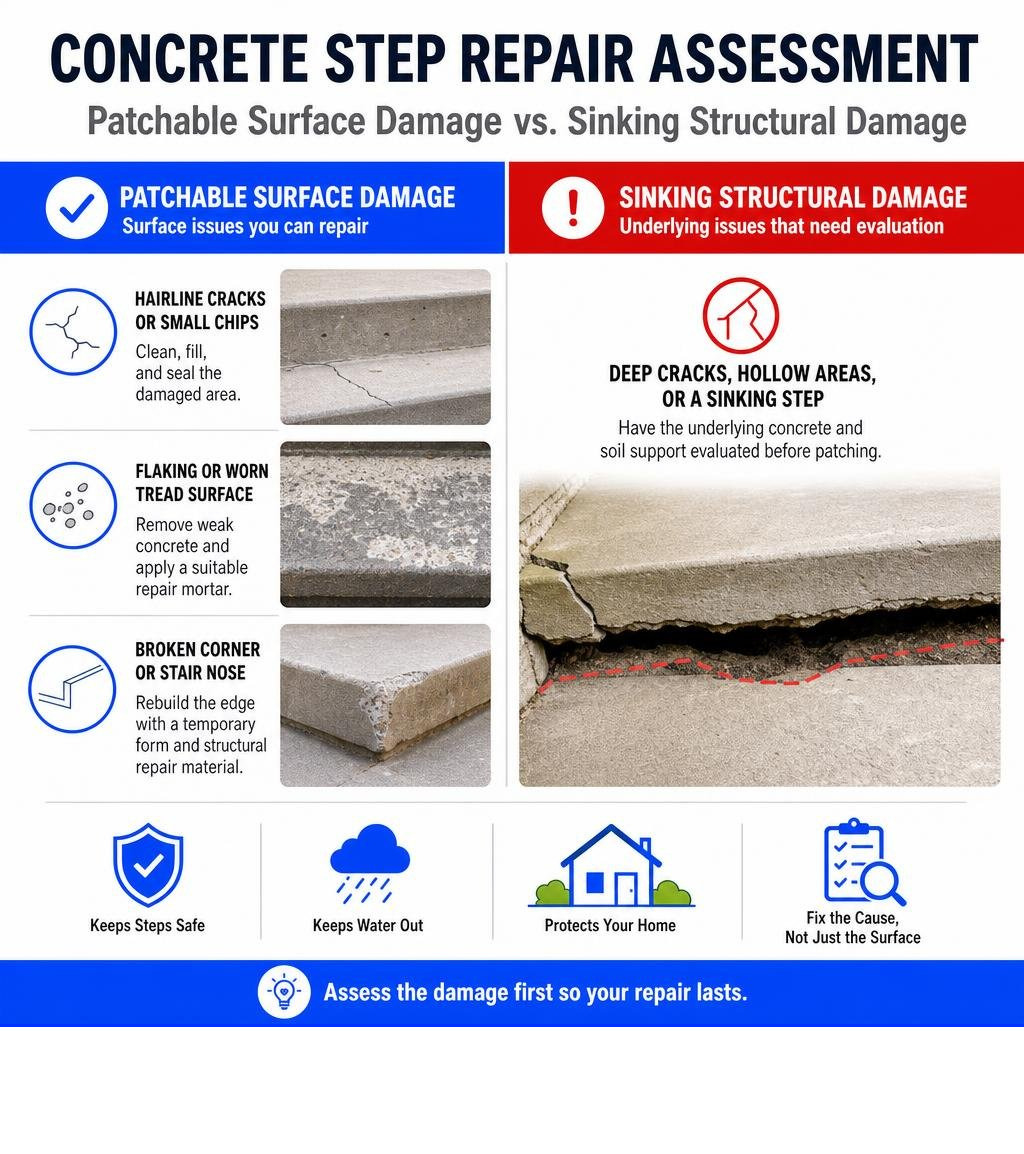
| What you see | Likely next step |
|---|---|
| Hairline cracks or small chips | Clean, fill, and seal the damaged area |
| Flaking or worn tread surface | Remove weak concrete and apply a suitable repair mortar |
| Broken corner or stair nose | Rebuild the edge with a temporary form and structural repair material |
| Deep cracks, hollow areas, or a sinking step | Have the underlying concrete and soil support evaluated before patching |
A timely repair protects curb appeal, but more importantly, it helps reduce trip hazards and keeps water from reaching deeper into the concrete. The key is not simply covering damage – it is finding out whether the step is still sound enough to hold a repair.
I am Trey McNamee, owner of FoamWorks Concrete Leveling, with more than two decades of experience in building-material strategy and product development and a team with over 30 years of combined concrete experience. At FoamWorks, we help homeowners understand when concrete step repair is a practical fix and when sinking concrete calls for leveling instead.
Assessing Damage: Repair vs. Full Replacement
Before rushing out to buy a bag of cement, you need to diagnose what is actually wrong with your steps. Applying a thin surface patch over a structurally failed or sinking base is like painting over rust—it might look pretty for a few weeks, but the underlying issue will quickly destroy your hard work.

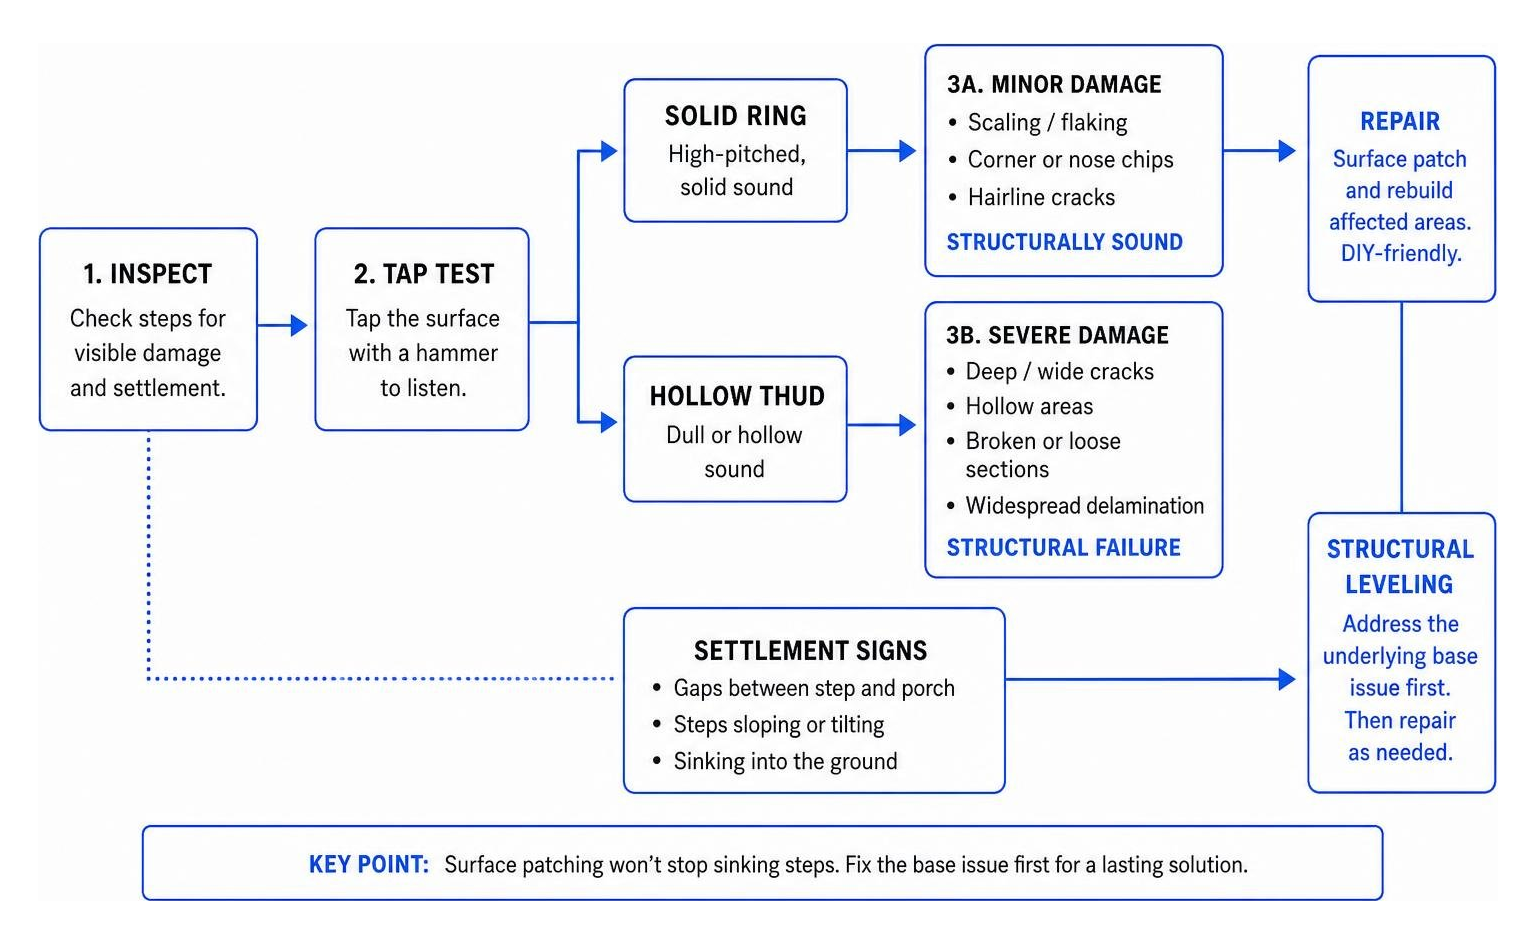
To determine whether your steps are a candidate for a straightforward DIY fix or require professional intervention, grab a ball-peen hammer and conduct a sound test. Tap lightly across the top tread, edges, and vertical risers:
- A high-pitched, solid ring indicates dense, healthy concrete. This surface is structurally sound and ready to bond with new patch materials.
- A dull thud or hollow echo signifies subsurface delamination or internal voids where the concrete matrix has failed beneath the surface.
If you discover hollow pockets, you must chisel away that weak layer until you hit solid rock. If the hollow sound spans the entire width of the structure, or if you notice severe Cracked Concrete splitting the slab into independent sections, a surface patch won’t hold up over time.
Identifying Minor vs. Severe Damage
Not all concrete damage is created equal. Understanding the severity helps you pick the right tools and avoid costly mistakes:
- Surface Scaling and Flaking: Superficial spalling happens when freeze-thaw cycles pop off the smooth paste layer on top of the step tread. If the erosion is under 1/2 inch deep and the underlying base is rock-hard, this is minor cosmetic damage that can be easily resurfaced.
- Corner and Nose Chips: The leading front edge (the stair nose) takes the brunt of foot traffic and impact. Shear forces frequently cause sharp corners to chip off. As long as the rest of the step is stable, these edges can be rebuilt using temporary forms or rapid-set mortars.
- Deep Structural Fractures: Large diagonal or vertical cracks extending completely through a riser usually indicate thermal stress, base movement, or structural overload. Cracks wider than 1/2 inch require physical mechanical anchors or structural reinforcement before patching.
When Sinking Steps Require Structural Leveling
If you notice a widening gap between your top step and your front porch, or if your steps are pitching toward your foundation, you are dealing with base settlement rather than simple surface wear.
In regions like Toledo, Ann Arbor, or Fort Wayne, heavy rains and freeze-thaw cycles frequently wash away or compact the soil beneath exterior stoops. Untreated concrete can absorb over 20% of its weight in water, which accelerates sub-surface erosion and base instability.
When the soil support fails, the entire concrete structure drops. Patching the top tread of a tilting step will not stop it from sinking further. Surface patching alone cannot resolve base settlement or frost heave—underlying structural issues must be corrected first.
Replacing an entire sunken stoop can cost anywhere from $1,500 to $4,000 or more, involving noisy demolition, heavy machinery, and ruined landscaping. At FoamWorks Concrete Leveling, we use high-density polyurethane foam injection to raise and stabilize sunken concrete steps for 30% to 50% less than full tear-out and replacement.
By injecting polymer foam through dime-sized holes, we lift the stoop back to its original position in just a few hours. The foam cures almost immediately, filling sub-surface voids and restoring proper pitch so water drains away from your home. Once the base is level and stable, you can safely perform minor surface repairs knowing your patch won’t crack next season.
Essential Tools and Materials for Concrete Step Repair
To achieve a long-lasting, professional-quality fix, you must match your repair material to the depth, location, and exposure of the damaged area. Using standard gravel-mix bag concrete for a 1/2-inch vertical edge repair is guaranteed to fail because the coarse stone aggregates prevent feather-edging and cause the wet mix to slump right off the riser.
| Material Type | Typical Application | Thickness Limits | Key Advantage |
|---|---|---|---|
| Vinyl Concrete Patcher | Surface scaling, thin tread spalls, shallow chips | Feather-edge up to 3/4 inch per layer | Contains polymer resins for superior adhesion to thin concrete |
| Polymer-Modified Repair Mortar | Deep corner rebuilds, heavy erosion, structural patching | 1/4 inch to 2 inches (or deeper in layers) | Exceptional bond strength, sag resistance, and low freeze-thaw shrinkage |
| Quick-Setting Cement | Vertical edge rebuilding, nose repairs without full formwork | 1/4 inch to 2 inches | Hardens in 10 to 15 minutes; ideal for fast hand-sculpting |
Along with your chosen concrete mix, assemble the following tools:
- Stiff wire brush and cold chisel
- 22-ounce hammer or ball-peen hammer
- Margin trowel and flat steel finishing trowel
- Masonry brush (or stiff broom) for non-slip texturing
- Liquid acrylic bonding agent
- Safety goggles, heavy rubber gloves, and a dust mask
- Clean buckets and a margin mixer or trowel for hand-mixing
Selecting the Right Mix for Your Concrete Step Repair
Selecting the appropriate mortar or patching product is critical for vertical stability and long-term durability. According to this Guide to Fixing Broken Exterior Steps, vinyl concrete patcher works best for shallow surface flaking, whereas polymer-modified rapid-set repair mortars are necessary for rebuilding vertical noses without slumping.
When working with repairs under 1 inch deep, avoid mixes with large aggregate stones. Standard concrete mixes contain 3/8-inch or larger stones that catch on your trowel, preventing smooth feathering and leaving air voids along narrow step edges. For thin vertical applications, polymer-modified mortars provide high compressive strength while allowing you to trowel material down to a razor-thin margin without losing adhesion.
Step-by-Step Surface Preparation and Bonding
Over 90% of concrete repair failures happen because of poor surface preparation. Concrete is naturally dirty and porous; if you place wet repair material over loose dust, oil, or weak concrete paste (laitance), the new patch will pop off during the very first winter freeze.
Follow these critical preparation steps to ensure a permanent mechanical and chemical bond:
- Chisel to Sound Concrete: Use a cold chisel and hammer angled at 45 degrees to chip away all crumbling, soft, or hollow concrete. Never attempt to feather-edge a patch into soft paste.
- Undercut the Edges: Instead of beveling the damage down to a sloped point, chisel straight down or slightly undercut the outer boundaries of the repair area. Creating a vertical edge that is 1/4 inch to 1/2 inch deep provides a mechanical key that locks the patch in place against foot traffic and thermal movement.
- Deep Clean the Substrate: Sweep away large debris, then scrub the concrete with a wire brush and a strong masonry cleaner or degreaser to remove embedded oil, sap, and salt residue. Vacuum up all fine dust particles. If available, pressure wash the area with at least 2000 PSI.
- Achieve Saturated Surface Dry (SSD) Condition: Dry concrete acts like a rigid sponge. If you apply wet repair mortar directly to dry concrete, the old substrate will instantly suck the water out of your fresh mix, starving the cement of the moisture needed for hydration and causing severe shrinkage cracking. Soak the concrete thoroughly with water, then wipe away any standing pools. The surface should look dark and damp, but free of standing puddles—this is known as the Saturated Surface Dry (SSD) state.
Applying Liquid Bonding Agents
Even with proper mechanical undercutting, bonding fresh mortar to decades-old cured concrete presents a chemical challenge called a “cold joint.” Because old and new concrete expand and contract at slightly different rates, you need an interfacial bridge to fuse them together.
Brush a professional-grade liquid acrylic or latex concrete bonding agent directly onto the SSD-prepared concrete. Pay special attention to deep corners and vertical risers.
Allow the bonding adhesive to set until it feels sticky and tacky to the touch (usually 10 to 20 minutes depending on temperature). Never apply repair mortar over wet, puddling bonding agent, and never allow it to dry completely to a glass-like sheen. If it dries, reapply another light coat before troweling your repair mortar.
Rebuilding Broken Corners and Stair Nosing
Step noses and outer corners suffer high shear stress when stepped on, making them the most frequently broken parts of any stair assembly. Rebuilding a missing corner requires creating a temporary boundary so you can pack high-strength mortar tightly into the void.
To build a simple, effective L-shaped temporary wood form:
- Screw two straight 1×4 or 2×4 wood boards together at a 90-degree angle to match the step corner.
- Line the inside face of the wood form with clear packing tape or coat it with standard cooking oil. This acts as a release agent so wet cement won’t stick to the form.
- Clamp the form firmly flush against the step riser and tread, using concrete pavers, bricks, or heavy clamps to hold it completely rigid.
For severe edge damage subject to heavy foot traffic, mechanical anchors provide extra structural reinforcement. Drill 1/4-inch pilot holes into the solid backing concrete at a 45-degree angle. Drive coated Tapcon masonry screws into the holes, leaving the screw heads protruding roughly 1/2 inch inside the repair zone. When you pack your mortar into the form, it completely encapsulates the screw heads, converting a cosmetic patch into a mechanically anchored, structural repair. Learn more about this mechanical anchoring technique in this detailed guide on How to Repair Concrete Steps Broken Corners.
Executing a Broken Corner Concrete Step Repair
With your form securely braced and your mechanical anchors in place, you are ready to mix and place your repair mortar. Follow these steps outlined in this guide on How to Repair an Eroded Concrete Step:
- Mix the Mortar: Combine your polymer-modified repair mortar or quick-setting cement with water according to the manufacturer’s exact proportions (typically around 5.5 parts powder to 1 part liquid). Mix for 2 to 3 minutes until it reaches a stiff peanut butter consistency. Only mix what you can apply within 10 to 15 minutes.
- Pack Forcefully into Voids: Using a margin trowel, push the mortar forcefully into the form and around any protruding screw heads. Pack it down tightly to eliminate internal air pockets. Overfill the form slightly.
- Perform the Thumbprint Test: Let the quick-setting mix stiffen for 5 to 15 minutes. Press your gloved thumb firmly onto the surface; when the mortar is hard enough to retain a faint thumbprint without slumping or sticking to your glove, it is ready to work.
- Strip the Form and Sculpt: Carefully slide the wood form down and away from the step (do not pull straight outward). Use the sharp edge of a margin trowel to shave away excess material flush with the surrounding concrete. Gently round sharp 90-degree outer corners into a slight radius—soft edges resist chipping far better than razor-sharp corners.
Finishing, Curing, and Preventive Maintenance
Smooth concrete outdoor steps are a major slip-and-fall hazard when wet or icy. Never leave a smooth steel-troweled finish on exterior stair treads.
Once you have shaped and leveled your patch, wait a few minutes for the surface moisture sheen to dissipate. Then, pull a masonry brush or a soft-bristle broom lightly across the wet surface in a single direction to create a non-slip broom texture that matches the surrounding concrete treads.
Proper curing is the single most critical factor in achieving maximum strength. Concrete does not harden by drying out—it hardens through a chemical reaction called hydration that requires water. Proper moist curing can increase the final strength of your patch by over 50%.
Keep the patch damp by misting it lightly with water, then cover it with plastic sheeting or wet burlap for 24 to 48 hours. Protect the repair from all foot traffic for at least 24 hours (72 hours for heavy use).
To maximize lifespan, apply a breathable silane-siloxane penetrating sealer over the entire step structure after a full 28-day cure. Penetrating sealers protect at the molecular level without forming a shiny surface film that can peel. A single coat blocks liquid water absorption while allowing internal vapor to escape, reducing crack re-occurrence by up to 80%.
Finally, eliminate chemical de-icers in the winter! Calcium chloride and rock salt drive water deep into concrete pores and accelerate freeze-thaw spalling. Use clean sand or non-clumping kitty litter for winter traction instead.
Frequently Asked Questions About Step Restoration
How long before you can walk on repaired concrete steps?
Most rapid-set repair mortars and polymer-modified patchers achieve initial set within 15 to 30 minutes. You can safely open the steps to light foot traffic after 4 to 24 hours, depending on ambient temperatures and product specs. Keep heavy loads off the repair for 72 hours. Full strength is achieved after 28 days of hydration.
Why do concrete step patches crack and pop off?
Patches usually pop off due to three common mistakes:
- Failing to remove weak, dusty concrete before patching.
- Applying repair material to dry concrete, which sucks out moisture and causes rapid shrinkage cracking.
- Cold joints caused by skipping a liquid bonding agent or mechanical anchors.
Failing to under-cut the repair edges also creates thin feather-edges that easily chip under foot traffic.
How do freeze-thaw cycles destroy exterior concrete steps?
Untreated concrete is naturally porous, functioning much like a rigid sponge that absorbs water. Freeze-thaw cycles account for roughly 60% of exterior concrete damage in cold climates, and unmaintained concrete can lose up to 50% of its lifespan. When absorbed water freezes, it expands by approximately 9% in volume. This internal pressure snaps the concrete paste apart, causing deep scaling, surface cracking, and corner spalling.
Conclusion
Restoring worn or chipped concrete steps is a rewarding DIY project that instantly boosts curb appeal and eliminates dangerous trip hazards around your home. By taking the time to chisel down to sound material, undercutting repair borders, applying liquid bonding agents, and properly wet-curing your mortar, you can achieve a durable fix that withstands seasonal weather changes.
However, surface patching is only half the battle if your steps are shifting. If you notice wide structural fractures, hollow voids, or steps sloping toward your foundation, surface mortar alone won’t solve the underlying problem.
At FoamWorks Concrete Leveling, we help homeowners across Northwest Ohio, Southeast Michigan, and Northeast Indiana fix the root cause of concrete failure. Our eco-friendly polyurethane foam injection restores sunken steps and stoops to a stable, level position in just a few hours—at a fraction of the cost of replacement.
Before spending time and money on cosmetic patches, make sure your concrete base is rock solid. Visit our Concrete Repair page or contact our experienced team today to schedule your free estimate!