

Choose Concrete Steps That Fit Your Entry and Your Soil
The best concrete steps depend on your entry height, available space, budget, and whether the ground is stable. Precast units are fast to install and come in standard sizes. Poured-in-place stairs allow custom widths, landings, curves, and finishes. A one-piece stoop with steps can create a solid front entry, but it needs a well-compacted base and good drainage to avoid settling.
Before choosing, measure the total rise from grade to the door threshold, plan consistent risers and treads, and check local code requirements. For a comfortable residential layout, many stairs use roughly a 7-inch riser, an 11-inch tread, and at least 36 inches of clear width. Add a handrail where required or where it improves safety.
Concrete is durable, but cracks, flaking edges, and stairs that pull away from the porch often point to freeze-thaw exposure, water movement, or weak soil beneath the base. The good news: if the concrete is still structurally sound, lifting and stabilizing may cost 30% to 50% less than tear-out and replacement.
I am Trey McNamee, owner of FoamWorks Concrete Leveling, with more than two decades of experience in building-materials strategy and product development and a team with over 30 years of combined concrete repair experience. We help homeowners assess sinking, cracked, and uneven concrete steps across Northwest Ohio, Southeast Michigan, and Northeast Indiana.
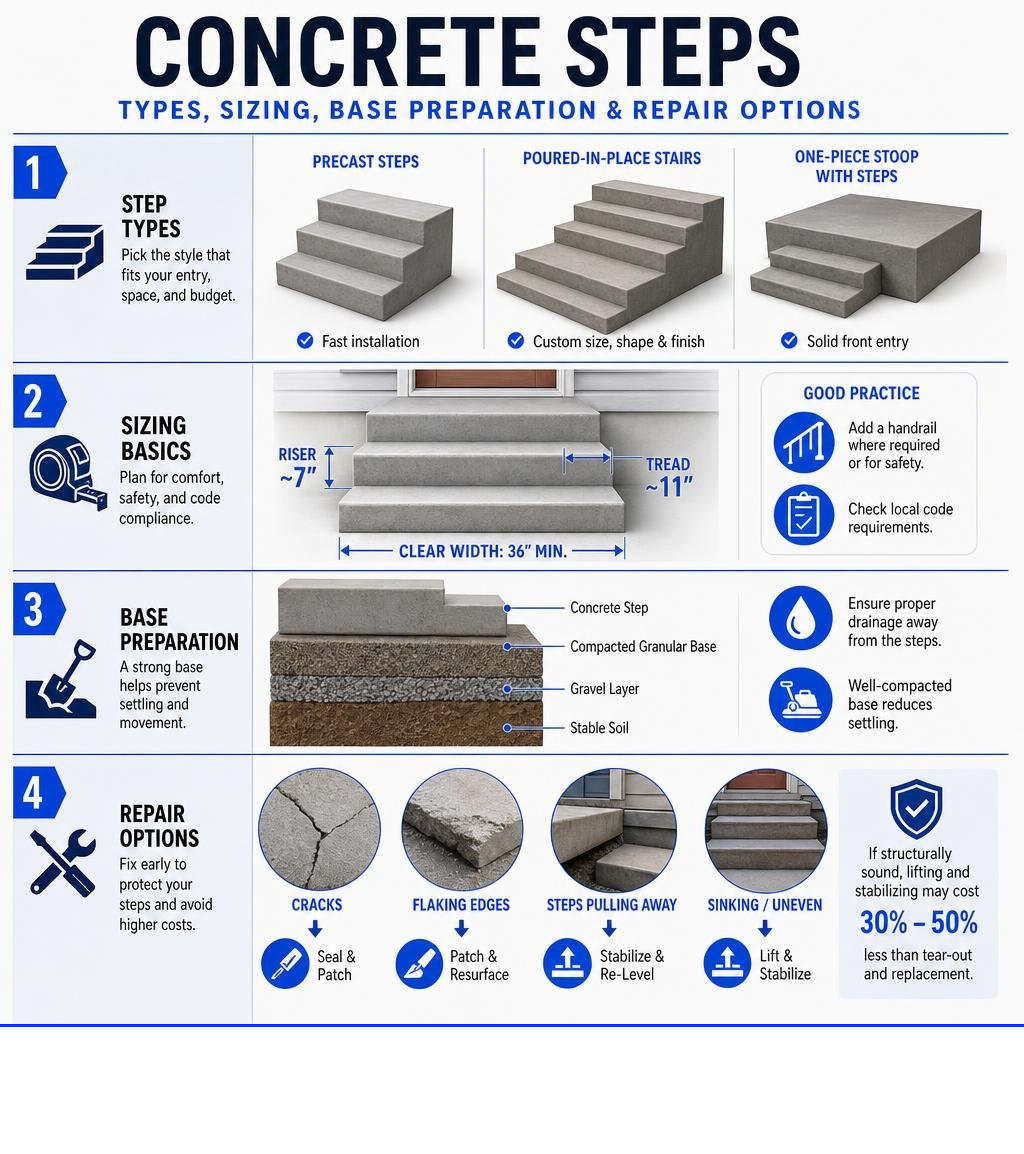
Concrete steps terms to remember:
Types and Configurations of Concrete Steps
Selecting the right stair setup involves balancing cost, aesthetic goals, site access, and long-term durability. Quality entry steps can boost home curb appeal by up to 14%, making the choice an important home improvement decision.
| Step Type | Best Use Case | Installation Time | Typical Lifespan | Relative Cost |
|---|---|---|---|---|
| Precast Concrete | Standard door entries, quick replacements | 1 to 2 hours | 30+ years | Moderate |
| Poured-in-Place | Custom entryways, wraparound stairs, stamped designs | 2 to 4 days | 30+ years | High |
| Monolithic Stoop | Elevated front porches with integrated landings | 3 to 5 days | 30+ years | High |
| Solid Concrete Blocks | Low-rise garden paths, single step-downs | Few hours | 20 to 30 years | Budget-Friendly |
Precast Concrete Stair Units
Precast steps are cast in controlled factory environments using high-strength steel reinforcement. Because they cure under optimal factory conditions, they achieve high density and excellent weather resistance against harsh Midwestern freeze-thaw cycles.
These units are manufactured as single-piece structures—often with hollow cores to manage weight—and delivered via boom truck or crane. A standard 1-tread unit might weigh around 125 pounds, while large multi-tread configurations with attached stoops can exceed 1,100 pounds. Precast steps require zero on-site curing time, allowing immediate foot traffic once set on a prepared gravel pad.
Custom Poured-in-Place Stairs
When your project demands custom widths, architectural curves, or stamped decorative textures that match an existing patio, poured-in-place concrete is the way to go.
Poured stairs are formed on-site directly over a prepared sub-base, tying into your home foundation with steel rebar dowels. This method allows you to pour a continuous, monolithic structure encompassing large landings, angled entryways, and custom side walls. While site preparation and formwork make poured stairs more labor-intensive, they offer total design freedom.
Standard Dimensions, Sizing Rules, and Safety Codes
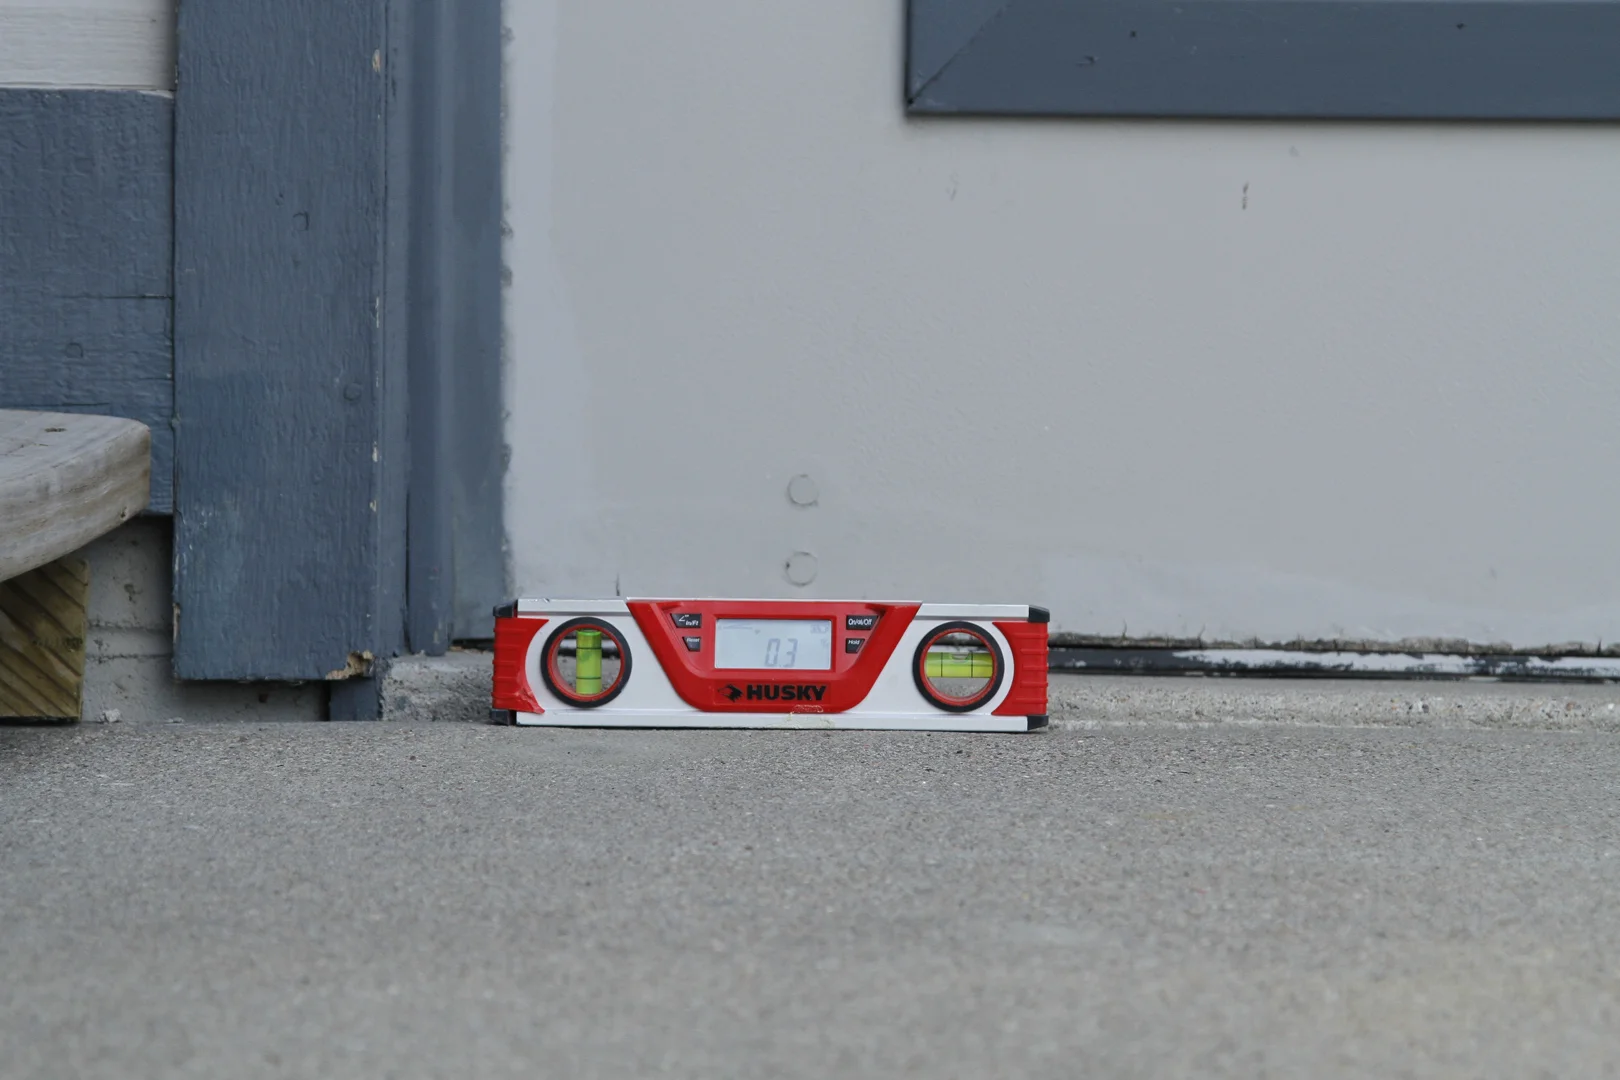
A comfortable, safe flight of stairs relies on precise geometry. Inconsistent step heights are the leading cause of trips and falls at home entrances.
- Riser Height: The vertical face of the step should measure between 6 and 7.75 inches (7 inches is standard residential practice). The maximum allowable rise in most building codes is 8.25 inches.
- Tread Depth: The horizontal walking surface should be at least 10 inches deep, with 11 inches considered ideal for full foot support.
- Stair Width: A minimum clear width of 36 inches is required by standard residential code, though 48 inches provides a more welcoming aesthetic for main entryways.
- The 2-Riser Rule: A time-tested masonry rule of thumb states that (2 × Riser Height) + Tread Depth should equal between 24 and 26 inches. For example, two 7-inch risers (14″) plus an 11-inch tread equals 25 inches—yielding a natural, comfortable stride.
- Uniformity: Building codes require that the variation between the highest and lowest riser in a flight does not exceed 3/8 inch.
How to Form, Pour, and Cure New Stairs
Pouring long-lasting stairs demands proper carpentry, site prep, and finishing techniques. For a deeper look at structural steps and planning methodologies, resources like Grounded In Concrete’s step-by-step guide, wikiHow’s concrete stair manual, and SlabCalc’s DIY entry guide outline helpful fundamentals.
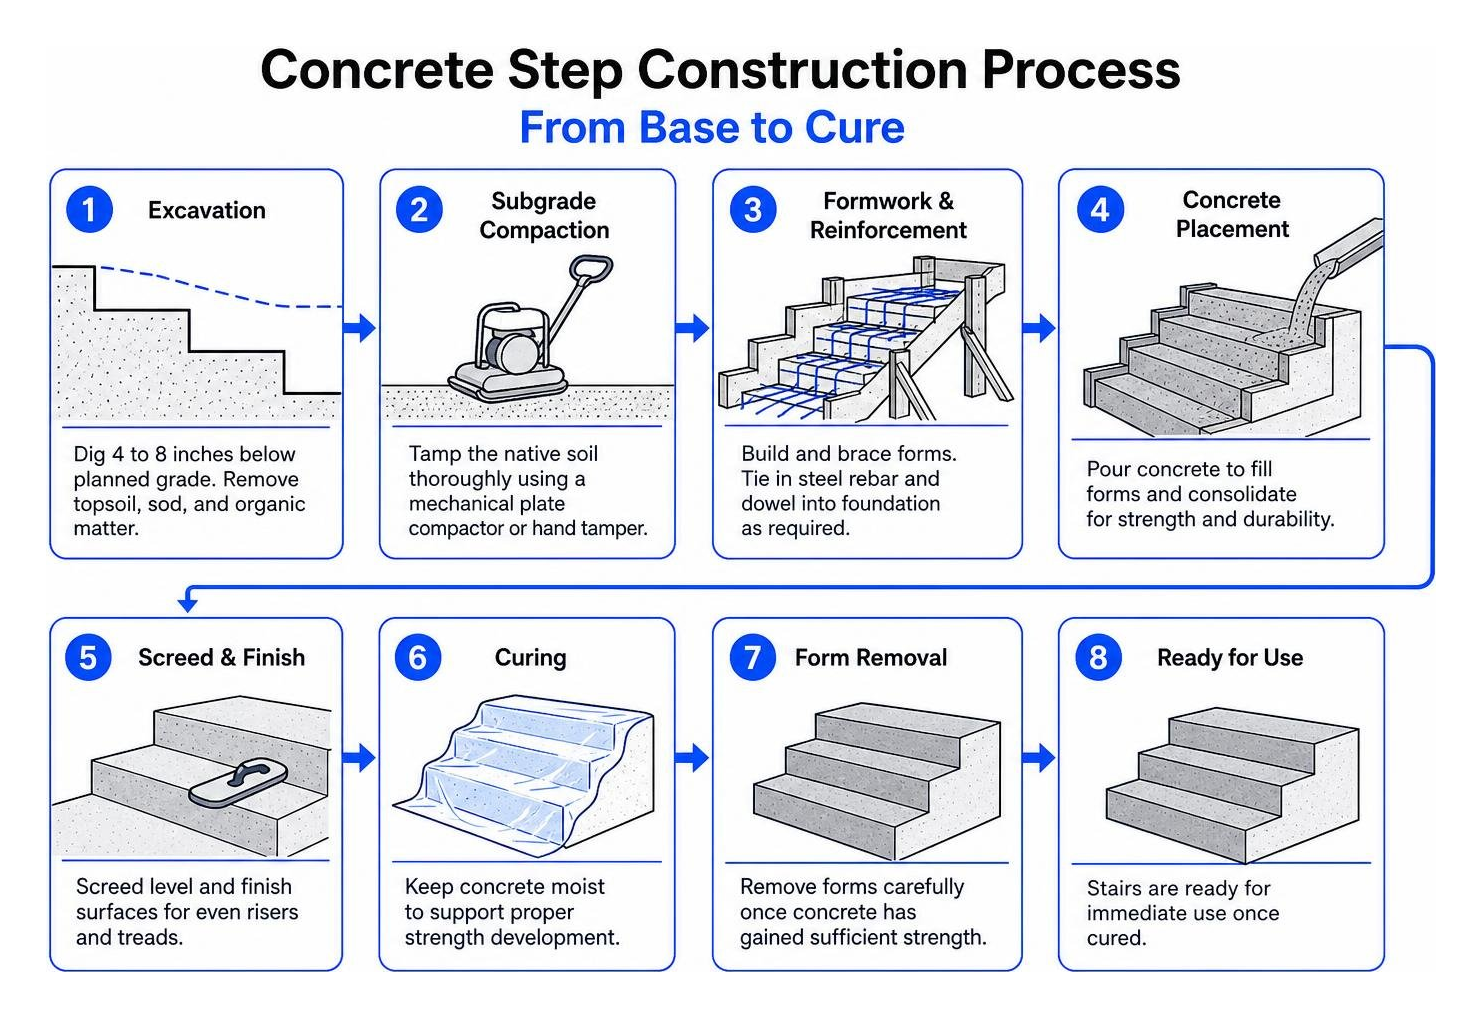
Excavation, Sub-Base, and Reusing Concrete Fill
Every lasting set of stairs starts beneath the ground:
- Excavation: Dig down 4 to 8 inches below your planned grade, clearing away all topsoil, sod, and organic matter.
- Subgrade Compaction: Tamp the native soil thoroughly using a mechanical plate compactor or hand tamper.
- Aggregate Base: Lay 4 to 6 inches of crushed, angular stone (such as #57 limestone or crushed gravel) and compact it in layers. In frost-prone climates, proper drainage prevents frost heave from lifting and snapping steps.
- Rebar Grid: Lay a grid of #3 (3/8-inch) or #4 (1/2-inch) rebar spaced 12 inches on center, elevated 1.5 to 2 inches off the sub-base with concrete chairs. For steps tied to a house, drill into the foundation and insert epoxy-anchored steel rebar dowels.
Pouring, Screeding, and Finishing Concrete Steps
For maximum durability, use a standard mix ratio of 1 part Portland cement, 2 parts clean sand, and 3 parts coarse gravel, which yields a durable 4,000 PSI concrete mix.
- Build Sturdy Forms: Use 3/4-inch exterior-grade plywood for side forms (stringers) and 2×8 dimensional lumber for risers. Angle the bottom edge of each riser board inward at roughly 5 degrees (beveled edge) to allow your finishing trowel to reach the back corner of the tread below. Apply form release oil to all wood faces.
- Pour Bottom-Up: Always pour the lowest step first. Vibrate or tap the exterior forms with a rubber mallet to eliminate honeycombs and air pockets.
- Screed and Float: Strike off the excess concrete level with the top of the riser forms. Pitch each tread slightly outward (roughly 1/8 inch per foot) to ensure rainwater drains away from the house.
- Wait Out the Bleed Water: Allow the surface sheen (bleed water) to evaporate before final floating. Troweling bleed water back into the slab weakens the surface layer, leading to premature flaking.
- Edge and Texture: Round the front nosing with an edging tool (a 1/2-inch radius prevents chipping) and drag a soft masonry broom lightly across the tread to create a slip-resistant texture.
- Cure for 28 Days: Concrete reaches its full structural design strength after a 28-day cure. Keep the concrete covered with plastic sheeting or moist burlap for the first 7 days to retain crucial hydration moisture.
Troubleshooting Common Issues: Cracks, Sinking, and Surface Flaking
Over time, external elements take their toll on outdoor masonry. When steps begin to pull away or sink, understanding simple techniques for lasting cement step repair helps keep your entryway safe. You can also explore Sameera Building Construction’s repair guide for additional context on masonry decay.
Repairing Chipped, Flaking, or Sunken Concrete Steps
When concrete breaks or sinks, homeowners face a choice: patch, lift, or replace.
- Chipped Corners and Edges: Clean the area with a wire brush, apply concrete bonding adhesive, build an L-shaped wooden form, and pack the corner with polymer-modified repair mortar. Learn more with our guide on easy DIY concrete step repair.
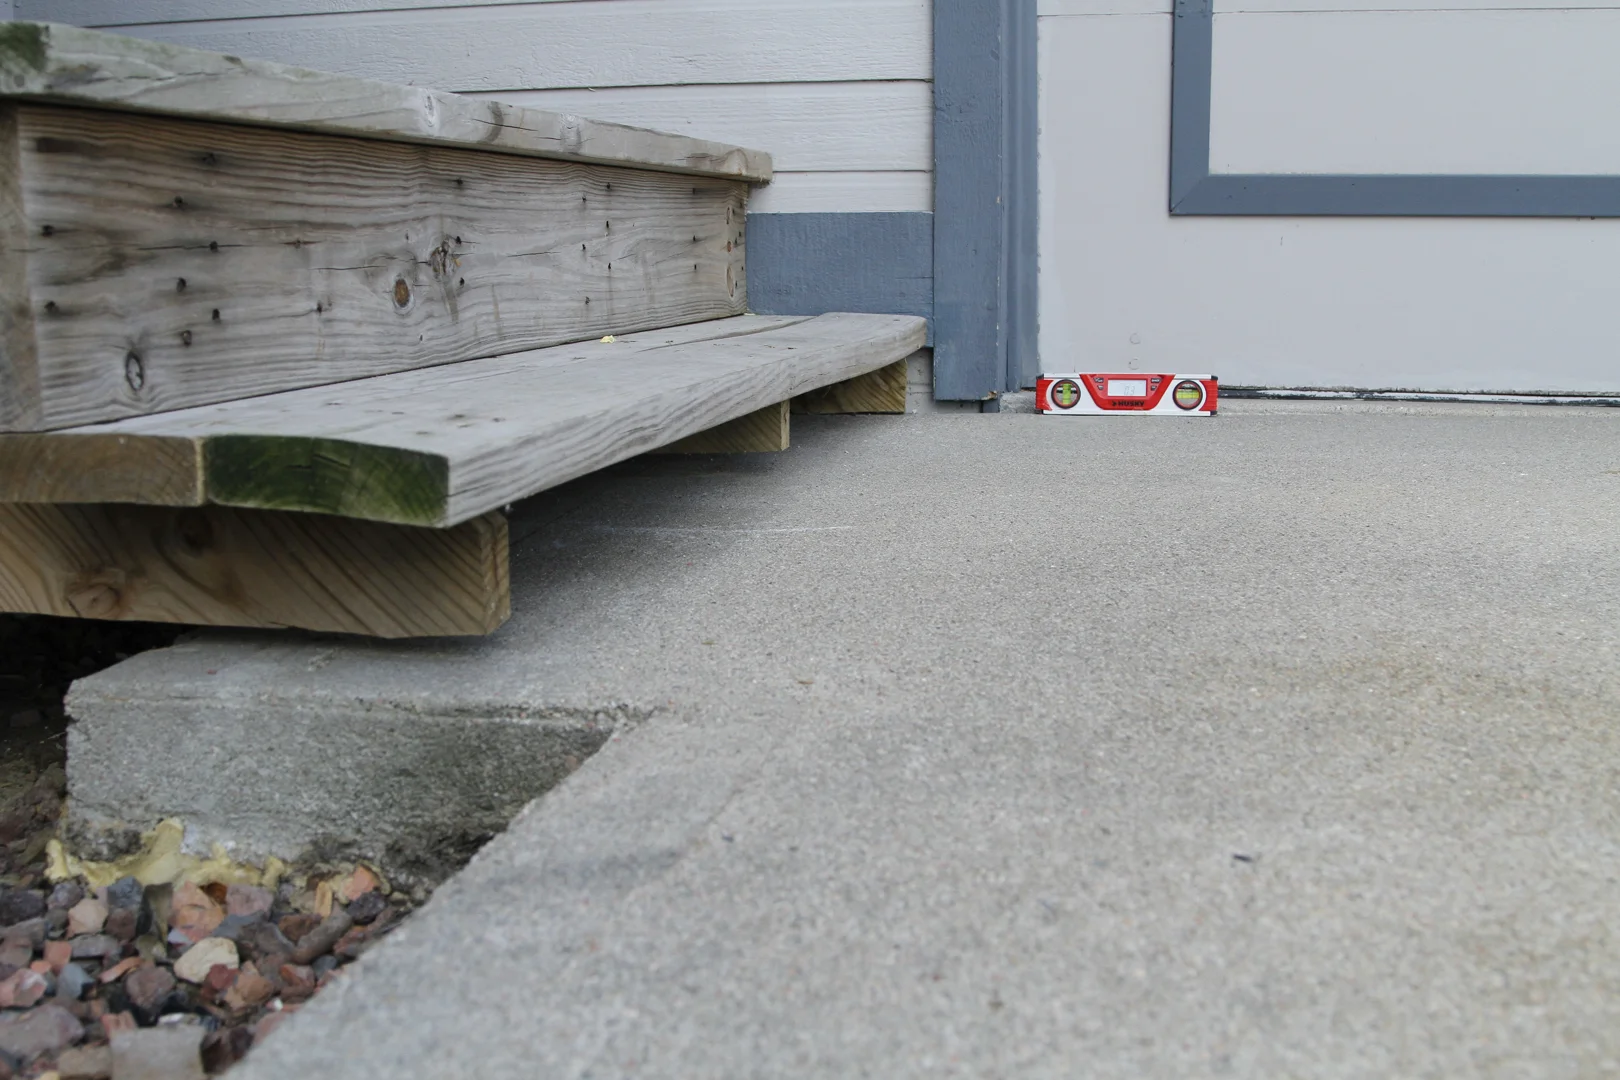
- Sinking Stoops and Steps: When the soil underneath steps compacts or erodes, the entire stair unit can tilt outward. Rather than paying thousands for demolition, polyurethane foam leveling offers a permanent fix. High-density foam is injected beneath the steps through dime-sized holes, lifting the slab back into alignment within minutes. Review our past work on porch repair and step lifting in Maumee, OH, our step and walkway project in Perrysburg, and our porch step raising in Toledo, OH.
- Larger Residential & Commercial Fixes: We have tackled extensive structural shifts, such as leveling a patio and steps in Sylvania, OH, executing walkway and step leveling in Maumee, OH, repairing a driveway and front stoop in Maumee, OH, completing porch and walkway leveling in Temperance, MI, repairing a porch cap in Findlay, OH, handling wrap-around porch repairs in Belle Center, OH, and our case study on lifting and stabilizing a 4-unit apartment building porch in Sylvania, OH.
FoamWorks Concrete Leveling uses polyurethane foam injection to repair sunken or uneven concrete for 30% to 50% less than full tear-out and replacement, helping homeowners save significantly on repair costs. Most repairs are completed in just a few hours, and the surface can be used almost immediately. Because there’s no need for heavy excavation, the process also reduces landscape damage, labor costs, debris removal, and disposal fees that come with replacing concrete. We provide free estimates to see how much you can save.
Handrail Selection and Code Compliance
Building codes require graspable handrails on any staircase with four or more risers (or an overall rise exceeding 30 inches).
- Materials: Powder-coated aluminum and one-piece welded wrought iron rails provide top-tier weather protection without rotting or warping.
- Mounting: Anchor rails securely into cured concrete using a rotary hammer to drill holes, securing the posts with stainless steel masonry wedge anchors or core-drilled holes set with hydraulic anchoring cement.
- Safety: Railings must withstand a minimum concentrated load of 200 pounds applied in any direction along the top rail.
Long-Term Maintenance and Winter Protection
With routine care, concrete steps can last over 30 years. Simple preventative maintenance protects your investment from expensive repairs:
- Annual Sealing: Applying a penetrating silane-siloxane concrete sealant every year can increase the lifespan of steps by up to 30%. Penetrating sealers soak into the concrete’s pores to block moisture intrusion without making the treads slick.
- Avoid Chemical Deicers: Never apply rock salt (sodium chloride), calcium chloride, or chemical deicers to concrete steps—especially during the first two winters. These chemicals force artificial freeze-thaw cycles that destroy the concrete paste. Use clean sand, kitty litter, or birdseed for winter traction instead.
- Keep Joints Sealed: Inspect joints where steps meet your home or walkway. Fill gaps with polyurethane masonry caulk to stop runoff from washing away the supporting subgrade.
For planning larger home renovation roadmaps, frameworks like ShunTool’s practical implementation guide and actionable planning strategies offer helpful goal-setting methods.
Frequently Asked Questions About Exterior Stairs
Can I reuse crushed old concrete as sub-base fill when rebuilding stairs?
Yes, using crushed, broken concrete as base fill is acceptable, provided it is broken into small, uniform pieces (2 inches or smaller) and thoroughly compacted with angular gravel. Never throw large, irregular chunks into forms, as they create hidden voids where soil settles, leading to cracked, sinking steps down the road.
How long must new concrete cure before heavy foot traffic?
Concrete typically sets enough for light foot traffic after 24 to 48 hours. However, avoid heavy loads, handrail installations, or moving heavy furniture across the stairs for at least 7 days. Concrete requires a full 28 days to reach its rated design strength (e.g., 4,000 PSI).
Why are my stairs pulling away from the front porch foundation?
Stairs pull away primarily because of subsoil settlement and poor water drainage. Downspouts discharging near the entry wash away the supporting base, causing the heavy front steps to rotate outward. Polyurethane foam leveling stabilizes the soil and lifts the steps back tight against your porch foundation without demolition.
Conclusion
Whether you are planning a new entryway, pouring custom steps, or maintaining an existing set, durable stairs rely on a stable base, proper dimensions, and routine maintenance. If your front steps have started to sink, tilt, or crack, you do not always need an expensive tear-out.
FoamWorks Concrete Leveling provides fast, non-invasive foam injection to lift and restore your steps in hours. Contact us today to schedule your free estimate and explore our professional concrete repair and leveling services.