

Choose a Garage Floor Coating That Fits Your Concrete
The best garage floor coating depends on the slab beneath it. A thick epoxy base can help cover sound but pitted concrete. Polyurea and polyaspartic systems are worth considering when faster curing and better resistance to sunlight matter. Paint is cheaper upfront but usually wears sooner. Before choosing any coating, check for moisture, repair cracks, and prepare the surface: even a strong coating can peel from poorly prepared concrete.
I’m Trey McNamee, owner of FoamWorks Concrete Leveling. My concrete repair work and more than 20 years in building-materials strategy shape how I assess a garage floor coating, starting with the condition of the slab.
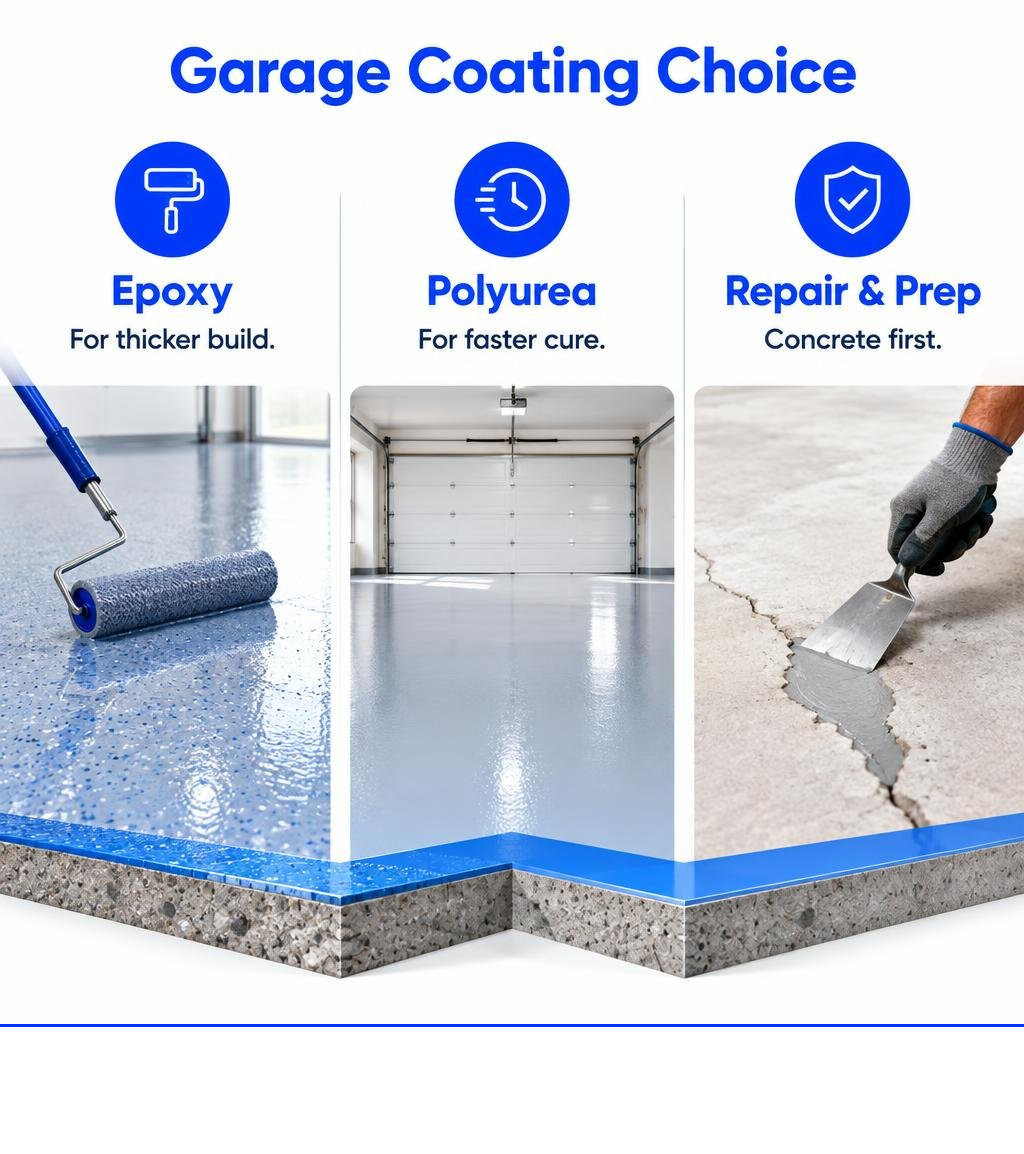
Basic garage floor coating terms:
Comparing Garage Floor Coating Options: Epoxy, Polyurea, and Polyaspartic
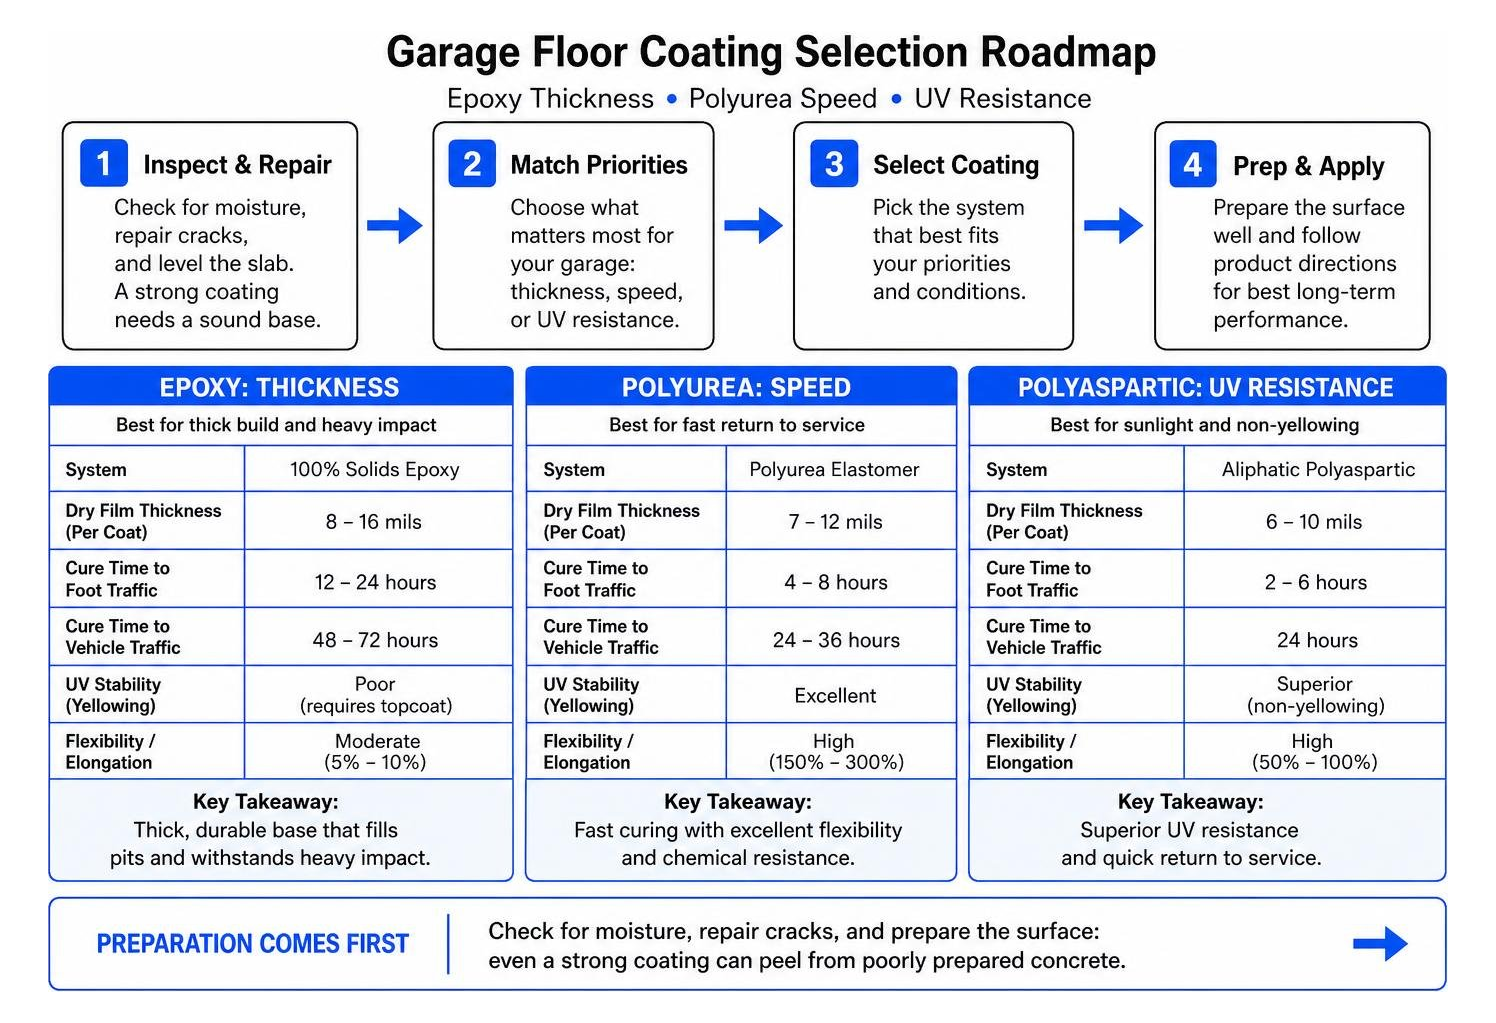
Choosing a garage floor protection system comes down to understanding the chemical differences between resin families. While many homeowners refer to any glossy finish as “epoxy,” the industry relies on distinctly different chemistries: water-based epoxies, 100% solids epoxies, polyurea elastomers, and aliphatic polyaspartics.
| Feature / Metric | Water-Based Epoxy | 100% Solids Epoxy | Polyurea Elastomer | Aliphatic Polyaspartic |
|---|---|---|---|---|
| Solids Content by Volume | 40% – 60% | 100% | 70% – 100% | 70% – 85% |
| Dry Film Thickness (Per Coat) | 2 – 4 mils | 8 – 16 mils | 7 – 12 mils | 6 – 10 mils |
| Cure Time to Foot Traffic | 24 hours | 12 – 24 hours | 4 – 8 hours | 2 – 6 hours |
| Cure Time to Vehicle Traffic | 72 hours (3 days) | 48 – 72 hours | 24 – 36 hours | 24 hours |
| UV Stability (Yellowing) | Poor (chalks/yellows) | Poor (requires topcoat) | Excellent | Superior (non-yellowing) |
| Flexibility / Elongation | Low (< 5%) | Moderate (5% – 10%) | High (150% – 300%) | High (50% – 100%) |
| Chemical Resistance | Low to Moderate | High | Superior | Superior |
| Typical Working Time (Pot Life) | 60 – 120 minutes | 30 – 45 minutes | Extended in can | 15 – 25 minutes |
For homeowners evaluating heavy-duty durability, reviewing specifications for heavy-duty garage floor solutions helps illustrate how solids content directly governs physical performance against abrasion and impacts.
100% Solids vs Water-Based Epoxy Formulations
The primary distinction between epoxy formulations lies in what evaporates during the curing cycle. Water-based epoxy kits contain water and solvents carrying resin and hardener particles. When applied, the water evaporates into the air, leaving behind only 40% to 60% of the wet material as a thin dry film (often only 2 to 3 mils thick).
By contrast, 100% solids epoxy contains zero volatile organic compounds (VOCs) and no evaporative carriers. The volume poured onto the concrete is the exact thickness that cures on the slab. This heavy build provides superior bonding strength, completely filling minor micro-pits, spider cracks, and concrete porosity. While water-based options serve as entry-level dust-proofing sealers, 100% solids epoxies create a thick, structural basecoat that can withstand heavy impacts from dropped tools and rolling floor jacks.
Polyurea and Polyaspartic Performance Advantages
Polyurea is a subgroup of polyurethane formed through the reaction of an isocyanate component with an amine-terminated resin blend. Polyaspartic is an aliphatic polyurea, engineered specifically to slow down the rapid cure time of standard polyurea so it can be rolled smoothly onto flat concrete.
These materials bring distinct mechanical advantages over traditional epoxies:
- Superior UV Stability: Epoxy resin breaks down and turns amber or chalky when exposed to sunlight through open garage doors. Polyaspartic topcoats are completely UV-stable and will not yellow over decades of exposure.
- Thermal Flexibility and Elongation: Concrete slabs expand and contract across seasonal temperature swings. Epoxy is rigid and can crack under extreme thermal shock, whereas polyurea elastomers offer extreme elongation (up to 300%), allowing the coating to move with underlying concrete movement.
- Rapid Cure Windows: While epoxies require 48 to 72 hours before taking vehicle weight, fast-curing polyaspartics allow homeowners to drive on the surface in just 24 hours.
The main trade-off is working time: polyaspartics have a tight pot life (often 15 to 20 minutes once mixed), requiring precision and experience during application.
Choosing the Right Garage Floor Coating for Concrete Conditions
No single coating fits every slab. Selecting the proper system depends on concrete age, traffic patterns, and existing slab defects:
- Older, Pitted, or Repaired Concrete: A 100% solids epoxy base coat is ideal. Its self-leveling thickness fills shallow surface defects and creates an even foundation.
- High UV Exposure and Daily Drivers: A hybrid multi-layer system (a high-adhesion epoxy or polyurea base with a full flake broadcast and an aliphatic polyaspartic clear coat) provides maximum abrasion resistance against road grit, salt, and sun.
- High Moisture Slabs: Slabs lacking an intact vapor barrier underneath require an epoxy moisture-mitigation primer before any topcoat is placed to prevent hydrostatic pressure from blowing the coating off the concrete.
Aesthetic and Performance Customization: Flake, Metallic, and Solid Systems
The finish you choose affects daily garage maintenance, slip resistance, and aesthetic appeal.

Full Broadcast Flake Systems vs Solid Color Finishes
- Full Broadcast Flake Systems: Vinyl color chips are thrown by hand into the wet basecoat until total saturation (“broadcast to rejection”). Once cured, the excess chips are scraped, vacuumed, and encapsulated beneath a clear polyaspartic topcoat. This build delivers unmatched durability, hides surface imperfections, masks dirt, and provides a subtle orange-peel texture for built-in slip resistance.
- Solid Color Finishes: These provide a sleek, uniform, high-gloss look often favored in industrial facilities. However, solid colors show every drop of dust, water spot, and tire track, and require anti-slip aggregate (such as aluminum oxide) added directly to the resin to avoid extreme slickness when wet.
- Metallic Systems: These use pearlescent metallic powders suspended in clear epoxy to create a three-dimensional, flowing marble look. While visually striking for showrooms, metallic floors are smooth and show surface scratching more easily than flake systems.
Essential Surface Preparation and Slab Repair Before Coating
The most common mistake in garage flooring is focusing on the topcoat while neglecting the concrete underneath. Over 90% of coating delaminations occur because the concrete surface was improperly prepped or structurally unsound.
Coating manufacturers specify an International Concrete Repair Institute (ICRI) Concrete Surface Profile (CSP) of CSP 2 to CSP 3 (resembling 80-grit to 100-grit sandpaper) to create mechanical “teeth” for the resin to lock into.
- Mechanical Diamond Grinding vs. Acid Etching: DIY kits often include muriatic or citric acid wash packets. Acid etching is unpredictable; it cannot profile hard-troweled slabs, does not remove oil residues, and introduces gallons of moisture directly into the concrete. Commercial diamond grinding cuts open the pores mechanically, cleans deep contaminants, and produces the exact profile needed for a permanent mechanical bond.
- Moisture Testing: Before coating, tape a 2-foot by 2-foot sheet of plastic to the slab for 24 hours. If dark moisture patches or condensation appear under the plastic, moisture vapor emissions are too high for standard coatings without a dedicated vapor barrier.
- Cracks and Control Joints: Cracks must be chased with a diamond blade and filled with a rigid epoxy or elastomeric joint compound flush with the surface.
- Sunken or Uneven Slabs: If one section of your slab has dropped, applying a coating will simply create a shiny trip hazard. Before you coat, you can stop hiding ugly floors and resurface your concrete today by ensuring the foundation is stabilized. For slabs with elevation differences, addressing settling through interior slab leveling provides a stable, uniform plane before any decorative system is rolled out.
Surface Preparation Essentials for a Long-Lasting Garage Floor Coating
Thorough slab prep requires a systematic, step-by-step approach:
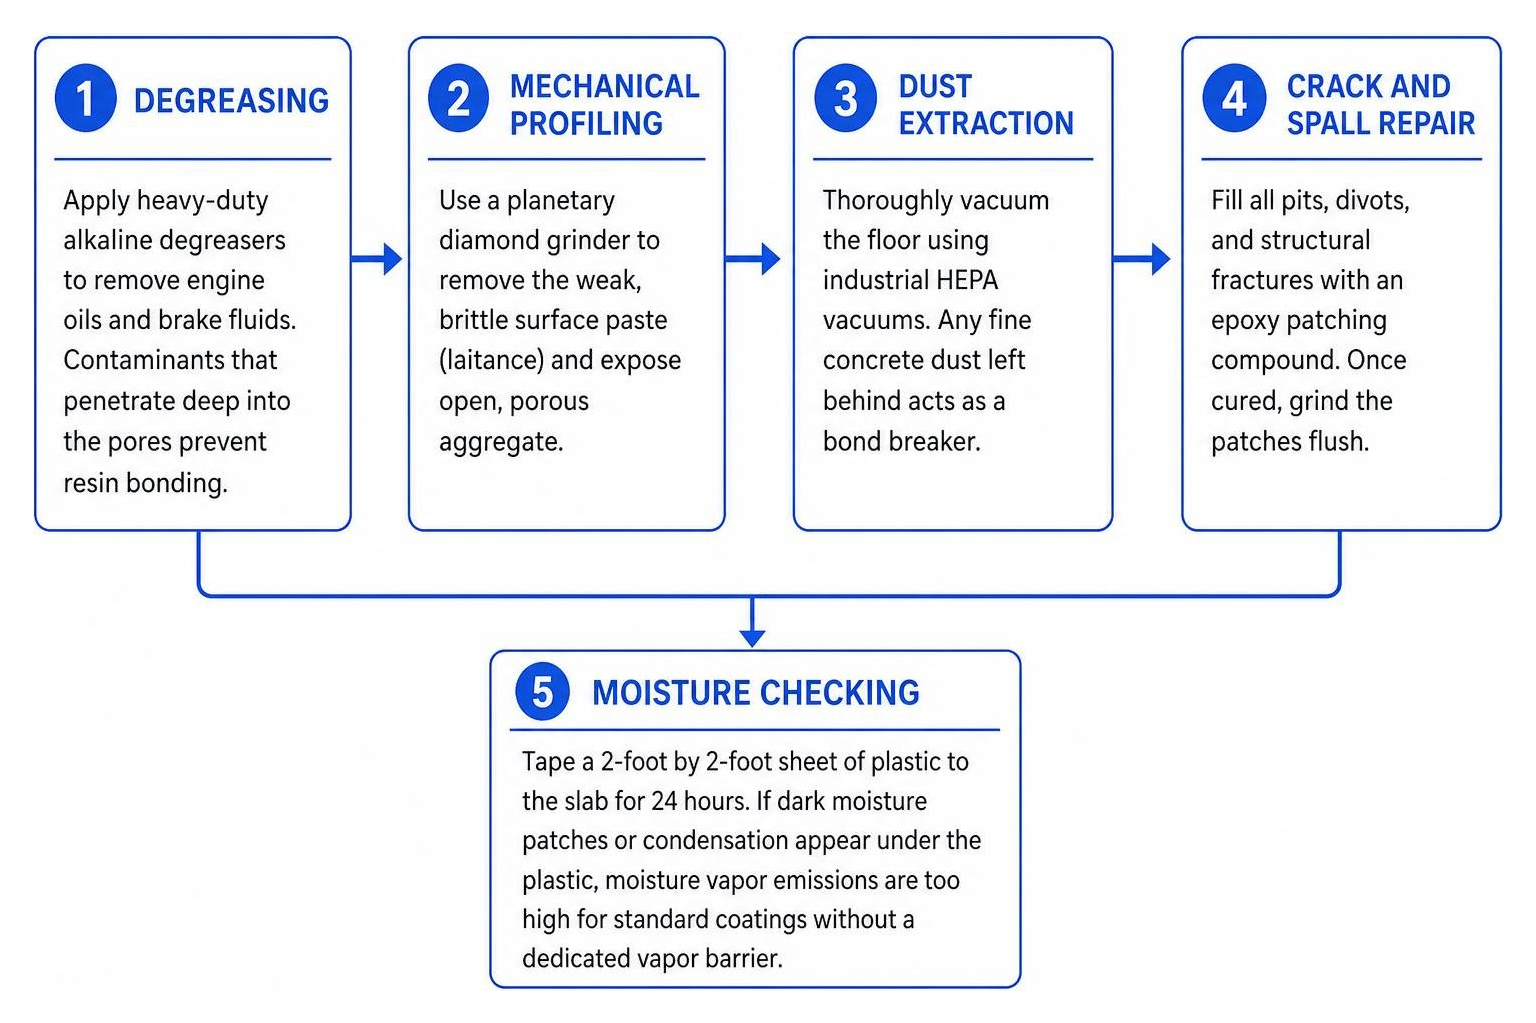
- Degreasing: Apply heavy-duty alkaline degreasers to remove engine oils and brake fluids. Contaminants that penetrate deep into the pores prevent resin bonding.
- Mechanical Profiling: Use a planetary diamond grinder to remove the weak, brittle surface paste (laitance) and expose open, porous aggregate.
- Dust Extraction: Thoroughly vacuum the floor using industrial HEPA vacuums. Any fine concrete dust left behind acts as a bond breaker.
- Crack and Spall Repair: Fill all pits, divots, and structural fractures with an epoxy patching compound. Once cured, grind the patches flush.
Cost Analysis and Longevity: DIY Kits vs Professional Installation
When evaluating cost, compare initial installation expenses against long-term maintenance cycles.
- DIY Box Kits ($250 to $600 total): Single-coat, water-based DIY kits sold at retail home centers yield a thin film (2 to 4 mils). Because surface preparation is typically limited to mild acid washing, these coatings often experience hot-tire pickup and peeling within 1 to 3 years, necessitating complete stripping and re-application.
- Professional Multi-Layer Hybrid Systems ($5.50 to $9.00 per sq ft): A professional system typically consists of a 100% solids epoxy or polyurea moisture-mitigating primer basecoat (8 to 12 mils), a full broadcast of vinyl chips (adding 5 to 10 mils of structural thickness), and an aliphatic polyaspartic topcoat (6 to 10 mils). The total dry build reaches 25 to 35+ mils.
While professional equipment and high-solids materials carry a higher initial investment, these multi-layer systems achieve a 10 to 20+ year service life under residential vehicle traffic, saving significant labor and material costs over time. If your concrete is sound but you prefer an alternative to heavy coatings, a penetrating concrete sealant can protect against freeze-thaw damage and chemical intrusion without forming a topical film.
Frequently Asked Questions About Garage Floor Shields
How long does a garage floor coating last under normal vehicle traffic?
A properly engineered multi-layer system (combining a high-solids basecoat, full flake broadcast, and polyaspartic topcoat) will last 10 to 20+ years in a residential garage. Single-coat water-based paints and sealers typically begin to show wear, staining, and tire delamination within 1 to 3 years.
How soon can you walk and park on a newly coated garage floor?
Cure schedules depend directly on the chemistry applied:
- Water-Based Epoxy: Light foot traffic after 24 hours; vehicle parking after 72 hours (3 full days).
- 100% Solids Epoxy Base with Polyaspartic Topcoat: Light foot traffic after 12 to 24 hours; full vehicle parking after 48 hours.
- Pure Fast-Cure Polyaspartic System: Light foot traffic in 4 to 6 hours; drive-on ready within 24 to 36 hours.
What causes garage floor coatings to peel under hot vehicle tires?
“Hot tire pickup” happens when vehicle tires reach operating temperatures of 140°F to 180°F from highway driving and park on a low-solids or poorly bonded floor. As the rubber cools, it contracts, gripping the smooth surface. If the coating is thin paint, water-based epoxy, or applied over an unprofiled slab, the thermal contraction pulls the coating right off the concrete. Using high-solids basecoats over mechanically ground concrete completely prevents this failure.
Conclusion
A successful garage floor upgrade combines the right chemical system with a clean, level, and structurally sound concrete base. Choosing a 100% solids basecoat topped with an aliphatic polyaspartic clear coat provides the best balance of thickness, impact strength, thermal flexibility, and UV stability.
Before rolling out any resin, make sure your concrete slab is stable, dry, and level. If your garage slab exhibits sinking, trip hazards, or uneven slabs, our team at FoamWorks Concrete Leveling can help. We use non-invasive polyurethane foam injection to lift and stabilize sunken concrete for 30% to 50% less than full replacement, completing repairs in just a few hours. Explore our interior slab leveling services to ensure your concrete is level and ready for a lifetime of protection.