
How to Seal Concrete Cracks Before Water Gets In
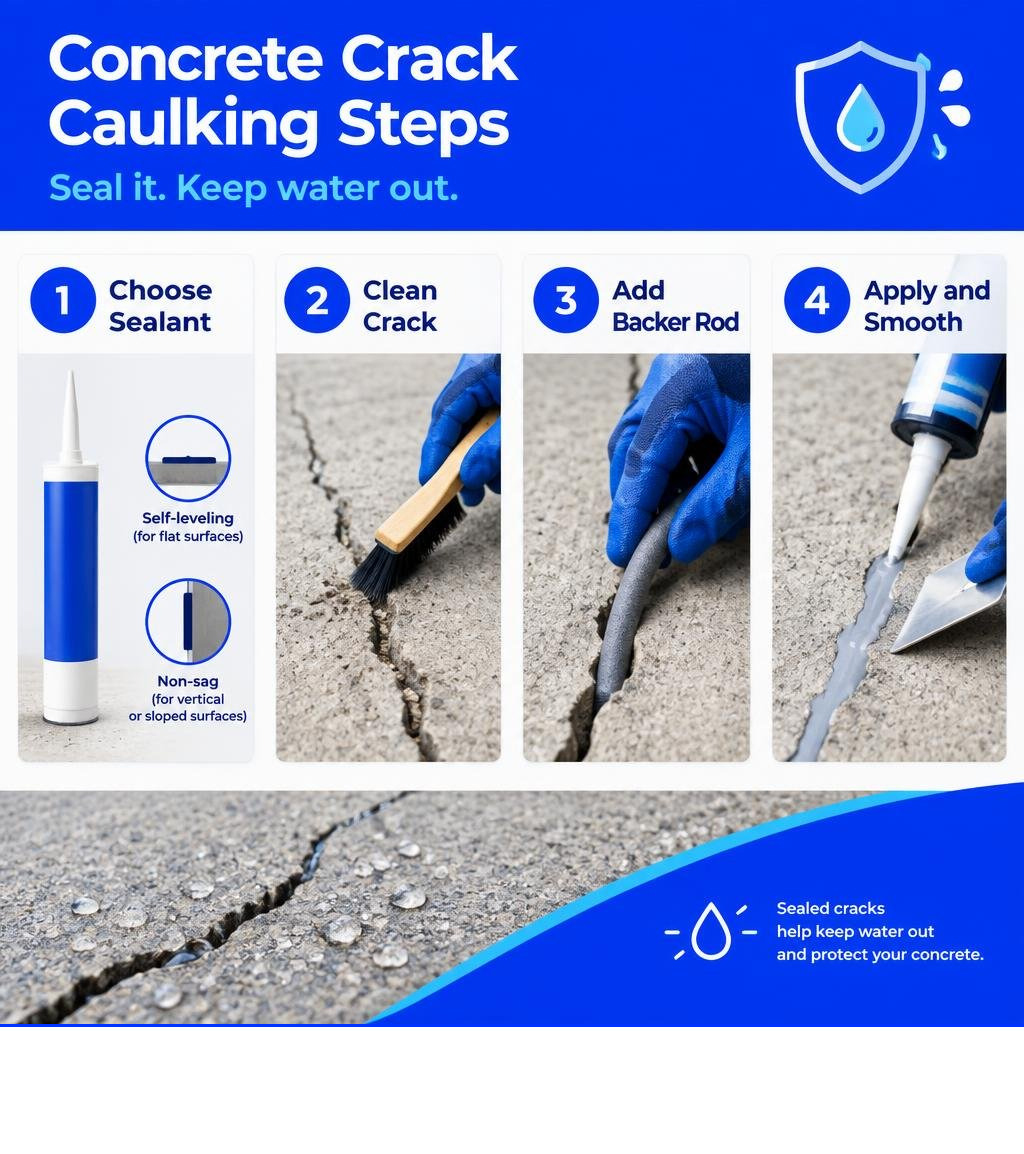
For most non-structural concrete cracks, use a flexible sealant made for concrete. Choose a self-leveling product for a flat driveway or garage floor, and a non-sag product for a vertical wall or sloped surface. Clean out loose material, let the crack dry as the product directs, add backer rod if the gap is deep or wide, then apply a small bead and smooth it while wet.
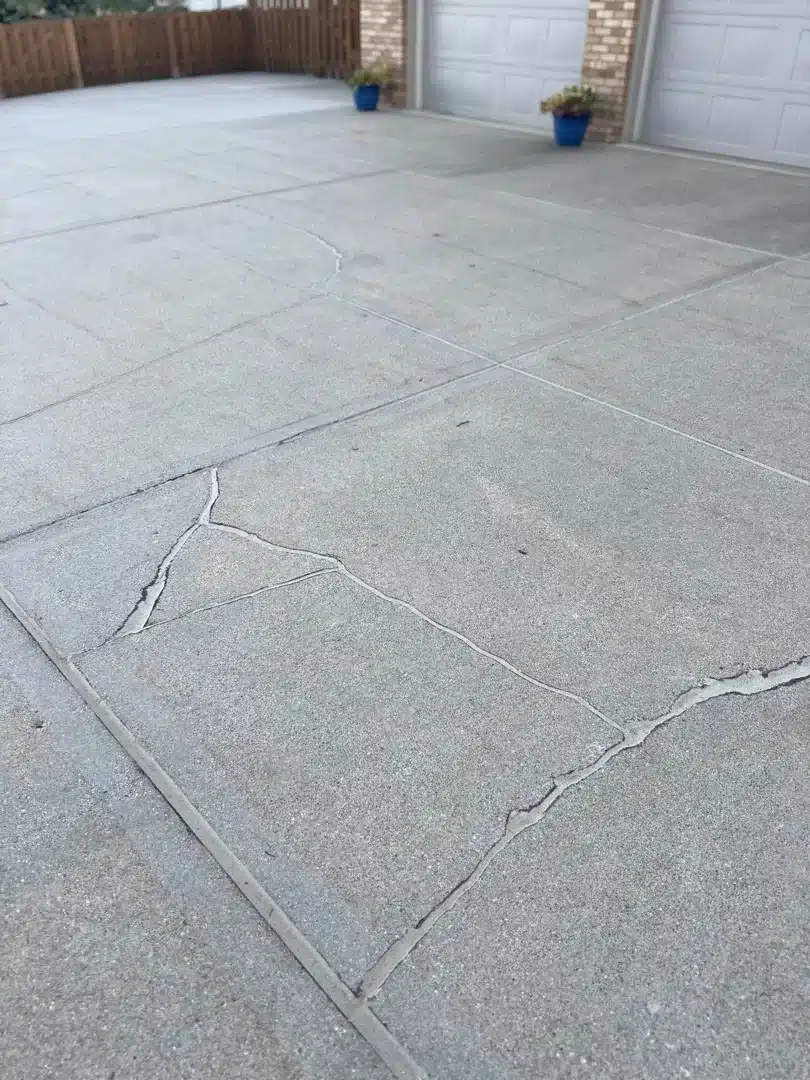
Sealing a crack helps keep water out. That matters in Northwest Ohio, Southeast Michigan, and Northeast Indiana, where water trapped in concrete can freeze and make damage worse. But caulk won’t fix a slab that’s sinking or a crack that points to a structural problem.
I’m Trey McNamee, owner of FoamWorks Concrete Leveling. My work in concrete crack repair and sealing includes helping homeowners decide when caulking for cement cracks is a good DIY fix and when the concrete needs more than a sealant.
Easy caulking for cement cracks word list:
Choosing the Right Caulking for Cement Cracks
When moisture enters concrete flatwork, winter freeze-thaw cycles turn tiny surface fissures into jagged chasms. Concrete expands in the heat of July and contracts in the freezing lows of January. Because slabs move constantly, rigid patches placed into active cracks will crack again.
To achieve a long-lasting seal, choose an elastomeric material tested under ASTM C920 (Standard Specification for Elastomeric Joint Sealants) with a “Use M” rating for masonry. These flexible sealants stretch and compress alongside thermal concrete movement without pulling away from the concrete sidewalls. You can explore our guide on flexible concrete sealant options to match specific product chemistries with your home repair projects.
| Sealant Type | Movement Capability | Paintability | Best Application | Expected Durability |
|---|---|---|---|---|
| Polyurethane | High (±25% to ±35%) | Excellent (after cure) | Driveways, garage floors, sidewalks | 10–20 years |
| Acrylic Latex | Low (±5% to ±10%) | Excellent (fast drying) | Interior drywall transitions, non-moving masonry | 2–5 years (outdoor failure prone) |
| 100% Silicone | High (±25% to ±50%) | Poor (does not hold paint) | Glass, non-porous metals, flashings | 5–10 years on masonry |
| Structural Epoxy | Rigid (0% movement) | Good (epoxy topcoats) | Basements, non-moving structural cracks | Permanent (static joints only) |
Comparing Polyurethane, Silicone, and Latex Caulks
Polyurethane is the gold standard for exterior residential concrete repair. A single-component polyurethane adheres tenaciously to porous masonry substrates, accommodates movement up to ±35%, and resists abrasion from tires and snow shovels. Products meeting technical standards for elastomeric joint sealants provide the weatherproofing needed for harsh midwestern winters.
Silicones offer excellent UV stability, but standard 100% silicone does not adhere reliably to porous, alkaline concrete over time without specialized primers. Furthermore, paint will not bond to silicone beads, leaving bright shiny lines across your slab.
Standard acrylic latex caulk should never be used outdoors on concrete flatwork. Water-based latex shrinks substantially as it dries, lacks ASTM C920 certification, and quickly dissolves or splits when exposed to pooling water and freezing conditions.
Self-Leveling vs. Non-Sag Caulking for Cement Cracks
Matching the sealant grade to your crack orientation prevents frustrating messes:
- Grade P (Pourable / Self-Leveling): Formulated with low viscosity to flow smoothly into horizontal joints without manual tooling. Self-leveling polyurethane works best on driveways, patios, and garage floors with slopes under 3%. If you try applying it on a steeper driveway or a vertical wall, it will run down the slope like pancake batter.
- Grade NS (Non-Sag / Gun-Grade): Formulated with a thicker body that stays in place without slumping. Non-sag caulks are essential for vertical foundation walls, stucco surfaces, steps, and flatwork with noticeable pitch. They require light manual tooling with a spatula or putty knife to press the sealant firmly against both sidewalls.
For a deeper look into the differences between surface treatments and joint fillers, review our breakdown on caulking vs general sealing differences.
How to Prepare and Route Concrete Cracks for Caulking
The number one reason concrete caulk fails is poor surface preparation. Polyurethane cannot stick to crumbling concrete, residual motor oil, dirt, or loose sand.
Before beginning any repair, inspect the slab closely. If your cracked concrete exhibits differential settling—where one side of the crack is significantly higher than the other—caulking will not solve the underlying subbase void. You can learn more about identifying severe structural crack hazards before spending time on surface repairs.
Essential Tools and Materials for Caulking for Cement Cracks
Gather the following items before opening your sealant tubes:
- High-thrust ratio caulk gun (a 12:1 or 18:1 mechanical advantage gun makes thick polyurethane easy to dispense)
- Angle grinder with a diamond tuck-point blade or a cold chisel and small sledgehammer
- Wire brush and shop vacuum or compressed air nozzle
- Closed-cell polyethylene foam backer rod (sized 25% wider than the joint width)
- Disposable nitrile gloves (polyurethane is extremely sticky)
- Margin trowel, putty knife, or backer rod roller
- Mineral spirits and clean cotton rags for clean-up
- Protective equipment: safety glasses, N95 dust mask, and hearing protection
If you are working within a tight budget, explore these budget-friendly concrete repair methods to get professional results without overspending.
Preparing the V-Groove and Installing a Foam Backer Rod
Follow this preparation sequence:
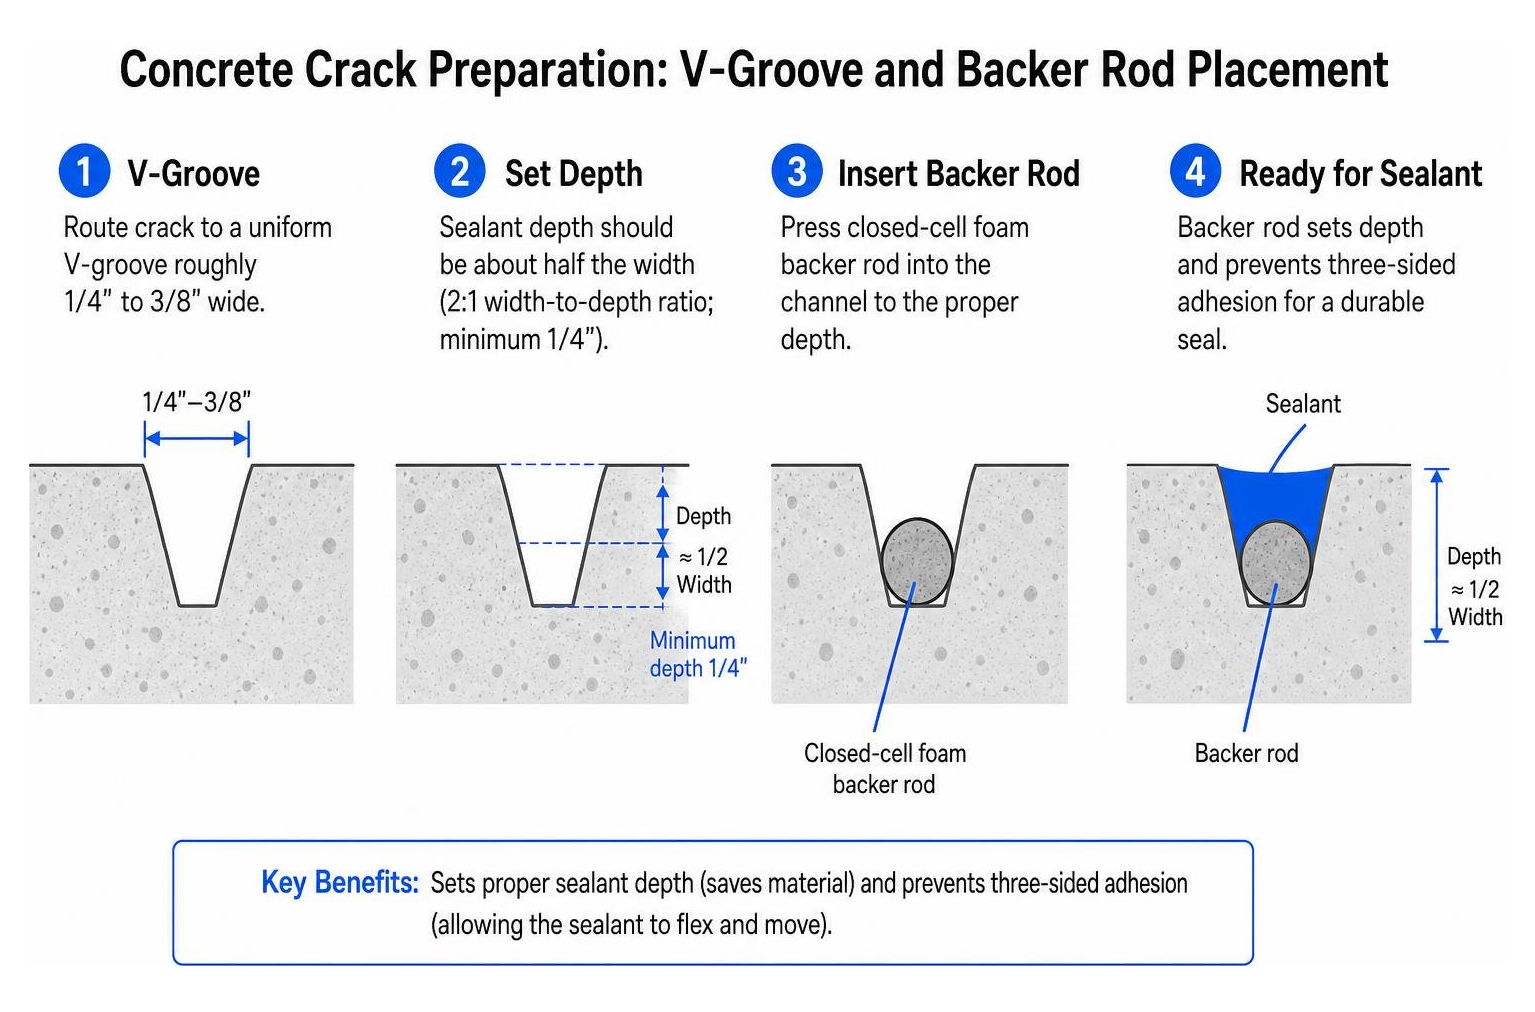
- Route the Crack: Hairline cracks under 1/4-inch wide do not hold enough sealant volume to handle thermal expansion. Use an angle grinder with a masonry wheel or a cold chisel to chase the fissure into a uniform, shallow V-groove roughly 1/4-inch to 3/8-inch wide.
- Clean Thoroughly: Sweep away large fragments, scrub the sidewalls with a stiff wire brush to remove weak cement laitance, and vacuum the groove. A quick blast of dry compressed air ensures no fine dust remains.
- Control Joint Depth: The depth of your sealant bead should always be roughly half its width, maintaining a 2:1 width-to-depth ratio (with a minimum depth of 1/4 inch).
- Insert Foam Backer Rod: For cracks deeper than 1/4 inch, press a closed-cell foam backer rod into the channel using a blunt tool. Backer rods serve two vital functions: they establish the proper depth so you do not waste expensive caulk, and they prevent three-sided adhesion. If caulk bonds to both sidewalls and the hard bottom of the crack, it cannot stretch sideways and will tear down the center.
For additional visual guidance, review these step-by-step DIY caulking instructions.
Step-by-Step Application and Finishing Techniques
Applying concrete caulk requires patience and steady hand pressure.

If your slab has broken sections or wide, unstable control joints, you may want to review professional concrete crack repair solutions before tackling the job yourself.
Applying Caulk to Horizontal Slabs vs. Vertical Walls
- Horizontal Flatwork (Self-Leveling Sealant): Cut the tip of your cartridge straight across to leave a small opening. Puncture the inner foil seal. Place the nozzle deep inside the crack and squeeze the trigger smoothly. Allow the sealant to rise until it sits roughly 1/8-inch below the slab surface. Because self-leveling sealant flows naturally to fill tiny voids, do not overfill the joint. An overfilled bead sits higher than the concrete, exposing it to tire scuffs and snow blower blades.
- Vertical Walls and Slopes (Non-Sag Sealant): Cut the cartridge tip at a 30-to-45-degree angle matching the width of the gap. Hold the gun at a consistent angle, pushing the bead forward into the joint rather than dragging it. Pushing forces the heavy sealant into intimate contact with both concrete sidewalls.
Tooling, Curing, and Painting the Sealant
- Tooling Non-Sag Caulk: Immediately after gunning non-sag caulk, smooth the bead using a curved margin trowel, putty knife, or a gloved finger lightly dampened with mineral spirits. Tooling compresses the sealant against the concrete for maximum bond strength and creates a clean, concave joint profile.
- Curing Timeline: Polyurethane reacts with atmospheric moisture to cure. At 70°F and 50% relative humidity, it reaches a tack-free state in 2 to 4 hours. Keep foot traffic off for 24 to 48 hours, and wait a full 5 to 7 days before driving heavy vehicles across the joint. Cold or exceptionally dry weather will extend these curing times.
- Painting and Blending: Once fully cured, polyurethane caulk accepts high-quality exterior acrylic latex or elastomeric masonry paints. If you want a textured concrete appearance, you can lightly dust clean masonry sand over wet non-sag sealant immediately after tooling.
Frequently Asked Questions About Concrete Crack Caulking
Homeowners often reach out to us with questions about sealant performance. You can also consult our common concrete sealant questions for more expert tips.
How long does concrete caulk take to dry before exposure to rain or traffic?
Most polyurethane sealants form a protective surface skin within 2 to 3 hours, making them resistant to light rain showers. However, avoid applying sealant if heavy downpours are forecast within 24 hours. Wait at least 24 hours before allowing pets or pedestrians on the slab, and allow 5 to 7 days of full cure time before parking vehicles on repaired control joints.
Can you apply concrete caulk over damp or fresh concrete?
While polyurethane requires ambient moisture to cure, applying it over soaking wet concrete will cause bubbling and bond failure. The concrete sidewalls must be visibly dry and free of standing water. Additionally, newly poured concrete should cure for at least 28 days before sealing, unless you are using a specialized sealant specifically formulated for green concrete.
Why did my concrete caulk split down the middle after winter?
When concrete caulk splits cleanly down its center, the cause is almost always three-sided adhesion or an unrated sealant. If sealant adheres to the bottom floor of a crack as well as both sidewalls, all tensile stress concentrates in the middle rather than dispersing across the bead’s width. Installing a closed-cell backer rod prevents bottom bonding, allowing the elastomeric material to flex freely during severe winter freezes.
Conclusion: Protect Your Concrete Slab for the Long Haul
Sealing concrete cracks is one of the most cost-effective ways to protect your flatwork from moisture intrusion, frost heave, and subbase erosion. A tube of quality polyurethane caulk, paired with thorough crack preparation and foam backer rod, keeps water where it belongs—away from your foundation and subbase soil.
However, caulk is a surface barrier, not a structural lifter. If sections of your driveway, sidewalk, patio, or pool deck have sunken, rocked, or broken due to subbase voids, caulk alone cannot level the surface.
FoamWorks Concrete Leveling provides fast, precision polyurethane foam injection to raise sunken slabs back to their original grade. Our high-density foam injection costs 30% to 50% less than full concrete replacement, requires no messy excavation, and cures in minutes rather than days. Backed by 30+ years of experience and a lifetime warranty, we proudly serve homeowners across Northwest Ohio, Southeast Michigan, and Northeast Indiana.
Contact our team today to schedule your free estimate and learn more about our comprehensive expert concrete repair and leveling services.