
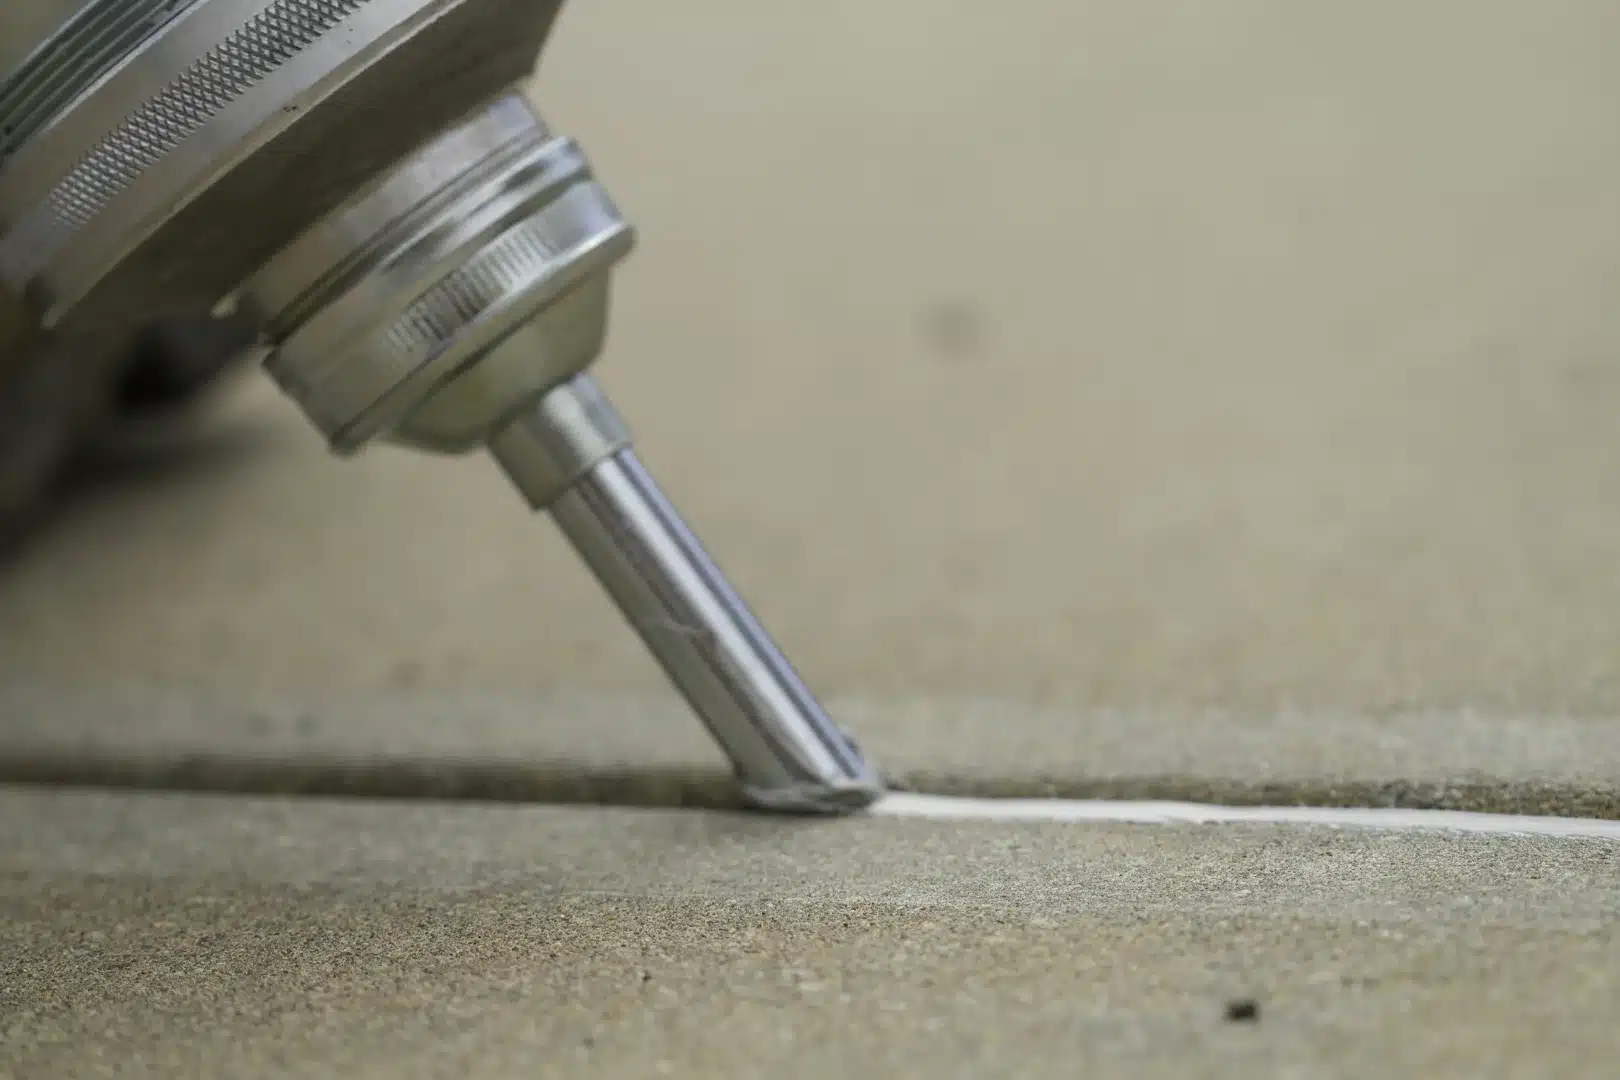
Concrete Caulking vs Sealing: The Quick Answer
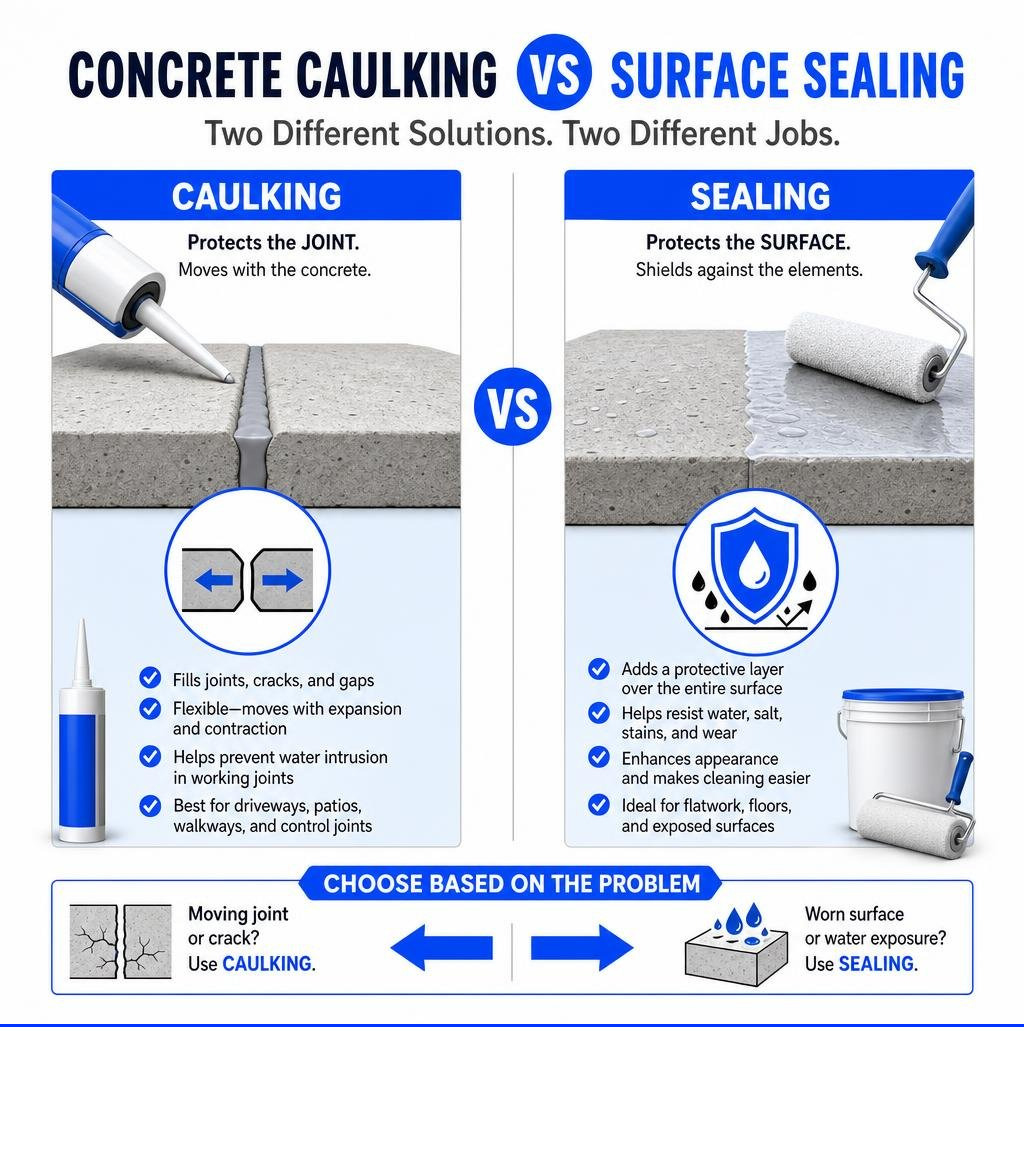
For concrete caulking vs sealing, the key difference is what you are protecting:
- Concrete caulking fills a crack or joint with a flexible material that moves as the slab expands, shrinks, or settles.
- Concrete sealing often means applying a protective coating across the concrete surface to reduce water, salt, stains, and wear.
- Use a flexible polyurethane or hybrid sealant for driveway control joints, patio joints, and cracks that change width with weather.
- Use a rigid filler or repair mortar only for dormant, non-moving cracks, chips, and spalls.
For outdoor concrete in Ohio, Michigan, and Indiana, flexible joint sealant is usually the better choice for working joints. Water that enters an open joint can freeze, widen the gap, and contribute to more cracking or slab damage over time. Regular painter’s caulk is not a reliable outdoor concrete repair because it has limited movement ability and can break down under sun, moisture, and freeze-thaw cycles.
I am Trey McNamee, owner of FoamWorks Concrete Leveling, with more than two decades of experience in building-material marketing, strategy, and product development, plus hands-on experience helping homeowners assess concrete caulking vs sealing needs. Below, we will clarify which product fits your crack, joint, or concrete surface before you spend time and money on the wrong repair.
Quick concrete caulking vs sealing terms:
Understanding Concrete Caulking vs Sealing: Definitions and Core Differences
To protect your exterior slabs, you must first understand the fundamental divide between filling an isolated gap and waterproofing a broad slab. In standard industry terminology, “caulking” or “joint sealing” refers to gunning an elastomeric material directly into control joints, isolation joints, or fracture lines. By contrast, “concrete sealing” often describes rolling or spraying a penetrating chemical or topical film over the entire face of a patio, driveway, or pool deck to repel road salts, moisture, and staining.
When comparing a flexible joint filler to a general caulk, performance hinges on standards established by ASTM International. High-performance exterior joint sealants are formulated and tested to meet ASTM C920 (Standard Specification for Elastomeric Joint Sealants). These commercial-grade elastomeric compounds can stretch and compress across extensive thermal cycles without tearing or losing their bond line.
Standard hardware store acrylic or painter’s caulks are formulated for interior aesthetic trims where joint movement is minimal. Using an everyday interior caulk on an exterior slab joint almost guarantees premature joint failure. When choosing materials, understanding the technical differences outlined in this guide on Concrete Crack Filler vs Caulk vs Self-Leveling Sealant | US Made Supply will help you avoid costly mistakes.
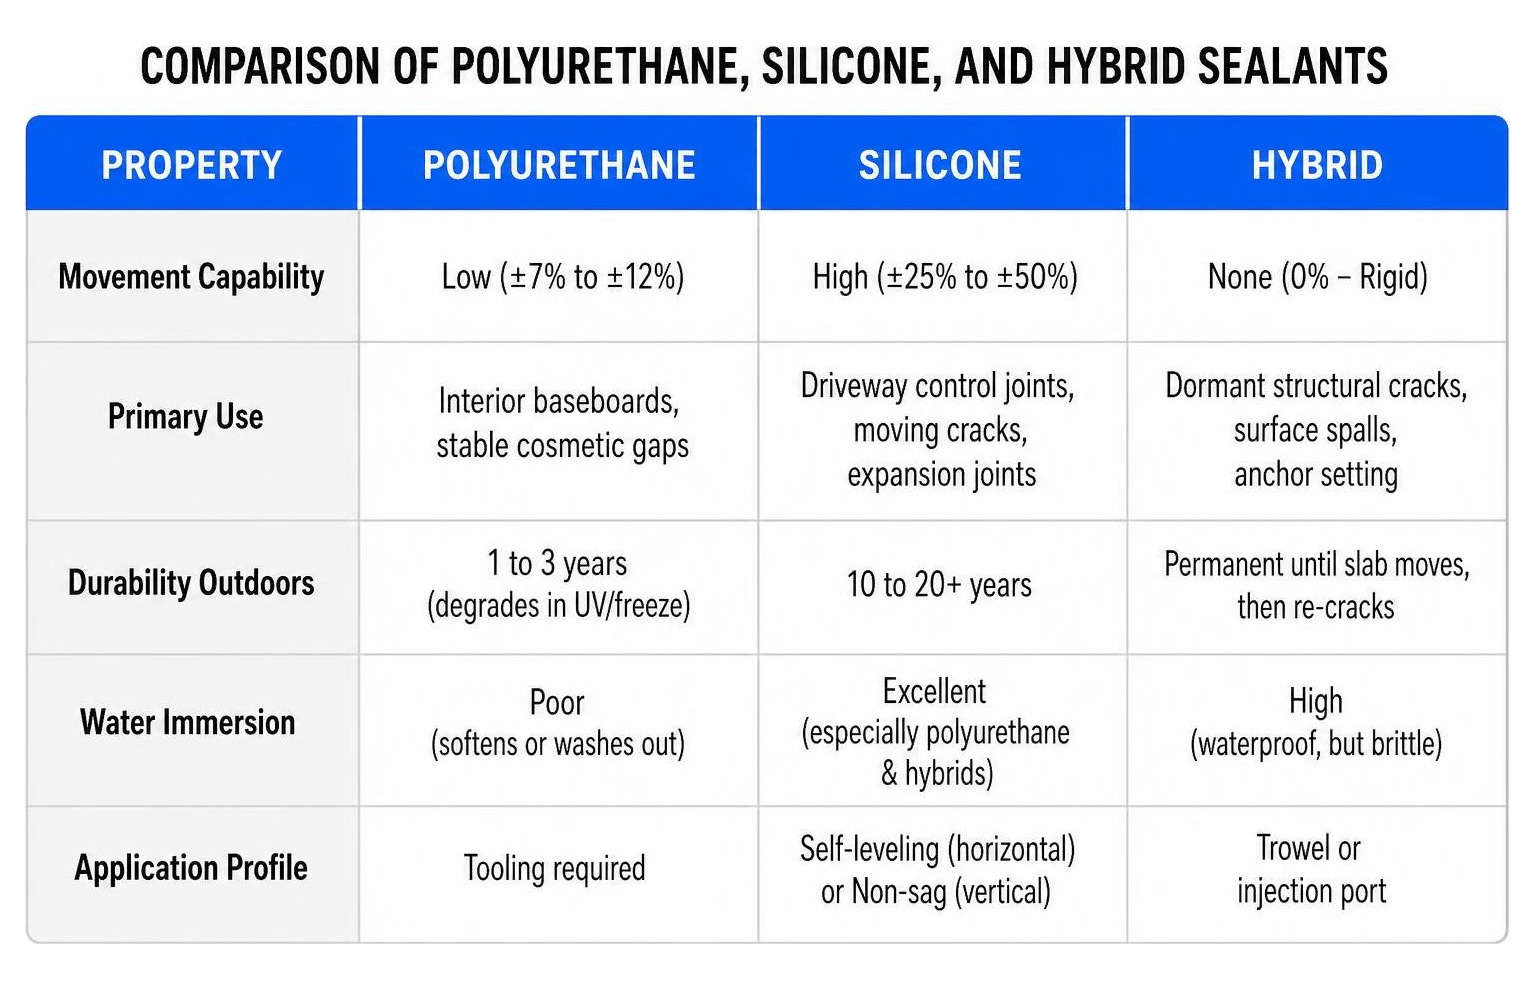
| Feature | Standard Joint Caulk (Latex / Painter’s) | Flexible Concrete Sealant (ASTM C920 Elastomeric) | Rigid Crack Filler (Epoxy / Mortar) |
|---|---|---|---|
| Movement Capability | Low (±7% to ±12%) | High (±25% to ±50%) | None (0% – Rigid) |
| Primary Use | Interior baseboards, stable cosmetic gaps | Driveway control joints, moving cracks, expansion joints | Dormant structural cracks, surface spalls, anchor setting |
| Durability Outdoors | 1 to 3 years (degrades in UV/freeze) | 10 to 20+ years | Permanent until slab moves, then re-cracks |
| Water Immersion | Poor (softens or washes out) | Excellent (especially polyurethane & hybrids) | High (waterproof, but brittle) |
| Application Profile | Tooling required | Self-leveling (horizontal) or Non-sag (vertical) | Trowel or injection port |
Moving vs. Dormant Cracks: Choosing Rigid Fillers or Flexible Sealants
Before applying any product, you must determine whether the fracture in your slab is active (moving) or dormant (static). Concrete expands in summer heat and contracts in sub-zero winter temperatures. In fact, a 100-foot concrete run can easily shift up to 3/4 inch between peak seasons.
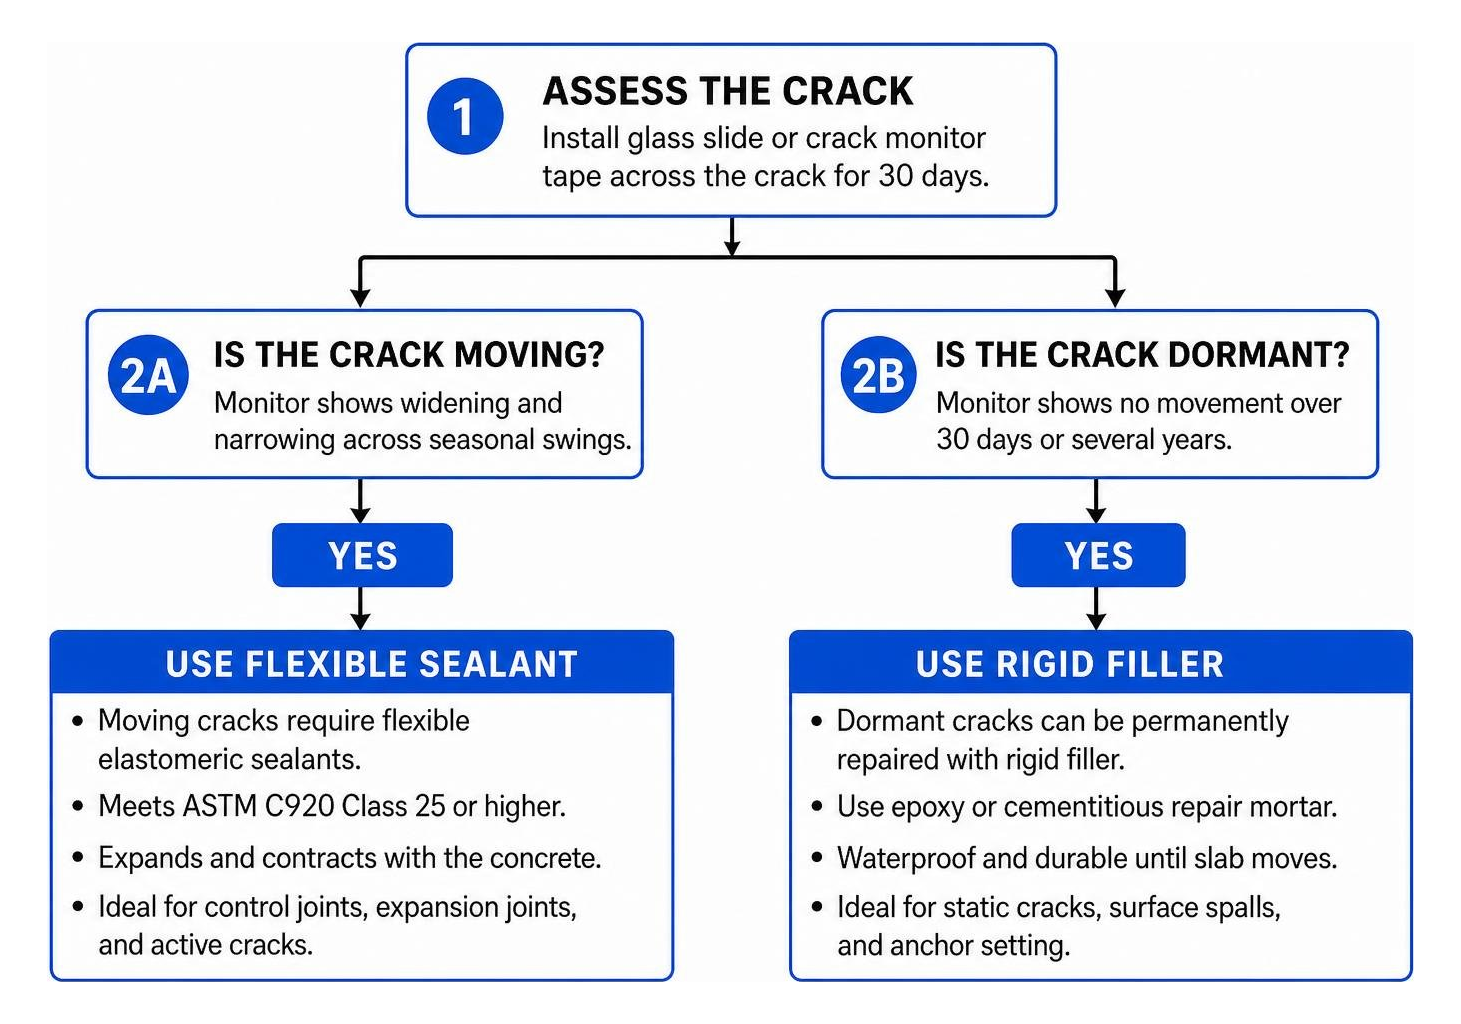
To evaluate movement, install a simple glass slide or crack monitor tape across the crack for 30 days. If the glass breaks or the monitor indicates widening and narrowing across seasonal swings, you are dealing with a moving crack.
- Moving Cracks: Require flexible elastomeric sealants (ASTM C920 Class 25 or higher) that expand and contract with the concrete.
- Dormant Cracks: Fractures caused by initial curing shrinkage that have stabilized over several years can be permanently repaired with rigid epoxy or cementitious repair mortars.
Applying a rigid epoxy into a moving crack guarantees that the patch will snap or a parallel fracture will form beside the repair as soon as the ground shifts. When recurring slab distress appears, understanding the underlying concrete repair causes is critical before sealing the surface.
Evaluating Concrete Caulking vs Sealing for Driveways and Flatwork
Driveway slabs and flatwork contain planned intentional cuts known as control joints, alongside perimeter expansion joints placed against foundations and garage aprons. Control joints guide where concrete cracks during curing shrinkage, but they remain vulnerable open avenues for water infiltration.
When rainwater flows through unsealed control joints, it erodes the underlying base aggregate and causes soil voids. In freeze-thaw climates across Ohio, Michigan, and Indiana, trapped water under the slab freezes, expands, and heaves the concrete upward before causing it to settle unevenly in the spring.
Sealing these joints with high-grade elastomeric sealant forms a watertight seal that keeps surface runoff directed away from the sub-base. If your slabs have already dropped or cracked due to sub-base washout, exploring professional cracked concrete repair solutions helps stabilize the foundation before joint caulking begins.
Comparing Sealant Chemistries: Polyurethane, Silicone, and Hybrid Polymers
Modern joint sealants rely on distinct chemical formulations. Selecting the right product depends on joint movement, solar exposure, moisture contact, and paint requirements.
Polyurethane Sealants
Polyurethane is the industry standard for exterior flatwork, driveways, and sidewalks. It exhibits exceptional abrasion resistance, meaning it can withstand heavy vehicle tires, snowplow blades, and abrasive grit without tearing.
Polyurethane cures via moisture in the air and substrate, allowing it to bond reliably to damp or green concrete. Its service life averages 7 to 15 years, and it can be painted once fully cured. For technical application nuances, review these Tips for Applying Waterproof Caulking on Concrete . Polyurethanes are also the preferred choice for submerged joints or areas prone to standing water because they resist sustained water immersion better than silicone.
Silicone and Hybrid MS Polymers
Silicone sealants offer top-tier UV resistance and can easily handle extreme movement capabilities up to ASTM C920 Class 50 (±50% joint movement). They boast a lifespan exceeding 20 years. However, standard silicone has one major drawback on flatwork: it is completely non-paintable and attracts surface road dirt. Furthermore, silicone often requires specialized chemical primers when applied to porous concrete substrates to prevent delamination along the bond line.
Hybrid MS Polymers (modified silane-polyethers) merge the superior weather and UV resistance of silicones with the paintability, adhesion, and tear strength of polyurethanes. Hybrid sealants are low-VOC, cure quickly in high-humidity conditions, and provide a 10-to-20-year service life without shrinking.
Self-Leveling vs. Non-Sag Formulations
Sealants are formulated in two primary physical consistencies:
- Self-Leveling (ASTM C920 Grade P): Designed exclusively for horizontal joints with less than approximately a 3% slope. Grade P sealants are fluid and pourable, flowing smoothly to fill the joint cavity and settle into a flat, smooth, uniform bead without requiring manual tooling with a spatula.
- Non-Sag / Gun-Grade (ASTM C920 Grade NS): Designed for vertical walls, steps, retaining masonry, and horizontal joints exceeding a 3% slope. Grade NS is a high-viscosity paste that stays where it is placed without slumping down the joint, but it requires manual tooling immediately after gunning to compress the bead against the concrete sidewalls.
Step-by-Step Joint Preparation and Sealant Application
The performance of an elastomeric sealant depends entirely on proper joint preparation. Approximately 80% of all premature sealant failures trace back to inadequate cleaning or incorrect joint geometry rather than product defects. For optimal results, follow the standard process used in professional concrete sealant application.
Sizing and Installing Backer Rod Correctly
A common mistake in DIY joint sealing is pumping caulk all the way to the bottom of a deep concrete crack. For an elastomeric sealant to stretch properly, it must follow an engineered 2:1 width-to-depth ratio. The depth of the sealant bead should be exactly half of the joint’s width, maintaining a minimum depth of 1/4 inch and a maximum depth of 1/2 inch.
To achieve this geometry, you must insert a closed-cell polyethylene foam backer rod into the joint before caulking. Sizing is critical: choose a backer rod with an outside diameter roughly 25% larger than the joint width so that it compresses firmly into place without slipping.
The backer rod serves two vital structural roles:
- It controls the depth of the sealant bead to maintain the proper 2:1 ratio.
- It acts as a bond breaker. Flexible sealant must adhere ONLY to the two opposing vertical sidewalls of the concrete.
If the sealant bonds to the concrete sidewalls and the bottom of the crack, it creates a catastrophic failure mode known as three-sided adhesion. When the slab contracts in winter, three-sided adhesion places immense multi-directional stress on the center of the bead, causing the sealant to tear down the middle (cohesive failure). Where joints are too shallow for foam rod, polyethylene bond-breaker tape must be placed along the joint floor.
Avoiding Common Installation Errors and Repairing Failed Joints
To ensure your joint protection lasts over a decade, avoid these common installation mistakes:
- Applying in Temperature Extremes: Never apply concrete sealants below 40°F or above 90°F. Applying sealant on freezing concrete prevents proper curing and bonding, while scorching heat causes bubbling and outgassing.
- Applying Over Wet Joints: Trapped moisture inside concrete pores creates vapor barriers that prevent the polymer from forming a mechanical lock with the concrete, causing adhesive peel-off.
- Omitting the Backer Rod: As noted, skipping the backer rod causes three-sided adhesion and premature center splits.
- Over-tooling Self-Leveling Formulations: Trying to tool Grade P self-leveling sealant with a spatula disrupts its natural surface tension and leaves uneven waves.
Repairing Failed Joints: If old caulk has peeled away or split down the center, it must be completely removed. Cut out the old material with an oscillating multi-tool or razor knife. Grind the joint sidewalls back to clean, bare aggregate with a diamond crack-chasing blade to expose fresh concrete pores. Vacuum out all dust, install a new closed-cell backer rod, and re-gun fresh polyurethane or hybrid sealant.
Frequently Asked Questions About Concrete Joint Protection
Can I use regular painter’s caulk on outdoor concrete?
No, you should never use regular painter’s acrylic or siliconized latex caulk on exterior concrete flatwork. Painter’s caulks are formulated for interior drywall and trim gaps that experience minimal movement. They can only accommodate 7% to 12% joint elasticity before rupturing.
When exposed to direct sunlight, standing water, and winter freeze-thaw cycles, acrylic latex shrinks, hardens into a brittle plastic, and separates from the concrete sidewalls within months. Exterior concrete joints require commercial-grade elastomeric sealants meeting ASTM C920, which handle ±25% to ±50% movement and provide resilient UV and moisture resistance.
Cost Analysis of Concrete Caulking vs Sealing for Home Repairs
The cost to protect your exterior concrete depends largely on whether you tackle the project yourself or hire a professional crew.
- DIY Material Costs: For a typical two-car residential driveway (consisting of roughly four transverse control joints plus the garage apron joint), DIY material costs range between $60 and $90. This covers four to six 10.1-ounce cartridges of high-grade polyurethane or hybrid self-leveling sealant ($8 to $15 per tube), a pack of closed-cell backer rod ($10 to $15), and basic surface-cleaning supplies. A 10.1-ounce tube yields approximately 12 linear feet of sealant at a standard 1/2-inch wide by 1/4-inch deep joint profile.
- Professional Contractor Rates: Professional joint routing, industrial dust-free cleaning, backer rod installation, and commercial-grade sealant application typically cost between $2.00 and $5.00 per linear foot.
While DIY sealing saves on immediate labor costs, professional installation guarantees commercial prep work and proper joint geometry. If unsealed joints have already permitted water to wash out the soil sub-base and drop your concrete slabs, joint caulking alone will not lift the sunken concrete.
FoamWorks Concrete Leveling uses high-density polyurethane foam injection to raise and stabilize sunken or uneven slabs for 30% to 50% less than the cost of full concrete tear-out and replacement. Most lifting repairs are completed in just a few hours, allowing the surface to be used almost immediately while preserving surrounding landscaping and eliminating disposal fees. You can review our past leveling and joint repair transformations by viewing our concrete repair before and after results.
How do I maintain and inspect concrete joints over time?
Perform a visual inspection of your driveway, sidewalk, and patio joints every spring and autumn. Look for signs of adhesive failure (sealant pulling away from the concrete edge) or cohesive failure (splitting down the center of the bead). Check for low spots where stones or road debris have punctured the sealant skin.
Routinely sweep leaves and soil out of expansion gaps, and wash away corrosive de-icing salts with a garden hose. High-quality polyurethane and hybrid elastomeric sealants typically provide a maintenance-free service life of 10 to 15 years before requiring re-caulking. For additional maintenance insights, consult our concrete sealant FAQ.
Conclusion
Protecting your exterior flatwork against moisture intrusion, sub-base erosion, and freeze-thaw damage requires using the correct joint materials. While rigid fillers and mortars work well for static, non-moving cosmetic chips, active control joints and working cracks demand high-performance, flexible elastomeric sealants designed to stretch with the concrete.
If your driveway, patio, or walkway exhibits uneven slabs, trip hazards, or deep structural fractures, joint caulking is the vital second step after foundation stabilization. At FoamWorks Concrete Leveling, our family-owned team brings over 30 years of hands-on experience to homeowners across Northwest Ohio, Southeast Michigan, and Northeast Indiana. We provide precision polyurethane foam injection, concrete leveling, and joint sealing backed by a lifetime warranty and a 100% customer satisfaction commitment.
Contact FoamWorks Concrete Leveling today for a free estimate and discover how our expert cracked concrete repair services can restore and protect your concrete for decades to come.