
Choose Lifting When the Steps Are Sound; Rebuild When They Are Not
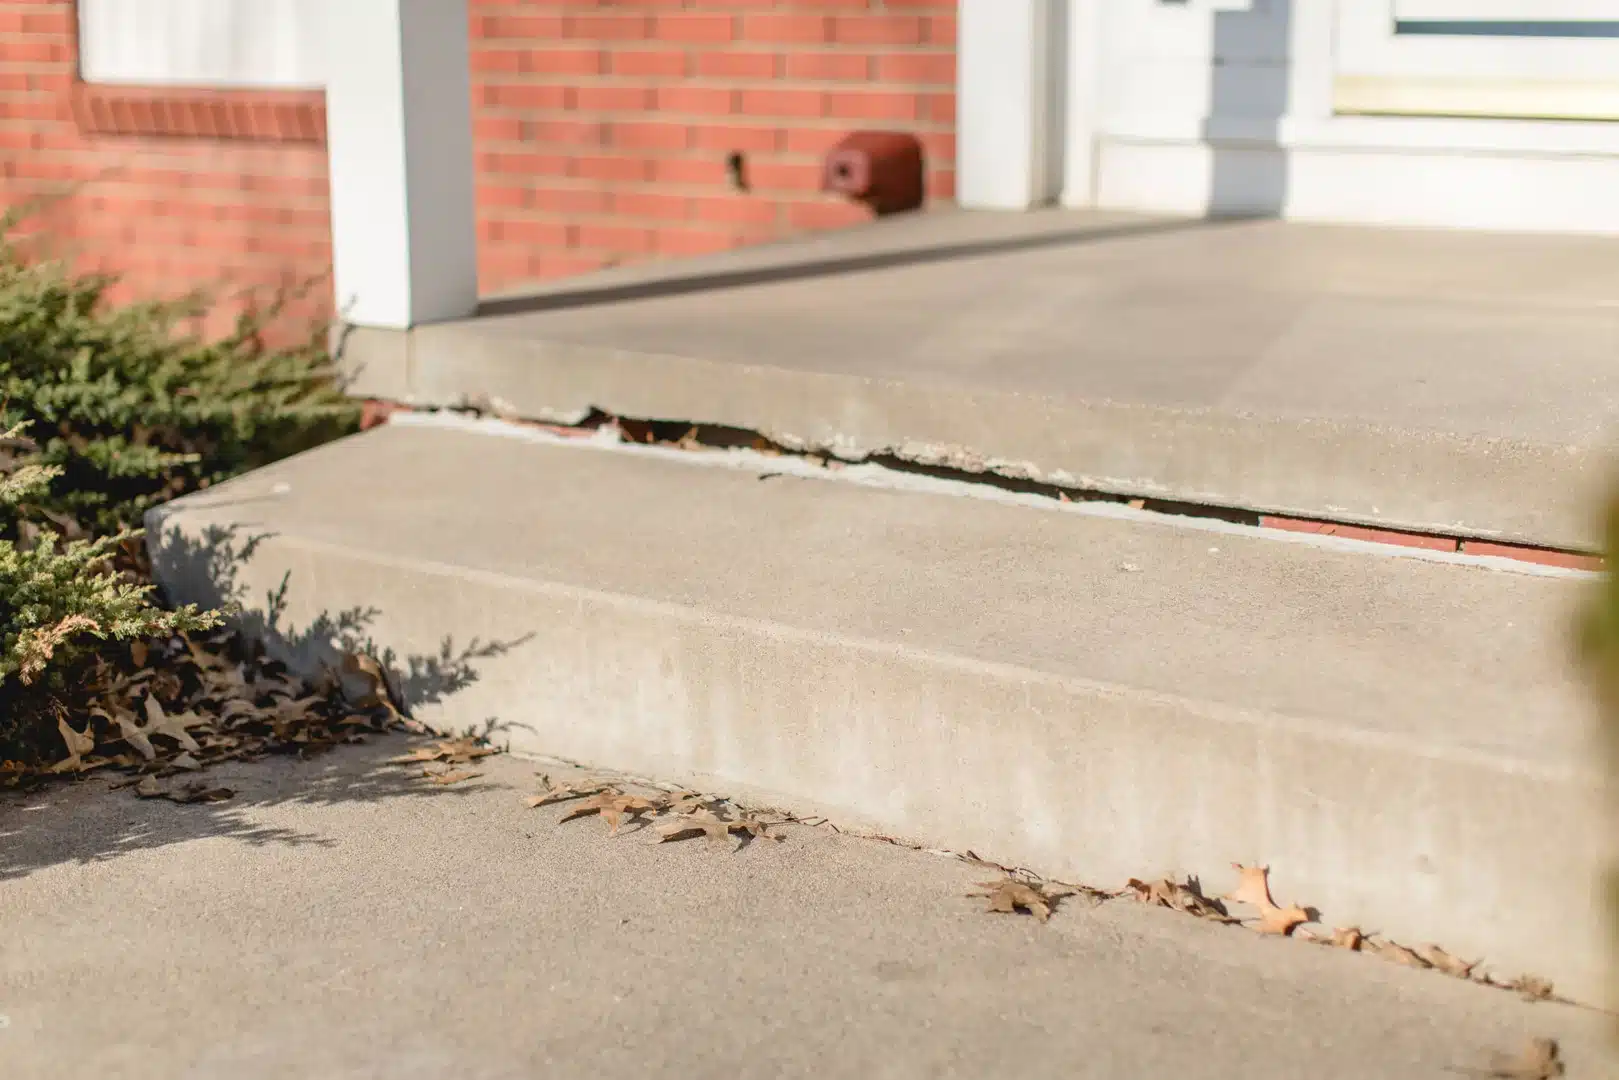
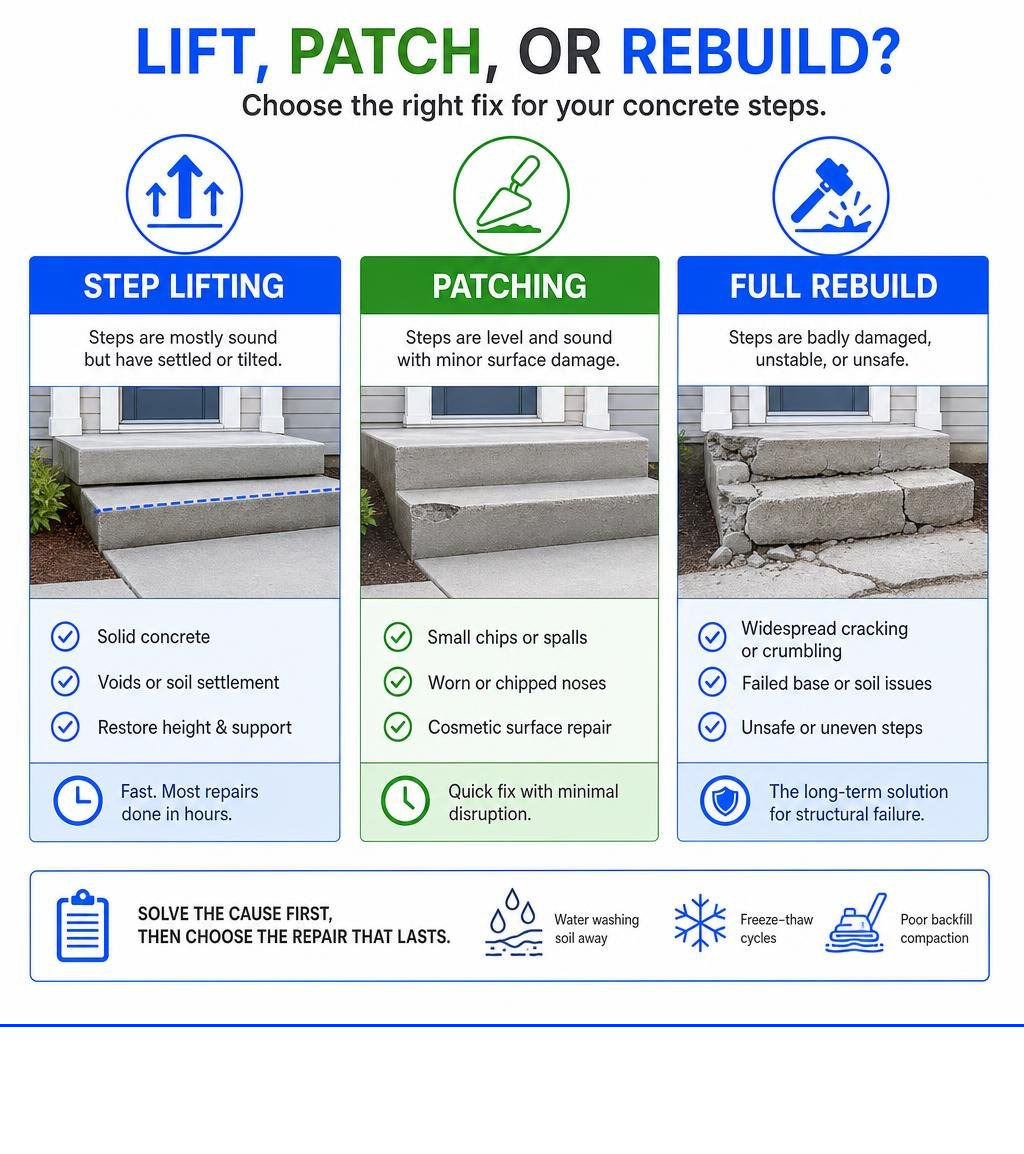
For lifting vs rebuilding concrete steps, start with the concrete itself. If the steps are mostly intact but have settled, tilted, or pulled away from the porch, polyurethane foam lifting can restore their height and support without demolition. If the concrete is badly crumbling, has deep structural cracks, or sits on a failed base, rebuilding is usually the safer long-term choice.
- Lift the steps when the slab is solid, damage is limited, and soil settling or an empty void caused the movement.
- Patch broken noses or small spalls when the rest of the stair structure is level and sound.
- Rebuild when there is widespread deterioration, major breakage, unstable soil, or unsafe step heights.
In Northwest Ohio, Southeast Michigan, and Northeast Indiana, freeze-thaw cycles, poor backfill compaction, and water washing soil away from the porch can all cause concrete steps to sink. Foam injection can often correct settled steps for 30% to 50% less than tear-out and replacement, with most repairs done in hours and little disruption to landscaping. But lifting is not a cure for concrete that has already lost its structural strength.
I am Trey McNamee, owner of FoamWorks Concrete Leveling, with more than two decades of experience in marketing, strategy, and product development in building materials. That background, along with FoamWorks’ concrete-repair experience, helps me explain lifting vs rebuilding concrete steps in practical terms: solve the cause first, then choose the repair that will last.
Essential lifting vs rebuilding concrete steps terms:
Lifting vs Rebuilding Concrete Steps: Core Differences and When to Choose Each
When exterior steps begin to separate from an entryway, homeowners are immediately faced with trip hazards, building code violations, and potential water intrusion around the foundation. Sinking occurs when the underlying earth can no longer support the heavy mass of cast concrete. In Midwest climates—such as Northwest Ohio and Southeast Michigan—uncompacted backfill around newly dug foundations often settles over several years. Compounding this, severe seasonal freeze-thaw cycles and misdirected downspouts wash away fines in the soil, leaving hidden voids beneath the heavy stair structure.
Understanding the root causes of concrete damage determines whether your staircase simply needs geotechnical support restored or if the concrete itself has reached the end of its useful lifespan. Knowing the options for raising sinking concrete steps before they downfall allows you to make an informed decision between non-invasive restoration and heavy structural replacement.

When Step Lifting and Leveling Works Best
Concrete lifting is ideal when the physical structure of the steps remains sound, but the ground underneath has dropped away. If your stairs have sunk evenly or tilted away from the porch, creating an awkward trip hazard at the top threshold or bottom landing, lifting solves the true problem: soil voiding.
Lifting is the primary choice under the following conditions:
- Structurally sound slabs: The treads and risers show minimal surface crazing and no through-slab structural fractures.
- Porch separation: The staircase has pulled away cleanly from the home’s facade or porch ledger without breaking apart into separate fragments.
- Uniform drop: The entire multi-step stoop has dropped a few inches below the doorway threshold, altering the critical step riser height.
- Intact substrate: Sound structural mass remains intact to withstand hydraulic or pneumatic leveling pressures.
Using closed-cell polyurethane foam injection, professional technicians inject expanding geopolymer foam beneath the settled slab. This process compacts weak sub-base soil and fills hidden underground voids, gently raising the entire structure back to flush alignment with the porch landing.
When Full Step Demolition and Rebuilding Is Necessary
Lifting works by transferring lift forces through the solid concrete mass. If that concrete has lost its structural integrity, injecting material underneath will merely push through existing fractures, compounding the problem rather than correcting it.
Full concrete replacement is mandatory when:
- Severe crumbling and aggregate loss: Deicing salts and unmitigated freeze-thaw cycles have turned the interior cement paste into soft, gravelly rubble.
- Deep through-cracks: Steps are broken cleanly into multiple displaced, unreinforced blocks that move independently under foot traffic.
- Sub-base failure beyond reach: The underlying soil has eroded completely down to an unstable slope, or an improperly built foundation requires comprehensive structural excavation and re-grading.
- Severe code non-compliance: The original stairs were built with unequal riser heights, excessively steep treads, or violate local municipal building codes.
In such cases, attempting to level broken masonry is a short-lived patch; complete demolition, ground re-compaction, and repouring is the only safe engineering path.
The Financial and Longevity Breakdown
Choosing between structural lifting and full demolition involves comparing immediate budget impact, long-term durability, and overall site disruption.
Evaluating Costs: Lifting vs Rebuilding Concrete Steps
Traditional mudjacking typically costs $100 to $300 per step, but relies on heavy slurry mixtures that add substantial weight to already settling soil. Polyurethane foam injection costs roughly $150 to $400 per step while adding virtually zero overburden weight. By contrast, hiring a contractor for a complete tear-out and repour averages $500 to $1,000+ per step, with a full multi-step concrete stoop rebuild easily ranging from $1,500 to $4,000 when factoring in demolition, disposal fees, permits, and landscape remediation.
At FoamWorks Concrete Leveling, we use polyurethane foam injection to repair sunken or uneven concrete for 30% to 50% less than full tear-out and replacement, helping homeowners save significantly on repair costs. Most repairs are completed in just a few hours, and the surface can be used almost immediately. Because there’s no need for heavy excavation, the process also reduces landscape damage, labor costs, debris removal, and disposal fees that come with replacing concrete. We provide free estimates to see how much you can save.
| Feature / Metric | Polyurethane Foam Lifting | Traditional Mudjacking | Full Demolition & Rebuild |
|---|---|---|---|
| Typical Cost per Step | $150 – $400 | $100 – $300 | $500 – $1,000+ |
| Complete 3-Step Stoop | $450 – $1,200 | $300 – $900 | $1,500 – $4,000 |
| Project Duration | 1 to 3 hours | 2 to 4 hours | 2 to 4 days |
| Cure Time to Foot Traffic | 15 to 30 minutes | 24 to 48 hours | 24 to 48 hours (light), 28 days full |
| Disruption to Landscaping | None (small van setup) | Moderate (heavy pump trucks) | High (jackhammers, dumpsters, buggies) |
| Expected Lifespan | 20+ years | 8 to 15 years | 25 to 50+ years |
| Soil Stabilization | Yes (expands & compacts soil) | No (adds heavy weight to soil) | Requires manual re-compaction |
Durability and Lifespan: Lifting vs Rebuilding Concrete Steps
Durability comes down to sub-base stabilization. Mudjacking repairs last approximately 8 to 15 years because the pumped cement-and-soil slurry is susceptible to water washout and can sink under its own heavy dead-load.
High-density polyurethane foam maintains a lifespan of 20+ years. As a hydrophobic, closed-cell polymer, it will not wash away, degrade underground, or absorb moisture during winter freeze-thaw expansion. This makes it an ideal option among modern concrete leveling solutions.
A newly poured staircase using a 4,000+ PSI air-entrained concrete mix will last 30 to 50 years—provided the underlying aggregate base is properly compacted, reinforced with rebar, and protected against moisture infiltration with high-grade sealers.
Step-by-Step Restoration Processes: Lifting vs Full Replacement
Understanding how each approach is executed helps property owners appreciate why project timelines and disruption levels differ so dramatically.
The Polyurethane Foam Lifting and Leveling Process
The process of polyurethane foam lifting is precise, fast, and non-destructive:
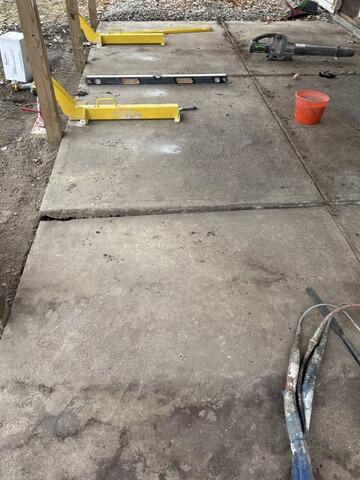
- Sub-Base Assessment: Technicians inspect the slab with laser levels to identify void locations, settling angles, and weight distribution.
- Precision Drilling: Small 5/8-inch ports (roughly the size of a dime) are strategically drilled through the concrete tread or landing.
- Mechanical Injection: Dual-component liquid polymers are injected beneath the concrete. As the components mix, an exothermic reaction causes the liquid to expand into a high-density structural foam within seconds.
- Controlled Elevation: Technicians monitor the rise with laser measuring systems, raising the steps millimeter by millimeter until they are flush with the porch ledger and level. Watch this satisfying lifting video to see how seamlessly the mechanical process works.
- Port Patching & Cleanup: Injection ports are cleaned and sealed with color-matched structural mortar. The high-density foam cures to 90%+ structural load capacity in under 15 minutes, allowing immediate use.
The Full Demolition, Framing, and Pouring Process
When concrete is shattered beyond the capabilities of foam lifting, full replacement follows a comprehensive structural construction cycle:
- Controlled Demolition: Contractors break apart the deteriorated steps using pneumatic jackhammers or rotary breakers, taking care not to damage the adjoining home foundation, porch framing, or siding. Concrete debris is hauled away for recycling.
- Sub-Base Excavation and Compaction: Excavating down 4 to 8 inches below grade allows contractors to install crushed stone base (such as #411 or 21AA limestone). This aggregate is mechanically compacted with vibratory plate tampers to prevent future settling.
- Formwork and Steel Reinforcement: Carpenters construct rigid molds using 3/4-inch exterior-grade plywood backed by 2×4 diagonal kickers, bracing the assembly to resist wet concrete pressure. A grid of 3/8-inch or 1/2-inch steel rebar is placed within the forms, elevated on concrete chairs to sit within the middle third of the pour.
- Concrete Pouring and Consolidation: A ready-mix concrete truck delivers a 4,000+ PSI mix with a target slump of 3 to 5 inches. The concrete is placed from the lowest step upward, consolidated using mechanical immersion vibrators (inserted for 5 to 10 seconds at 12-to-18-inch intervals) to eliminate air pockets and honeycombing without causing aggregate segregation.
- Screeding, Floating, and Texturing: The top tread surfaces are struck off flush with a straightedge, floated with magnesium tools to bring up the paste, edged, and given a light broom finish for slip resistance.
- Moist Curing: The finished concrete is kept damp or protected under wet burlap and curing blankets for 7 to 14 days, allowing the cement hydration process to reach optimal design strength before heavy use.
Patching Broken Nosing and Surface Flaws Without Full Tear-Out
Often, a concrete staircase is structurally level or has been successfully lifted with foam, but exhibits broken tread corners or chipped nosing from mechanical impacts, deicing salt damage, or foot traffic. Homeowners can execute structural nose repairs without tearing out the entire assembly by following specialized structural repair methods highlighted in our cracked concrete repair services.
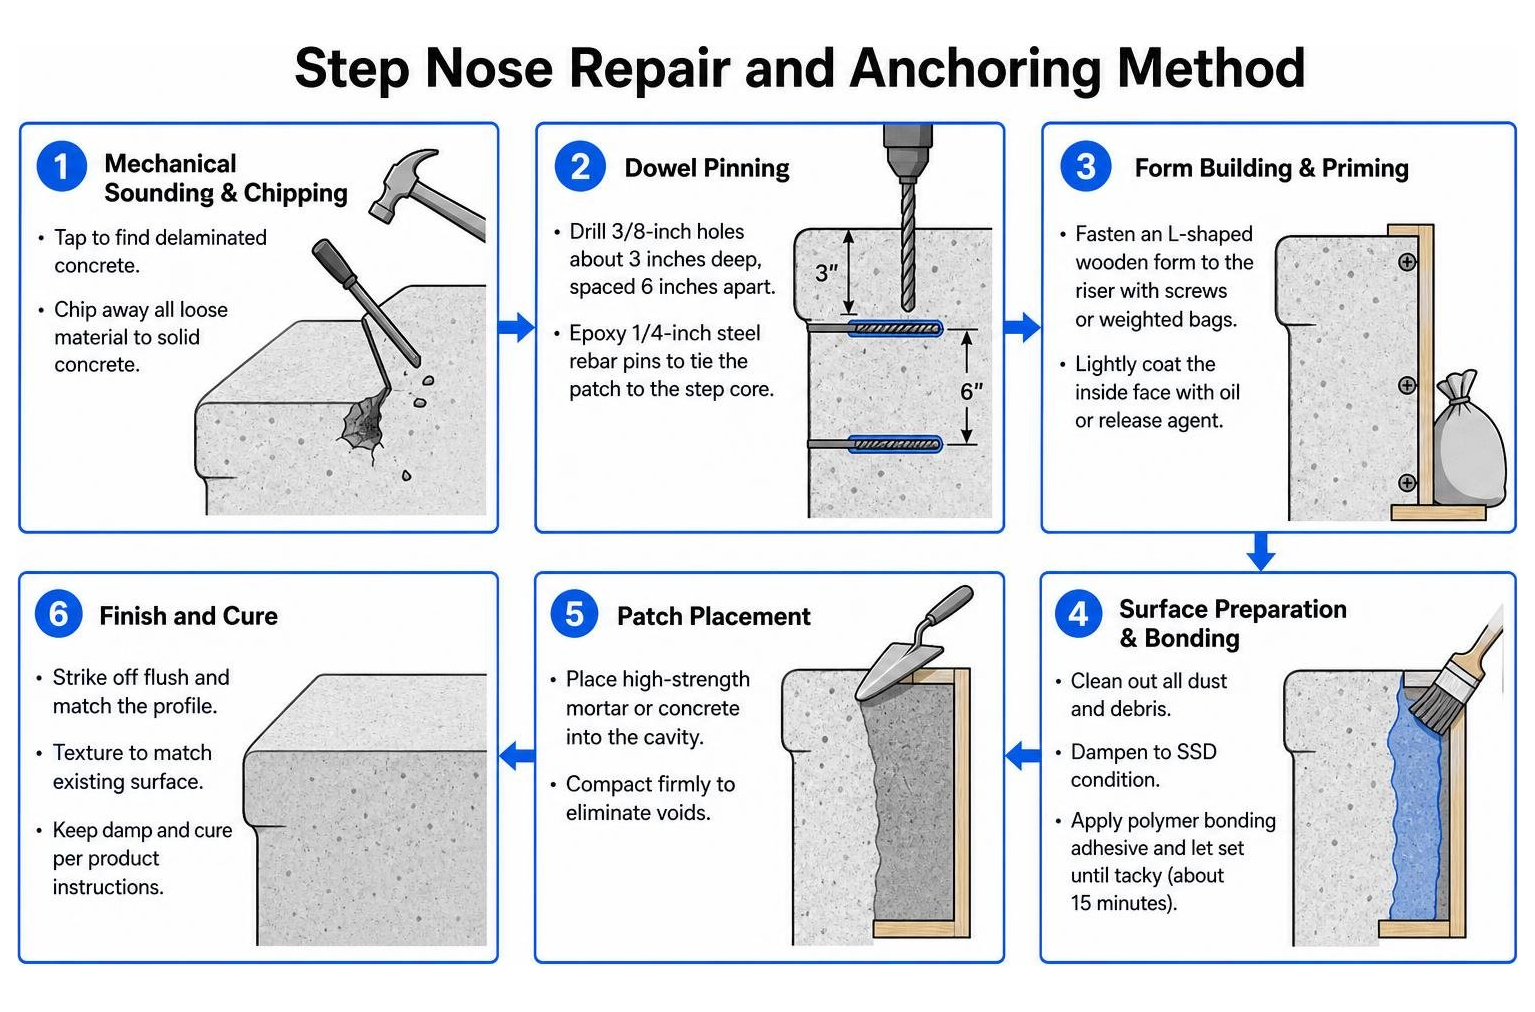
According to external guides on repairing crumbling cement stairs and fixing broken exterior steps, successful repairs require proper surface preparation:
- Mechanical Sounding & Chipping: Tap the surface with a small hammer. Delaminated concrete produces a hollow, dull thud, while sound concrete yields a high-pitched ring. Chisel away all crumbling concrete down to solid material, slightly undercutting the edges to create a mechanical lock for the new patch.
- Dowel Pinning: For broken nosings deeper than 1.5 inches, drill 3/8-inch holes roughly 3 inches deep into the sound concrete face, spaced 6 inches apart. Epoxy 1/4-inch steel rebar pins into the holes to structurally tie the patch to the step core.
- Form Building & Priming: Fasten an L-shaped wooden form against the riser face using Tapcon screws or weighted sandbags. Lightly spray the inside face of the wood form with cooking oil or release agent. Thoroughly clean the cavity of fine dust, dampen it to a saturated surface dry (SSD) condition, and apply a polymer bonding adhesive until tacky (about 15 minutes).
- Mortar Placement & Shaping: Pack the void with a rapid-set, polymer-modified structural repair mortar. Trowel firmly to ensure no internal voids remain.
- Finishing & Curing: Strip the forms after 20 to 30 minutes, rub down the edges with a sponge or margin trowel to match the surrounding contour, press a damp burlap sack or stiff brush to match the original non-slip texture, and keep the patch damp for 24 to 48 hours.
Protecting and Sealing Your Concrete Steps for Long-Term Safety
Once concrete steps have been leveled, rebuilt, or patched, applying preventative weatherproofing protects your investment against aggressive freeze-thaw cycles.

- Penetrating Silane-Siloxane Sealers: Unlike surface acrylics that create a shiny film prone to peeling, penetrating sealers absorb deep into the concrete’s pores. They chemically bond to the interior silicate structure, creating a hydrophobic, water-shedding barrier that stops water from entering and freezing within the concrete paste.
- Expansion Joint Caulking: Seal the perimeter gap where your concrete steps meet the porch ledger or house siding using a commercial-grade polyurethane or hybrid polymer sealant. This prevents rainwater and snowmelt from flowing behind the steps, which can wash out sub-base soils.
- Anti-Slip Safety Nosing: For high-traffic exterior steps, installing heavy-duty aluminum nosing strips with textured rubber inserts shields exposed stair corners from heavy impacts while reducing slip and fall hazards.
- Reapplication Timelines: Apply penetrating sealers 28 days after a new concrete pour (or 7 to 14 days after a polymer mortar patch) and reapply every 2 to 5 years depending on sun and foot traffic exposure.
Frequently Asked Questions About Concrete Step Repair
Can I lift sunken concrete steps myself using DIY methods?
While patching small spalls or rebuilding a broken step nose is an approachable DIY task costing roughly $20 to $60 in materials, mechanical slab lifting is not a DIY-friendly project. Concrete steps are heavy structural units, often weighing between 1,500 and 4,000+ pounds.
Attempting to raise settled steps using automotive bottle jacks or wooden levers can cause uneven stress concentrations, cracking the concrete in half or causing dangerous shifts. Professional polyurethane leveling relies on specialized hydraulic rigs, computerized plural-component heating and proportioning pumps, and precise laser feedback to safely lift the assembly without stressing the porch foundation. Reviewing a 3-step guide to safe repair highlights the equipment necessary for safe restoration.
How soon can you walk on concrete steps after lifting versus rebuilding?
With closed-cell polyurethane foam injection, steps can handle foot traffic within 15 to 30 minutes of injection, reaching full structural cure within an hour.
By contrast, freshly poured rebuilt concrete steps require at least 24 to 48 hours before permitting light foot traffic, a full 7 days before bearing heavy structural loads, and 28 days of hydration curing before applying surface sealers or stains.
Why do concrete steps pull away from the porch foundation?
Steps pull away due to soil compaction failure, downspout washout, or inadequate base preparation:
- Settling Backfill: The ground immediately adjacent to a home’s foundation wall is backfilled during original construction. If not mechanically compacted in 6-inch lifts, this loose soil will slowly settle over a 5-to-10-year window, leaving an empty void beneath the steps.
- Improper Water Drainage: Roof runoff discharged too close to the porch quickly erodes sub-base gravel and soil beneath exterior slabs.
- Absence of Foundation Pinning: If the steps were poured directly on the grade without steel dowels pinning them into the main house footing, ground shifts cause the steps to pull outward and drop away from the threshold. Look for these unmistakable signs of settling concrete to address root causes before structural failure occurs.
Conclusion
Deciding between lifting and rebuilding your concrete steps comes down to assessing structural soundness versus sub-base failure. When the concrete mass is stable, free of deep spiderweb fractures, and simply resting on settled soil, polyurethane foam lifting provides a clean, permanent repair at a fraction of the cost and disruption of a tear-out. If the steps have deteriorated into soft, crumbling rubble with broken internal reinforcement, full demolition and replacement is the safest course of action.
At FoamWorks Concrete Leveling, we help property owners throughout Northwest Ohio, Southeast Michigan, and Northeast Indiana protect their home’s entryways, eliminate hazardous trip liabilities, and restore curb appeal. Backed by 30+ years of industry experience and a lifetime warranty, our non-invasive foam injection process levels settled steps quickly and affordably.
Contact us today to explore our expert concrete repair services and schedule your free, no-obligation estimate.