
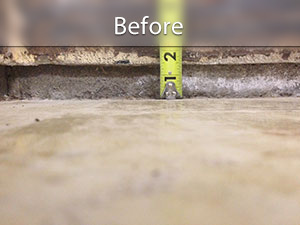
How to Level a Basement Floor Without Blocking Drainage
To learn how to level a basement floor, start by checking it with a long straightedge and marking high and low spots. Test for moisture before covering the slab. Grind small high spots, fill shallow dips with a concrete floor-leveling product, or build a shimmed subfloor over a large slope. If the floor slopes toward a drain, keep that drainage path open. Your finished floor may need to be flat, not perfectly level.
If the slab has sunk or has major cracks, find out why before hiding the problem under new flooring. I’m Trey McNamee, owner of FoamWorks Concrete Leveling. My building-materials background and concrete repair work shape my advice on how to level a basement floor while keeping drainage and slab stability in mind. For a broader look at the process, This Old House offers a useful guide on how to level a concrete floor.
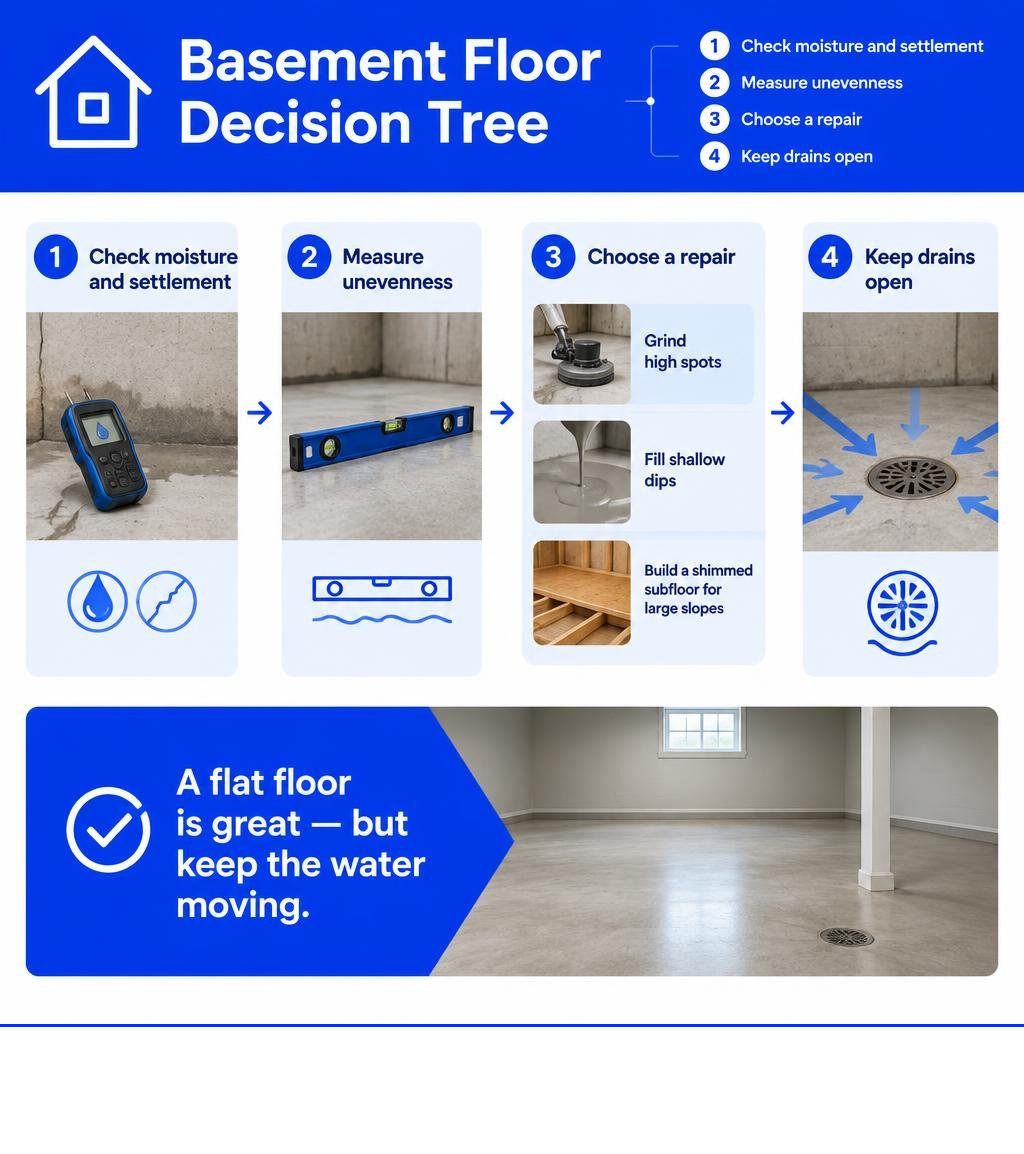
How to level a basement floor glossary:
Assessing Your Slab: Level vs. Flat and Measuring Unevenness
Before grabbing a trowel or buying materials, you need to understand the critical distinction between a floor that is level and a floor that is flat.
A level floor sits on a true horizontal plane parallel to the horizon (zero degrees of tilt). A flat floor is an even plane without humps, dips, waves, or sudden transitions, even if the entire surface gently slopes across the room. In basement finishing, flatness is almost always what your finished flooring requires. Most modern floor coverings—especially luxury vinyl plank (LVP), engineered hardwood, and laminate—demand a subfloor that is flat within 3/16 inch over a 10-foot radius (or 1/8 inch over 10 feet for ceramic and porcelain tile).
If your basement slab gently slopes toward a floor drain, forcing it to be 100% dead-level can eliminate emergency drainage protection while costing thousands of dollars in excess compound.
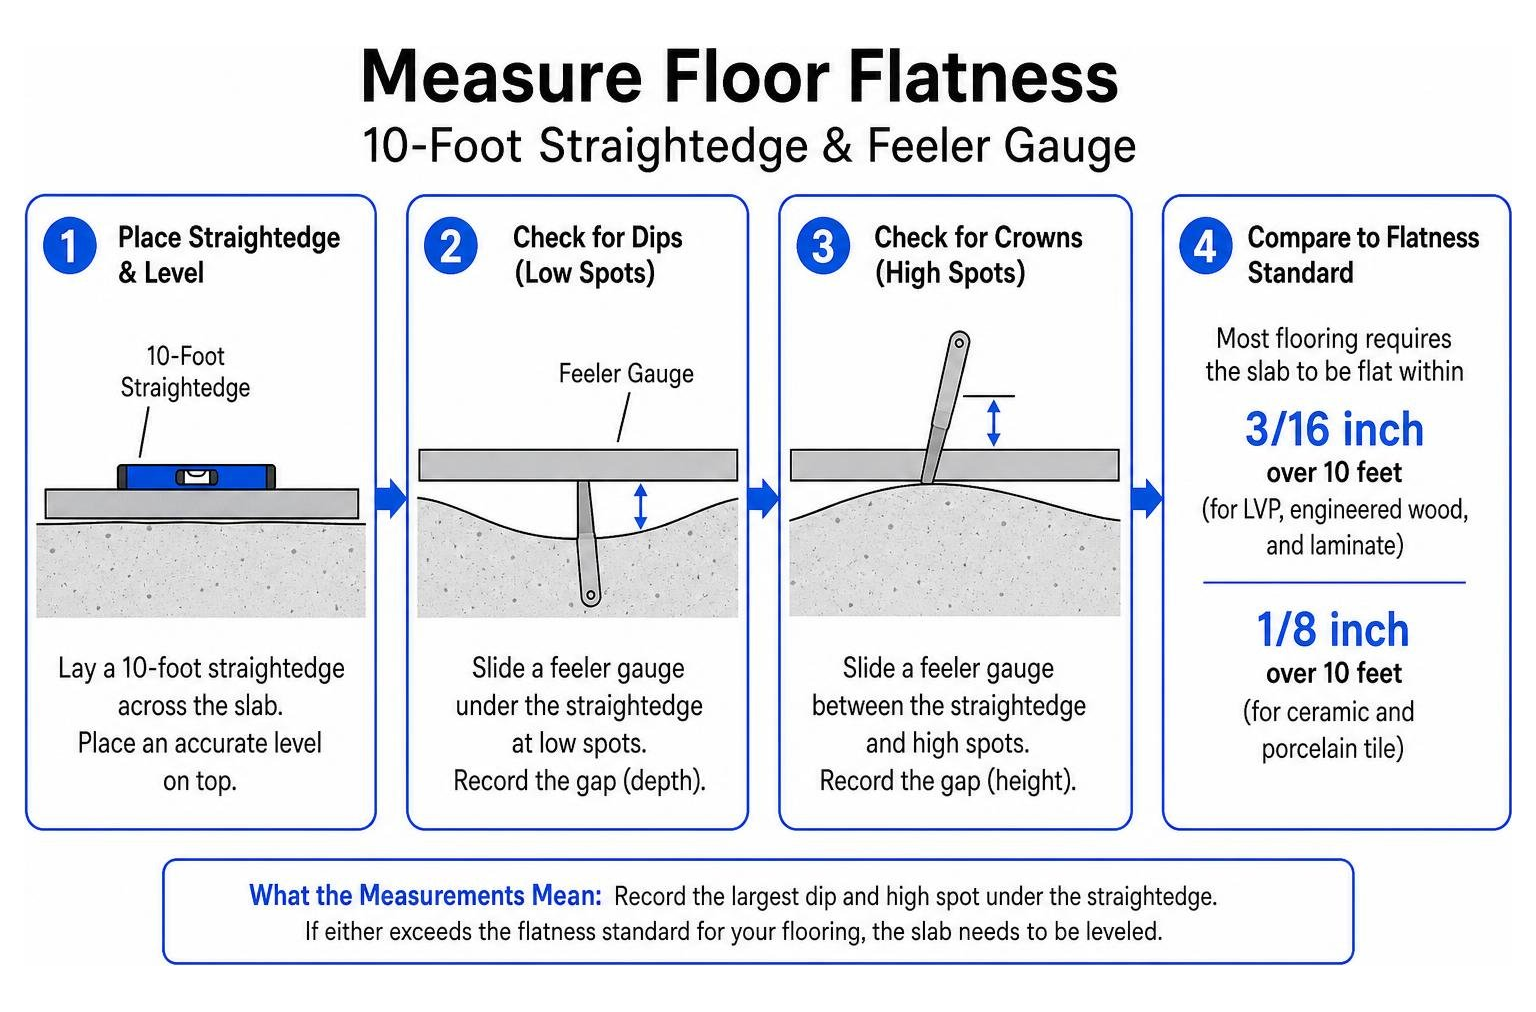
To accurately measure the condition of your slab, use one of these reliable methods:
- The 10-Foot Straightedge or Rigid Baseboard Method: Lay a 10-foot aluminum straightedge, unbowed metal stud, or stiff piece of MDF baseboard across the slab. Place an accurate level on top. Use a tape measure or taper gauge to record the height of any dips beneath the straightedge and the height of any crowns lifting the board off the slab.
- The Grid-and-Dowel Technique: Map out a 3-foot by 3-foot grid across your basement floor with chalk. Set up a rotary laser level or builder’s transit in the center of the room. Take a measurement at each grid intersection. You can hot-glue small wooden dowels cut to the exact depth of the low spots directly to the concrete to serve as visual depth gauges when pouring leveler.
- Moisture Testing: Concrete is porous and breathes moisture from the surrounding earth. Tape a 2-foot by 2-foot square of clear 6-mil polyethylene plastic tightly to the slab on all four edges using duct tape. Leave it for 48 to 72 hours. If heavy condensation gathers beneath the sheet, or if the concrete turns dark underneath, you have moisture vapor transmission that must be addressed with a specialized vapor barrier or primer before installing levelers or wood subfloors.
| Leveling Method | Typical Cost (per sq. ft.) | Depth Capacity | DIY Difficulty | Best Suited For |
|---|---|---|---|---|
| Concrete Grinding | $0.50 – $1.50 (Tool Rental) | 1/16″ to 1/4″ per pass | Moderate (Dusty) | High spots, ridges, seam lips |
| Self-Leveling Compound (SLU) | $3.00 – $7.00 | Feather edge up to 1″ | Moderate to High | Low spots, wide shallow dishing |
| Treated Sleeper Framing | $1.50 – $3.50 | 1.5″ to 3.5″+ | Moderate (Carpentry) | Deep slopes (2–3 inches), cold floors |
| Modular Subfloor Panels | $2.50 – $4.50 | Up to 1″ (with shim kits) | Low to Moderate | Minor moisture, DIY friendly |
How to Level a Basement Floor: 4 Cost-Effective DIY Methods
Choosing the right approach depends on the depth of variation across your slab, your available ceiling height, and your budget. Here are the four primary methods for correcting uneven concrete.
Method 1: Concrete Grinding for Minor High Spots
When your slab has localized high spots—such as curled control joints, trowel ridges, or high crowns—it is far cheaper and easier to remove the high areas than to raise the entire room with liquid leveler.
Concrete grinding typically shaves between 1/16 inch and 1/4 inch of concrete per pass. To tackle this:
- Rent a walk-behind concrete grinder or an angle grinder fitted with a diamond cup wheel and a dedicated dust shroud.
- Always connect the grinder to an industrial HEPA-filtered vacuum designed for concrete dust. Standard shop vacuums will quickly clog and release hazardous crystalline silica dust into your home.
- Move the grinder in sweeping, overlapping figure-eight patterns to avoid creating gouges or low trenches in the concrete.
- Check your progress frequently using a 4-foot or 6-foot straightedge until the high spot sits flush with the surrounding floor.
Method 2: Step-by-Step Guide on How to Level a Basement Floor with Self-Leveling Underlayment
Self-leveling underlayment (SLU) is a polymer-modified cement that flows like thick pancake batter, seeking its own flat plane before hardening into a smooth surface. It is ideal for filling shallow dips from a feather edge up to 1 inch thick. For deeper fills, the volume required becomes cost-prohibitive—for example, professional self-leveling estimates for a 450 sq. ft. basement can easily top $3,200.
Follow these steps for a clean, professional application:
- Clean and Degrease: Sweep and vacuum the concrete thoroughly. Remove all paint, oil, wax, and curing compounds. If water beads up on the slab instead of soaking in, mechanical profiling (grinding or scarifying) is required so the primer can bond.
- Seal Perimeter and Voids: Seal all cracks, floor joints, and perimeter baseboards with a paintable acrylic caulk or foam backer rod. Because self-leveler flows like liquid syrup, it will seep down any unsealed crevice.
- Apply Concrete Primer: Roll on an approved acrylic concrete underlayment primer using a 3/8-inch nap roller. Primer prevents the dry concrete slab from sucking water out of the leveling mix too quickly, which causes pinholes, bubbling, and weak bonding. Allow the primer to dry to a tacky, translucent film (typically 3 to 12 hours).
- Mix in Rapid Batches: Self-leveler sets rapidly (usually within 15 to 20 minutes of working time). Work in a two-person team: one person continuously mixes while the other pours and spreads. Measure water precisely according to the manufacturer’s bag instructions—too much water ruins the compressive strength and causes chalking. Use a heavy-duty 1/2-inch corded drill with an eggbeater mixing paddle.
- Pour, Gauge, and Smooth: Pour the compound into the marked low spots, working from the farthest corner toward the exit. Use an adjustable gauge rake set to your target depth to distribute the liquid evenly, followed by a spiked roller or smoother to release trapped air bubbles and blend overlapping pours smoothly.
- Curing: The floor will support light foot traffic within 4 to 6 hours and will be ready for floating floor underlayment in 24 to 48 hours.
Method 3: Sleeper Joists and Subfloors for Severe Slopes (2-3 Inches)
When a basement slab has a severe slope—such as a 2-to-3-inch drop across the room—liquid self-leveler becomes far too expensive and heavy. Building a sleeper subfloor using ground-contact pressure-treated lumber is the most economical solution, typically costing just $2 to $5 per square foot.
To build a sleeper subfloor:
- Lay a Vapor Barrier: Cover the clean slab with continuous 6-mil polyethylene sheeting, overlapping seams by 12 inches and sealing them with vapor-tape.
- Install Sleeper Joists: Lay pressure-treated 2x4s flat or on edge spaced 16 inches on center (tighten to 12 inches on center if you plan to install heavy ceramic tile). For sloped floors, rip taper-cut stringers matching the pitch of the floor, or level standard 2x4s using rot-proof composite shims.
- Anchor to the Slab: Fasten the sleepers through the shims into the concrete using concrete screw anchors (such as Tapcons) or powder-actuated fasteners placed every 24 inches.
- Fasten Subfloor Sheathing: Apply heavy-duty construction adhesive along every sleeper joist. Lay 3/4-inch (23/32-inch actual) tongue-and-groove CDX plywood or OSB panels perpendicular to the sleepers. Stagger panel end joints by at least 4 feet. Driving screws combined with structural adhesive boosts assembly stiffness by up to 70% and prevents future floor squeaks. Using OSB instead of plywood can save 20% to 30% on subfloor panel material costs.
Method 4: Modular Subfloor Panels and Rigid Foam
If you have limited ceiling height but need thermal insulation and moderate leveling, modular subfloor panels (such as 2×2-foot engineered panels with raised dimpled plastic or rigid foam backing) are an excellent DIY choice.
- Modular Panels with Shims: These panels float over the slab and lock together with tongue-and-groove joints. Manufacturers offer dedicated plastic leveling shim packs that slip directly under the corner support pockets to flatten out dips up to 1 inch without mixing wet cement.
- High-Density Rigid XPS Foam: For minor adjustments and maximum warmth, you can lay high-density extruded polystyrene (XPS) rigid foam boards (minimum 25 PSI compressive strength) directly over your vapor barrier, taping all seams. Top the foam with a floating layer of 5/8-inch or 3/4-inch tongue-and-groove subfloor panels glued at the seams.
Concrete Preparation and Drainage Considerations
Proper mechanical bonding determines whether a floor repair lasts for decades or flakes apart after one season.
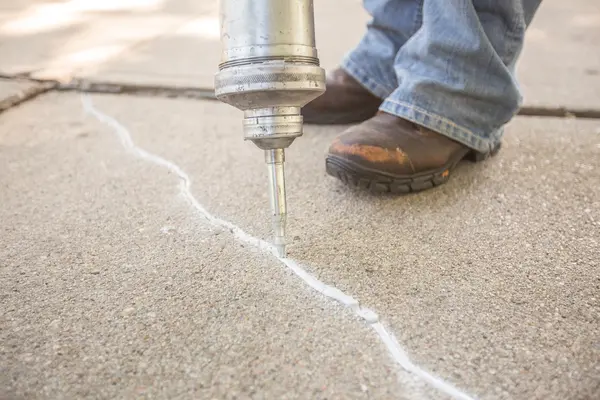
Before applying any leveling compound:
- Repair structural and hairline cracks using a two-part structural epoxy or polyurethane concrete repair gel. Epoxy forms a rigid, high-strength bridge across cracks that exceeds the compressive strength of the concrete itself.
- Remove all drywall mud spills, old adhesive remnants, and paint splatters. A simple “duct-tape test” works well: stick a strip of heavy-duty duct tape firmly to the cleaned slab and rip it up quickly. If concrete dust or particles coat the tape, the surface requires further vacuuming and priming before leveling.
How to Level a Basement Floor Around Existing Drains
Most unfinished basements have a floor drain designed to prevent catastrophe in the event of a water heater failure, plumbing leak, or storm backup. Never pave over or trap your floor drain behind a level wall of cement.
To level the surrounding living area while preserving your drainage:
- Construct a Temporary Dam: Build a curved wooden or foam dam around the drain perimeter at a radius of 2 to 4 feet. Fasten and caulk the dam to the concrete to hold back self-leveling compound while you flatten the remainder of the room.
- Install a Drain Riser: If raising the overall floor height, thread a matching PVC drain riser extension into the existing drain bowl so the finished grate sits flush with the new flooring.
- Transition the Pitch: Blend the leveled subfloor down toward the recessed drain opening using a manual sand-mix mortar bed or preformed transition trim, preserving a continuous 1/8-inch-per-foot pitch toward the drain grate.
Why You Should Never Use Sand or Pebbles Under Subfloors
Homeowners occasionally consider spreading dry sand or fine pea gravel across a sloped concrete slab to quickly level out a floor before dropping down plywood sheets.
Do not do this. Sand and unbonded aggregate will shift, migrate, and settle over time beneath everyday foot traffic, creating hollow voids beneath the subfloor that cause bouncing, joint separation, and floor failure. Furthermore, loose sand acts like a sponge in a basement environment, trapping damp vapor against the bottom of wood subfloors and accelerating mold growth and dry rot.
When to Call a Professional for Sinking Basement Slabs
Surface leveling products and sleeper subfloors are designed to treat uneven surfaces, not active structural slab failure. If your basement floor has dropped suddenly, pulled away from the exterior foundation walls, cracked into disjointed tilting slabs, or sounds hollow when tapped with a hammer, the underlying soil has settled, washed out, or compacted.
Pouring heavy concrete or leveler over a sinking slab adds dead weight to unstable soil, accelerating the settlement. In these situations, deep structural lifting is required.
At FoamWorks Concrete Leveling, we specialize in non-invasive interior slab leveling using high-density polyurethane foam injection. By drilling small 5/8-inch holes (the size of a dime) through the slab, we inject expanding structural foam beneath the concrete. The expanding foam compacts loose sub-base soils, fills hidden voids, and raises the sunken concrete back up to its proper elevation in minutes.
Polyurethane foam lifting repairs sinking concrete for 30% to 50% less than full tear-out and replacement, with zero landscape destruction and no messy concrete trucks. Most residential projects are finished in just a few hours, allowing you to walk on and build over the slab immediately.
Frequently Asked Questions About Leveling Basement Floors
Should I make my basement floor level or just flat?
In nearly all residential finishing projects, you should make the floor flat, not necessarily dead-level. Finished floating flooring (such as vinyl plank or laminate) only requires an even plane free of sudden dips and crowns (typically 3/16 inch variation per 10 feet). Preserving an overall gentle pitch allows your floor drains to function properly while saving substantial time and material costs.
What is the cheapest way to fix a 2-to-3-inch basement floor slope?
The cheapest method is framing a low-profile pressure-treated sleeper system using 2×4 lumber and composite leveling shims, topped with 3/4-inch OSB sheathing. This method costs approximately $2 to $5 per square foot. Buying enough chemical self-leveler to fill a 3-inch slope over several hundred square feet would require dozens of bags and cost significantly more.
What type of contractor levels interior concrete basement floors?
- Concrete Leveling Specialists (Polyjacking/Slabjacking): Hire these professionals if your basement concrete slab has settled, sunk, or cracked due to shifting sub-base soil.
- Flooring Contractors: Hire these specialists for minor surface corrections (under 1 inch) using grinding and self-leveling underlayments directly before floor covering installation.
- General Contractors or Carpenters: Best for framing elevated subfloors, sleeper systems, or complete basement finishing.
Conclusion
Leveling your basement floor is one of the most critical preparation steps in any basement renovation. By properly measuring your slab, addressing moisture vapor transmission, keeping emergency floor drains clear, and selecting the right technique—whether spot-grinding, pouring self-leveler, or installing a sleeper subfloor—you will protect your new floor from premature failure.
If your basement slab has sunk, cracked, or dropped unevenly due to settling soil, don’t bury the problem under expensive subflooring. Contact our experienced team at FoamWorks Concrete Leveling to schedule a free estimate for interior slab leveling. We proudly serve homeowners across Northwest Ohio, Southeast Michigan, and Northeast Indiana with clean, fast, lifetime-warranted concrete lifting.