
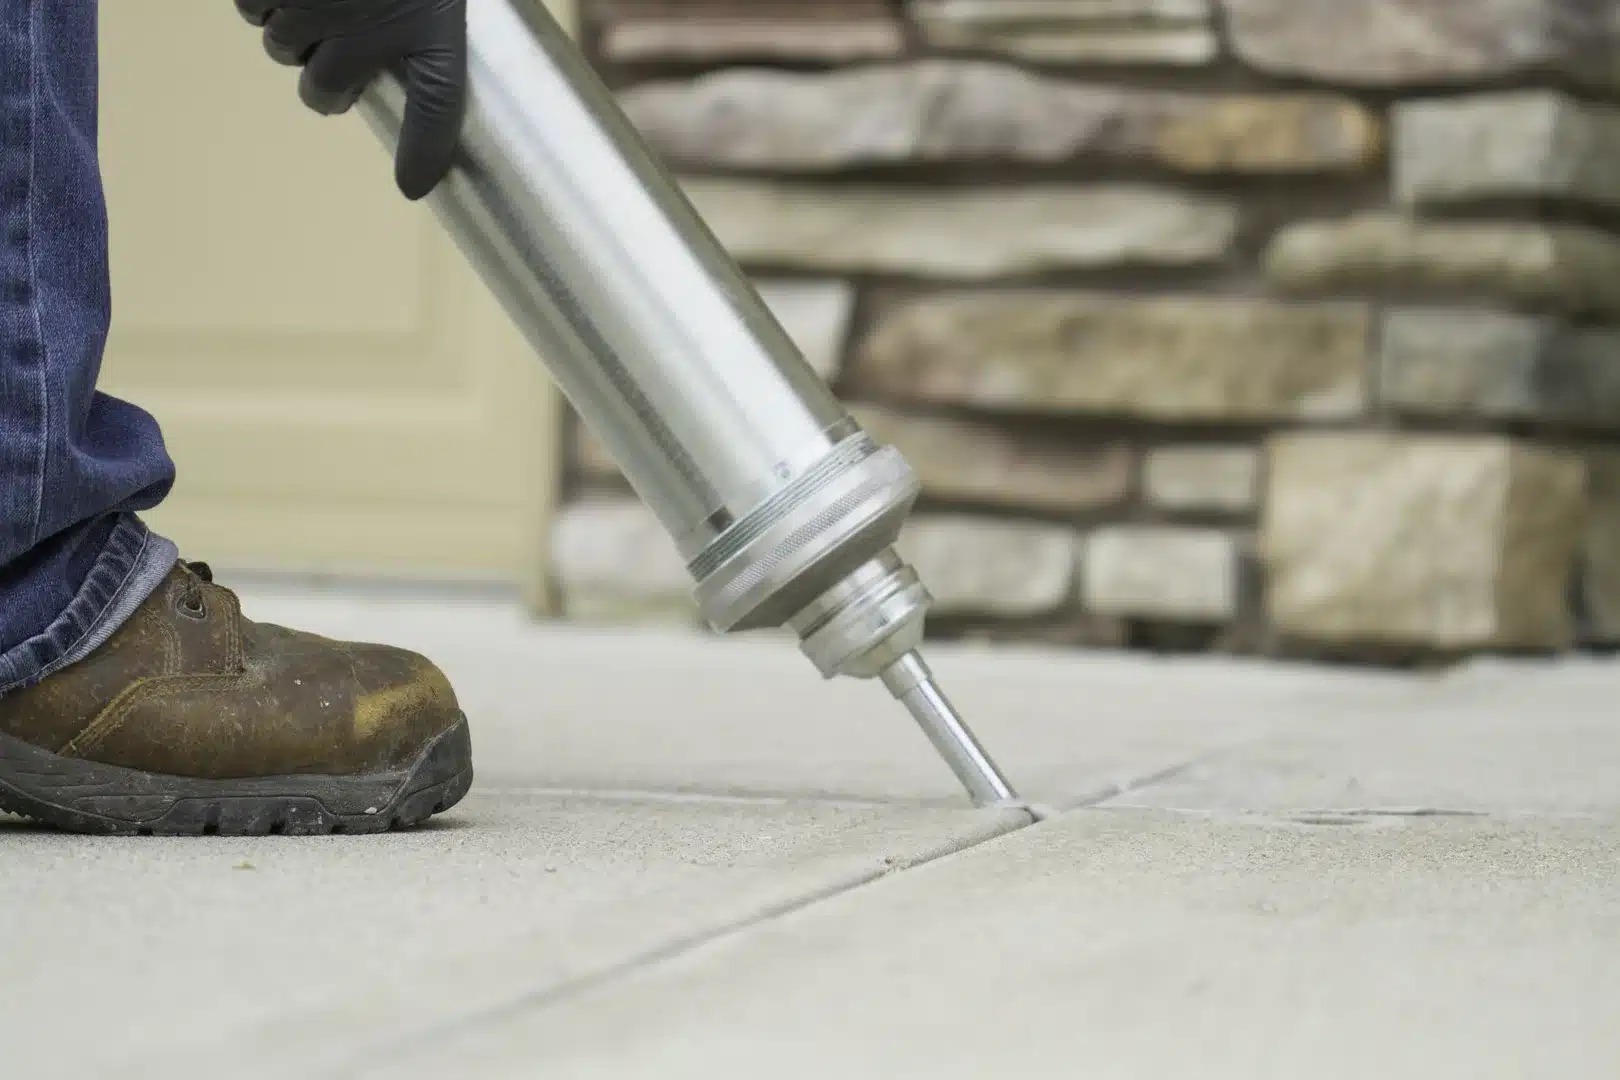
How to Caulk Driveway Cracks Before They Get Worse
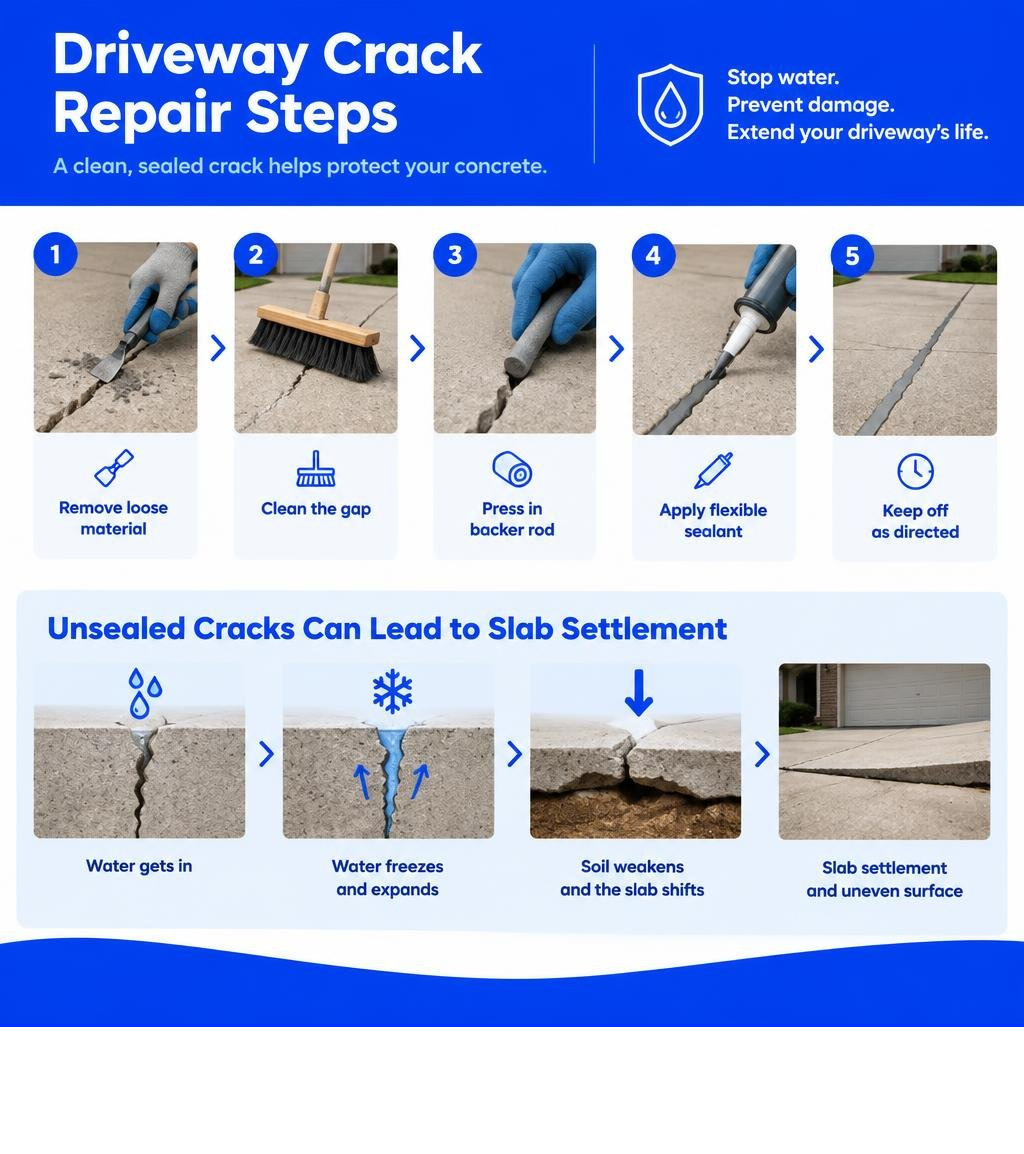
To seal a concrete driveway crack, remove loose material, clean the gap, and let it dry completely. Press foam backer rod into deep or wide gaps, then apply a flexible sealant made for concrete. Use self-leveling sealant on flat areas and non-sag sealant on slopes. Keep people and cars off the repair for the time listed on the product label.
Sealing a crack helps keep water out. That matters in Northwest Ohio, Southeast Michigan, and Northeast Indiana, where water can freeze in cracks and make them worse. If a slab is already sinking or uneven, caulk alone will not fix the support beneath it.
I’m Trey McNamee, owner of FoamWorks Concrete Leveling. Our team’s concrete repair work and my background in building materials shape this practical guide to caulking driveway cracks.
Basic caulking driveway cracks vocab:
Understanding Crack Types and Choosing the Right Repair Product
Every crack tells a story about what is happening beneath your pavement. Before you load up a caulk gun, you need to assess the specific damage on your driveway. Not all fractures behave the same way, and picking the wrong repair material can leave you redoing the entire project next spring.
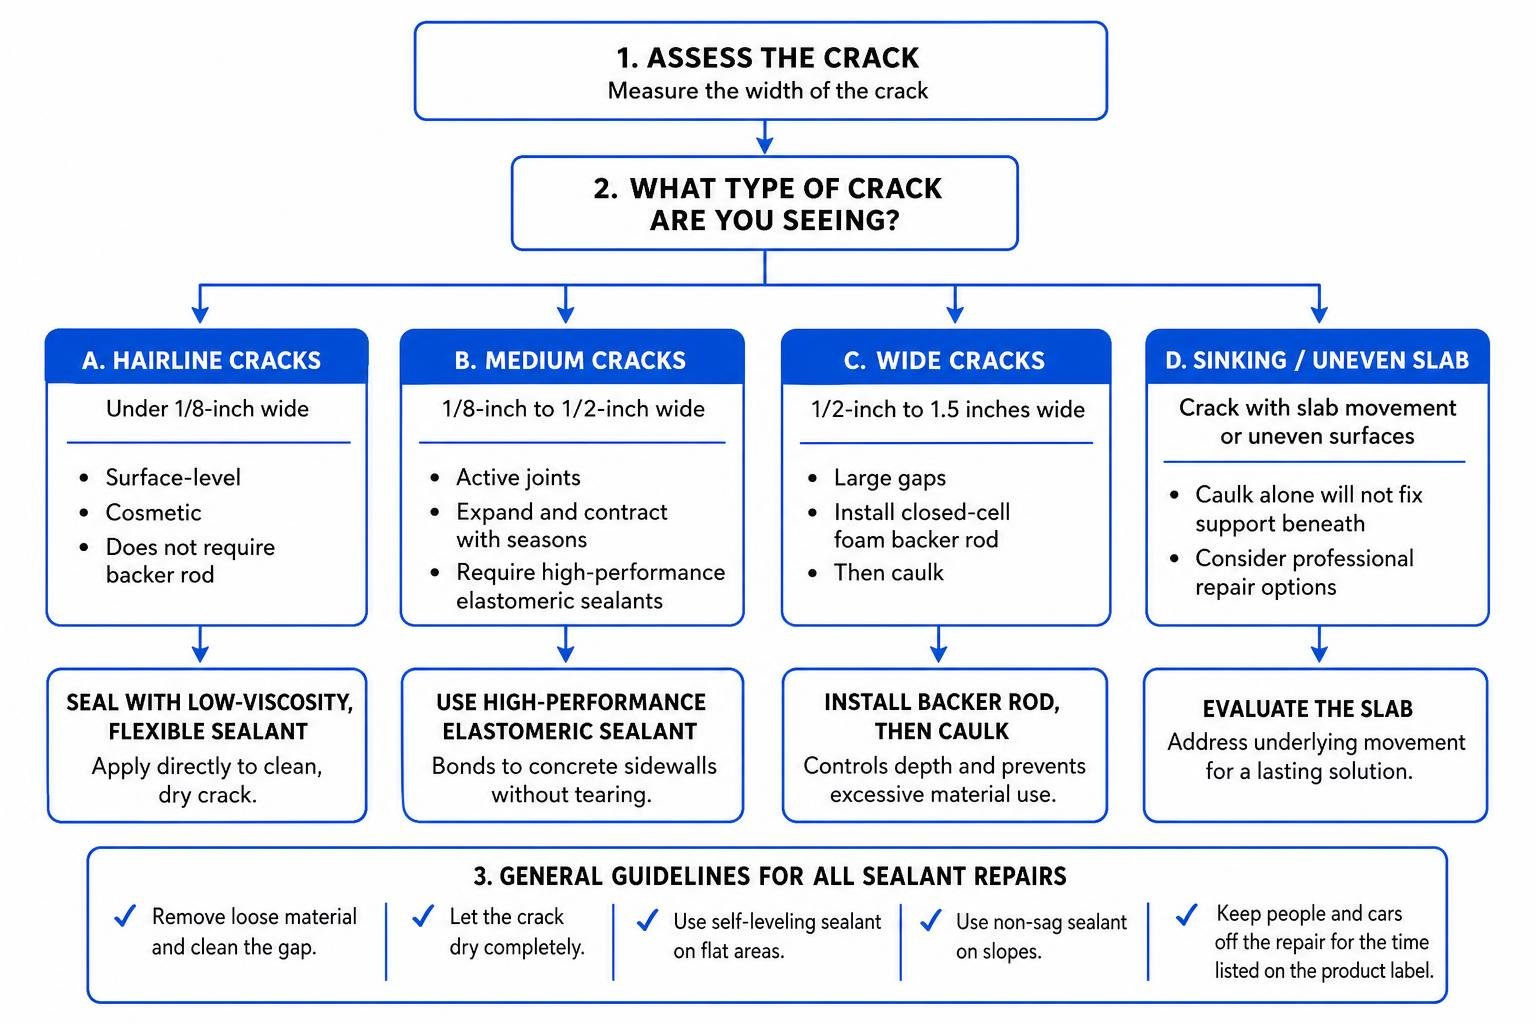
Driveway cracks generally fall into four main categories:
- Hairline Cracks (under 1/8-inch wide): These are surface-level cosmetic fractures caused by normal curing shrinkage or minor settling. They do not require a backer rod and can be sealed directly with low-viscosity, flexible sealants.
- Medium Cracks (1/8-inch to 1/2-inch wide): These active joints expand and contract as seasons change. They require high-performance elastomeric sealants that bond firmly to concrete sidewalls without tearing.
- Wide Cracks and Expansion Joints (1/2-inch to 1.5 inches wide): These large gaps need a closed-cell foam backer rod installed prior to caulking to control depth and prevent excessive material usage.
- Alligator or Fatigue Cracking (interconnected web-like pattern): Resembling reptile scales, this pattern indicates complete subbase failure. Caulking cannot bridge these structural fractures; the underlying soil has washed out or compacted, requiring professional leveling or subbase reconstruction.
Selecting the right product depends directly on your pavement material, the crack width, and your local climate. In regions with harsh winter freezes, rigid patch materials crack immediately during thermal cycles.
| Repair Material | Best Crack Width | Flexibility & Movement | Lifespan | Climate Suitability |
|---|---|---|---|---|
| Cold-Pour Liquid Fillers | Up to 1/4 in | Low (semi-rigid) | 1–3 Years | Mild climates only; loses 20–40% lifespan in freeze-thaw zones |
| Polyurethane Joint Sealants | 1/4 in to 1.5 in | Very High (expands/contracts) | 3–5 Years | Excellent for freeze-thaw cycles and high joint movement |
| Hot-Applied Rubber Rope | 1/4 in to 1 in | High (heat-bonded) | 5–8 Years | Great thermal tolerance; handles severe winter expansion |
| Commercial Hot-Pour Mastic | 1/2 in to 2 in | Maximum (elastomeric) | 7–10 Years | Heavy-duty municipal/commercial freeze-thaw durability |
Crack Filler vs. Sealant when Caulking Driveway Cracks
Homeowners frequently mix up crack fillers and crack sealants, but they perform very different jobs.
Crack fillers are typically rigid or semi-rigid compounds (often asphalt emulsions, acrylics, or hydraulic cement mortars). They are designed to fill a static void. The problem? Concrete driveways are never static. As temperatures swing from summer heat to winter sub-zero lows, concrete slabs expand and shrink. Because rigid fillers lack elasticity, they quickly pull away from the edges or fracture internally under thermal stress.
Crack sealants, particularly elastomeric polyurethane and advanced polymers, are engineered to stretch and compress. When you look at caulking vs sealing concrete explained for homeowners, a true caulk acts as an elastomeric bridge. Reviewing the technical specifications of polyurethane sealants highlights how elastic polymers maintain a watertight seal even when joints widen significantly during deep winter freezes.
Self-Leveling vs. Non-Sag Polyurethane Formulations
When you head to the store, you will encounter two main forms of polyurethane caulk: self-leveling and non-sag (gun-grade).
- Self-Leveling Sealant: This low-viscosity formula behaves almost like honey. Once dispensed into a horizontal crack, gravity pulls it flat, creating a smooth, professional joint with virtually no hand tooling required. However, you should never use self-leveling caulk on an incline or vertical face; it will simply run down the slope and pool at the bottom of your driveway.
- Non-Sag Sealant: This thick, high-viscosity paste stays exactly where you place it. It is required for sloped driveways, vertical curbs, steps, and retaining walls. It requires manual smoothing with a trowel, putty knife, or gloved finger to press the sealant firmly against both sidewalls.
For the ideal installation, maintain an hourglass profile with a 2:1 width-to-depth ratio. That means a 1/2-inch wide crack should have a sealant depth of approximately 1/4 inch. For more details on choosing the right compound for your property, check our guide on selecting the right concrete sealant.
Step-by-Step Instructions for Caulking Driveway Cracks
Fixing driveway gaps is an easy weekend project if you have the right equipment and follow a structured sequence.
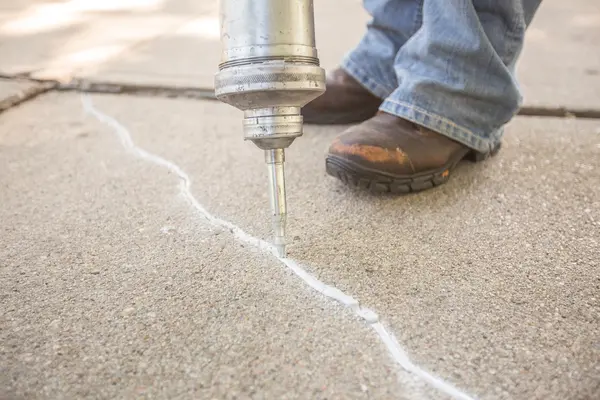
Required Tools and Materials
- Heavy-duty caulk gun
- Polyurethane concrete sealant (self-leveling or non-sag)
- Closed-cell foam backer rod (sized 1/8-inch wider than your gaps)
- Mason’s chisel and small hand sledge hammer
- Stiff wire bristle brush
- Shop vacuum or high-powered leaf blower
- Nitrile gloves and safety glasses
- Heat-dried fine silica finishing sand
- Mineral spirits and clean shop rags (for non-sag cleanup)
For an overview of comprehensive joint care, review our practical guide to repairing cracked concrete.
Step 1: Cleaning and Preparing the Joint Surface
No sealant will stick to crumbling aggregate, loose dirt, moss, or road film. Surface preparation makes or breaks your repair.
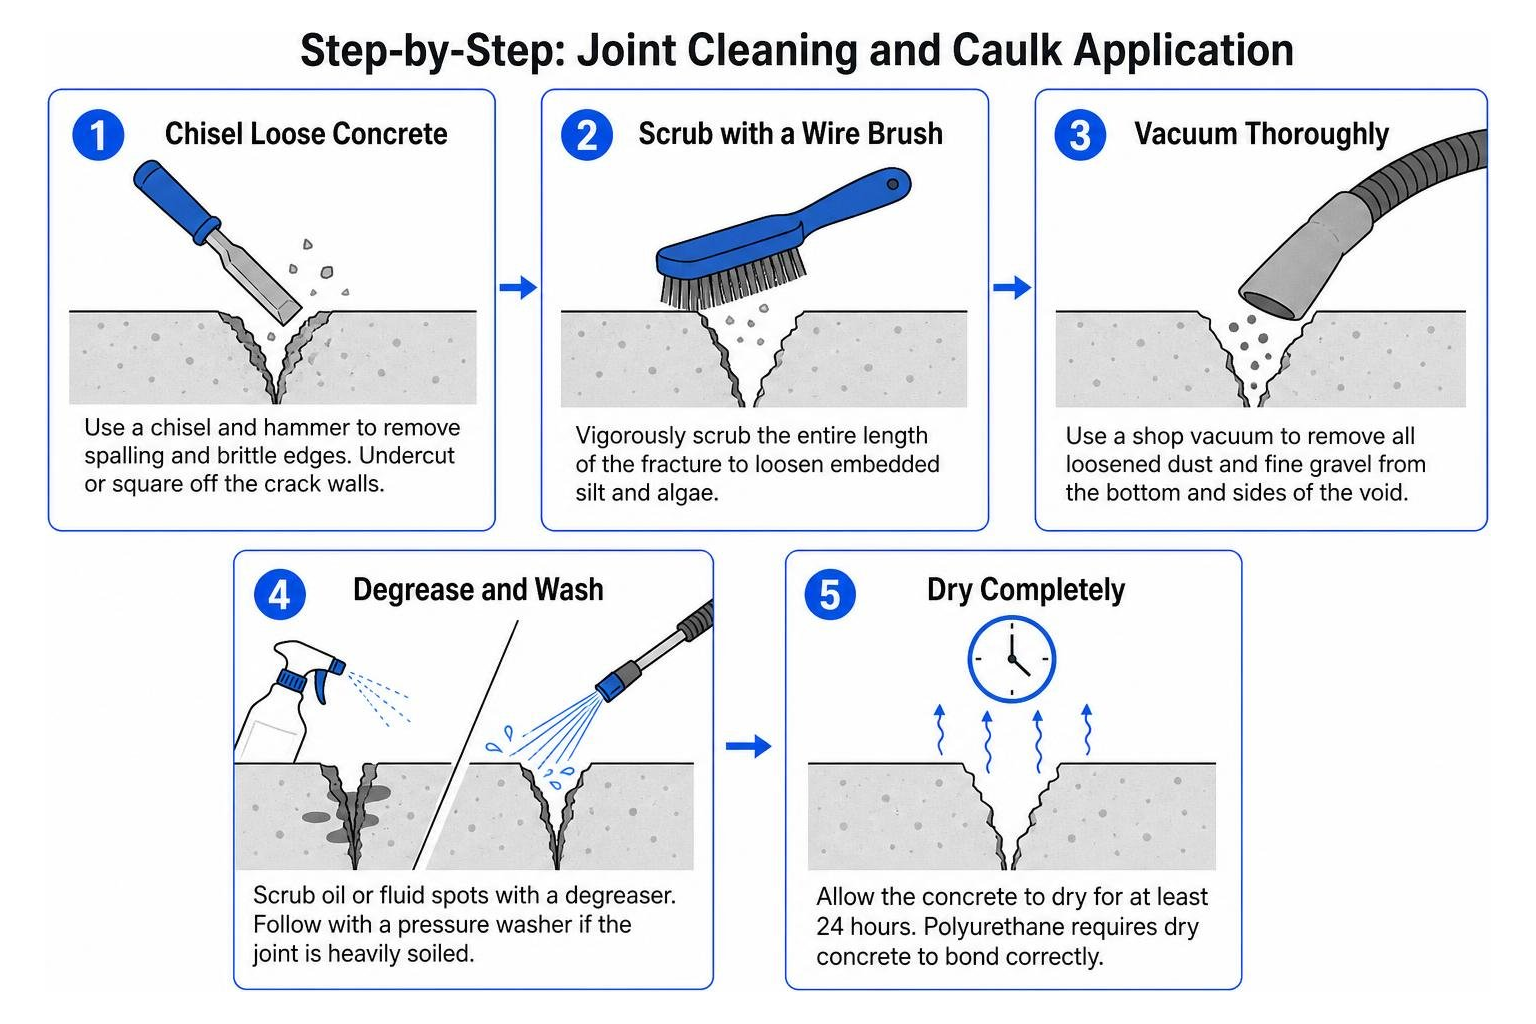
- Chisel Loose Concrete: Use a hammer and cold mason’s chisel to chip away any spalling, brittle edges along the crack. Undercut or square off the crack walls if possible; a V-shaped groove or inverted shoulder gives the caulk maximum surface area to grip.
- Scrub with a Wire Brush: Vigorously scrub the entire length of the fracture using a stiff wire brush to loosen embedded silt and algae.
- Vacuum Thoroughly: Use a shop vacuum to extract all loosened dust and fine gravel from the bottom and sides of the void.
- Degrease and Wash: If your driveway has motor oil or transmission fluid spots near the crack, scrub them with an industrial degreaser. Follow with a pressure washer if the joint is heavily soiled.
- Dry Completely: Allow the concrete to dry for at least 24 hours. Polyurethane requires dry concrete to bond correctly. Moisture trapped inside will react with the polyurethane, causing small gas bubbles to form in the cured caulk. Utah concrete specialists outline similar cleaning protocols in their guide to proper concrete crack preparation.
Step 2: Installing Backer Rod in Deep Gaps
A common DIY mistake is filling a two-inch-deep crack entirely with expensive caulk. Deep caulk beads cannot cure evenly, will sag, and will fail under tension.
If a crack is deeper than 1/2 inch or wider than 1/4 inch, you must install a closed-cell foam backer rod. The backer rod serves two vital functions:
- It acts as a depth limiter and “caulk saver,” keeping the caulk bead at the recommended 2:1 width-to-depth ratio.
- It serves as a bond breaker at the bottom of the joint. Sealant should only adhere to the two vertical side walls. If it sticks to the bottom as well (three-sided adhesion), the caulk loses its elasticity and tears down the center as the slabs shift.
Select a backer rod diameter that is roughly 1/8 inch (or one size) larger than the crack width so it fits snugly. Press the foam rod into the joint using a blunt tool, paint stick, or roller wheel, setting it consistently 1/4 inch to 3/8 inch below the concrete surface plane.
Pro Tip: For tight, irregular cracks where foam rods cannot be pressed in evenly, pour clean, dry silica sand into the bottom of the crack to establish a firm base, leaving the top 1/4 to 1/2 inch open for caulk.
Step 3: Applying and Finishing Caulk for Driveway Cracks
With the joint prepped and the backer rod positioned, you are ready to seal.
- Cut the Nozzle: Cut the caulk tube nozzle at a 30-degree angle using a utility knife. Size the opening to match the width of the crack. Puncture the inner foil seal thoroughly.
- Load and Prime: Place the tube into your caulk gun and squeeze until the sealant reaches the tip.
- Dispense Evenly:
- For Self-Leveling Sealant: Place the nozzle tip directly into the crack and squeeze the trigger with smooth, continuous pressure. Move along the joint at an even pace, filling the crack until the sealant sits just below flush (about 1/16 to 1/8 inch below the concrete surface). Let the liquid settle on its own.
- For Non-Sag Sealant: Gun the sealant firmly against both sidewalls. Use a margin trowel, putty knife, or a gloved finger dipped in soapy water (or mineral spirits) to tool the bead flat, pressing the sealant firmly against the concrete edges.
- Broadcast Finishing Sand (Aesthetic Camouflage): Fresh, bare polyurethane caulk has a smooth, shiny, rubbery appearance that stands out against weathered concrete. To make your repair blend in seamlessly, wait 5 to 10 minutes after application, then broadcast heat-dried ultra-fine silica sand directly over the wet caulk. The sand granules embed into the sticky surface, creating a matching rough texture and preventing airborne dirt from sticking. Once fully cured, simply sweep away the excess loose sand. Homeowners interested in visual blending techniques can explore more ideas on making repaired concrete blend naturally.
Cure Times, Common Pitfalls, and Sealcoating Guidelines
Once applied, give the sealant enough time to cure properly before subjecting it to foot or vehicle traffic.
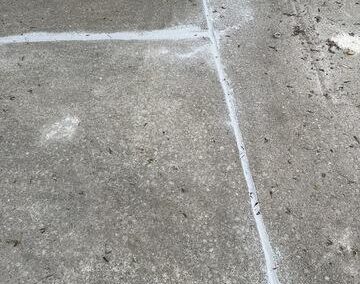
Polyurethane sealants cure via moisture in the surrounding air. Cure schedules follow these typical benchmarks:
- Tack-Free Time: 2 to 4 hours (safe from dust and light debris).
- Foot Traffic: 12 to 24 hours.
- Full Vehicle Traffic Cure: 3 to 5 full days (72 to 120 hours).
Driving over freshly caulked joints too early presses tire treads directly into the uncured polymer, permanently deforming the joint and pulling the sealant away from the sidewalls. For answers on curing under various weather conditions, see our answers to common concrete sealant questions.
Avoiding Common Application Mistakes
Steer clear of these frequent DIY missteps to ensure your repair lasts:
- Overfilling Joints: Leaving a crowned hump of caulk above the driveway surface exposes it to snowplow blades, vehicle tires, and foot traffic, quickly tearing it loose. Always recess the bead slightly below the slab surface.
- Applying to Wet Concrete: Polyurethane will bubble and foam if applied over wet concrete, ruining both adhesion and appearance.
- Ignoring Temperature Windows: Apply sealants when ambient outdoor temperatures are steadily between 40°F and 90°F (ideally 50°F to 80°F). Applying in freezing weather stalls the cure mechanism, while extreme summer heat can cause premature skinning and trapped bubbles.
- Caulking Over Subgrade Failure: If concrete slabs rock, bounce, or have sunken significantly, filling the gap with caulk is a short-term band-aid. The shifting slabs will quickly rip the caulk apart. Read our guide on when DIY patching needs replacement or leveling to identify structural slab problems early.
Can You Apply Sealcoat Over Caulked Cracks?
Yes, applying an acrylic, water-based, or penetrating driveway sealer over your repaired driveway adds an extra layer of protection against water, oil, and UV rays.
However, timing is critical:
- Wait 48 to 72 Hours: Allow your polyurethane caulk to reach a deep cure before rolling or spraying sealers over it. Coating uncured caulk traps solvents, weakens adhesion, and can discolor the topcoat.
- Compatibility Check: Use high-grade water-based acrylic or penetrating silane/siloxane sealers. Avoid pure solvent-based coal tar or asphalt hot sealers directly over polyurethane, as harsh petroleum solvents can soften the caulk.
- Learn more about comprehensive surface sealing techniques in True Value’s overview of methods for sealing concrete driveways.
Frequently Asked Questions About Driveway Caulk
How long does polyurethane driveway caulk last before needing replacement?
In moderate conditions, a quality polyurethane caulk lasts 3 to 5 years. In cold Northern climates subject to frequent freeze-thaw cycles, road salts, and heavy snowplowing, overall lifespan can decrease by 20% to 40%. Inspect your sealed joints every autumn, and touch up any sections where the bond has pulled away. For help identifying failing joints, see our article on evaluating concrete crack severity.
When should I use sand instead of a foam backer rod?
Foam backer rods require relatively uniform joint walls. When you are dealing with jagged, spalled, or narrow cracks that taper down unevenly, forcing a round foam rod into place can be difficult. In those spots, pour clean, dry silica sand into the fissure to fill the lower cavity. Tamp the sand lightly until you have a consistent base 1/4 to 3/8 inch below the surface, then apply your caulk on top.
Can caulking fix sunken or uneven concrete slabs?
No. Caulking provides a waterproof top barrier, but it offers zero structural support. If a slab has dropped because soil washed away beneath it, caulking the gap will not level the hazard or stop further settlement.
When you encounter dropped slabs, uneven expansion joints, or deep voids under your driveway, the concrete must be raised from beneath. Learn more about when to call professionals for cracked concrete before small cracks turn into major trip hazards.
Conclusion
Sealing your driveway cracks is one of the most effective DIY maintenance steps you can take to protect your concrete. By keeping water from slipping beneath the surface, you prevent soil erosion and stop winter frost heave before it starts.
When slabs have already settled, tilted, or pulled apart, caulk alone cannot fix the underlying void. That is where we can help. At FoamWorks Concrete Leveling, we use high-density polyurethane foam injection to raise and stabilize sunken driveway slabs for 30% to 50% less than the cost of full tear-out and replacement.
Our foam injection process takes just a few hours, leaves your landscaping intact, eliminates disposal and tear-out mess, and lets you drive on your concrete almost immediately. Backed by over 30 years of experience, a lifetime warranty, and a commitment to 100% customer satisfaction, our family-owned team is here to restore your driveway.
Contact FoamWorks Concrete Leveling today for your free estimate and explore our full range of expert concrete repair and leveling services.